Customer Reviews for Ring Video Doorbell - Smart Wireless WiFi Doorbell Camera with Built-in Battery, 2-Way Talk, Night Vision, Satin Nickel
- Built-in rechargeable battery video doorbell with 1080p HD Video
- Easy install, privacy zones, and improved motion detection
- 2-way talk, mobile notifications, adjustable motion zones
Customer Reviews
Feb 21, 2024
by
Jan 27, 2024
Can’t live without it!
I wish the motion detection had a longer range , but other than that I love it. I bought an attachment for my apartment door and it was an easy installation. The video quality is clear and the battery life is great.
by
 Customer review from influenster.com
Jan 26, 2024
Great for security
I received this product as a gift from work last year and have really appreciated it. The video quality is crystal clear, and the night vision is also great quality. The battery lasts for nearly a month but does vary depending on how you use it. I would definitely recommend to those who live in a townhouse community like me as it helps keep an eye on the comings and going.
by
Customer review from influenster.comDec 1, 2023
secure
the holder is not a tight grip. so it popped off my door when closing the door. just the ring cam fell not the bracket. Ring cam still works. I just had to tape Ring cam to my door.
by
Response from RingMar 1, 2024
Hi Daniel.
Thank you for taking the time to share your experience with us. We understand the importance of a seamless installation process so that you can begin using your Ring Video Doorbell (2nd Gen.) right away. The features and technology provided by the Ring Video Doorbell (2nd Gen.) are incredibly valuable and help provide you with peace of mind about your home security. We can definitely provide you with more information regarding the concern mentioned in your review.
It sounds like the device is not performing as expected in regards to installation. With Ring Video Doorbell (2nd Generation), stay connected to your home from anywhere by seeing who’s at your door and answering it right from the Ring app. Enjoy enhanced features like upgraded video quality from 720p HD to 1080p HD, Near Zone motion detection in areas as close as 5 to 15-feet in front of your home and a reimagined mounting setup that simplifies installation.
We recommend following these instructions when installing your Ring Video Doorbell (2nd Gen.):
For the best results, mount it around 1.2 metres above the ground.
There are two types of screws included in the product packaging:
The four wood screws are used to secure the mounting bracket to your door or wall.
The two star-shaped security screws are used to to tighten the screws into the bottom of the Ring Video Doorbell (2nd Generation) faceplate to help deter theft.
You'll need to install wall anchors when installing on stucco, brick or concrete.
Grab 4 of the wall anchors from Bag A. Using your Ring Doorbell as a template, mark 4 drill holes on the wall. Use a 1/4" masonry drill bit (not included) to drill the holes, then insert the 4 wall anchors.
Install the mounting bracket.
Using a Philips head screwdriver, drive the mounting screws from Bag A into your wall (or into the anchors, if installed) until they are flush with the mounting bracket.
Attach your Ring Doorbell to the mounting bracket.
Hook the slot on the rear of your Ring Doorbell onto the tab near the top of the mounting bracket.
Then, let the Doorbell pivot down to sit flush on its bracket.
Secure the doorbell.
CAUTION! If you use the wrong screws to secure the doorbell, you could damage the battery during installation, create a fire hazard, and be seriously injured.
DO NOT USE any screw other than the included short security screws when securing your Ring Doorbell to the bracket.
Use the star-shaped end of the included screwdriver to insert and tighten two of the security screws from Bag B into the bottom of your Ring Doorbell.
For more detailed information on installing your RIng Video Doorbell (2nd Gen.) without an existing doorbell, please visit this link: https://ring.com/support/articles/r6n21/Installing-Your-Ring-Video-Doorbell-2nd-Gen-Without-an-Existing-Doorbell. For more information on installing your Ring Video Doorbell (2nd Gen.) with an existing doorbell, please visit this link: https://ring.com/support/articles/7hvj2/How-to-Physically-Install-Ring-Video-Doorbell-2nd-Gen-with-an-Existing-Doorbell.
We invite you to reach out to our Community if any additional information is needed regarding your Ring Video Doorbell (2nd Gen.). The Ring Community is our first peer-to-peer community forum, giving our customers the ability to help one another by sharing their feedback and experiences with each other. You can find it here: https://community.ring.com/.
Thank you,
Melissa from Ring.
Nov 24, 2023
Security at its best
The video quality is amazing on this camera The motion detection is the same The camera detects motion very easily is very sensitive to it there's very good audio clarity the battery life it depends on the setting you have it so that depends on you but it's a very good battery life as long as you have it on a good battery setting for motion but that's all said as far as your settings go I give this doorbell a 10 out of 10 I love it and I would recommend it for anybody it also has great features for even people that don't have a ring doorbell for the neighborhood and alerts and everything
by
Customer review from influenster.comNov 8, 2023
it’s alright
very easy and simple installation process. The one thing I would say about the motion detected is sometimes that it doesn’t work someone will come straight up to our door and it doesn’t notify us at all.
by
Customer review from influenster.comOct 24, 2023
Good
Compact, rechargeable, beautiful design, can be charged via solar, clear image, has mobile app access, good motion sensor, clear video, can use sudio call.
by
Customer review from influenster.comSep 24, 2023
Great safety addition and pic quality
Had the original ring and now this one. Very happy with both purchases and the ability to alert and speak through microphone. Quality of video is very good also.
by
Customer review from influenster.comSep 19, 2023
Good quality
The video quality was great and you could hear too love how it sends you a message every time someone is at the door or if it sees motion overall a nice camera
by
Customer review from influenster.comSep 6, 2023
great at connecting multiple devices on one app
not sure how we existed before video doorbells. Used to have to duck on the floor and peek out of a window to avoid the solicitors. Now I can easily just open an app on my phone to see who the heck is on my doorstep. i can then choose to “answer” through the app, or ignore it.
This also comes in handy for package/mail delivery. I now know when something has arrived so I can bring it in right away.
The ring app is easy to use.
I gave 3 stars because the video quality, even on a newer version, leaves a lot to be desired at times.
by
Response from RingSep 21, 2023
Hi tracyd108.
Thank you for sharing your experience with us.
We understand how important it is to be able to see who is at your door with the Ring Video Doorbell 2. The features and technology provided by the Ring Video Doorbell 2 are incredibly valuable and help provide you with peace of mind about your home security. We are eager to provide you with a solution for the video quality concern mentioned in your review.
It sounds like the video quality you are experiencing is not as clear as expected. The first thing we will want to check is your wifi speed. To run a wifi speed test:
Turn off your mobile phone’s cellular data and connect to the same wifi network as your Ring device.
Open the Ring app.
Tap the menu (☰).
Tap Devices.
Select your device.
Tap Device Health.
Under Tools, tap Test Your Wifi.
Tap Start to run a test that will measure your upload and download speeds.
Both upload and download speeds should be at least 1 Mbps or greater, but 2 Mbps or above is ideal.
Check the numbers on your wifi speed test. If either your upload or download speed is below 1 Mbps, then you might consider replacing your router (especially if it's older than five years). Contact your internet service provider to learn more about getting newer equipment and faster speeds.
Learn more here: https://support.ring.com/hc/en-us/articles/205348254-Troubleshooting-Poor-Video-Quality-.
Ring Community was launched to help deliver the most current news and educational information to our neighbors. This online forum is divided into four categories: Product Boards, Ring Updates, Tips + Tricks, and a Moderators’ Corner. The Product Boards are where you can begin new topics with your questions or feedback; there is also a search option that helps you find topics that have already been posted by other neighbors. We invite you to visit our site at https://community.ring.com/ today.
All the best,
Nicole from Ring.
Customer review from influenster.comAug 23, 2023
Good !!!
I purchased this for my husband for Christmas last year and he installed it by removing the old doorbell and wiring it into the electric. (I also purchased the Alexa that pairs with it, but I'll make a separate review for that.)It's been a life saver! Not only can we answer the door when we're away, but we can answer it from inside the house, when we don't recognize the person at the door.Today, there was a suspicious looking van in our neighborhood, going door-to-door, soliciting work (allegedly) and although I was home, I heard their footsteps on my front porch. Then. they bent down and looked in our windows! I was thankful that I could use this doorbell to run them off, but I alerted my husband (who was at work), to please pull up the Ring from his phone and watch, until I was safe.In all honesty, it's also fun to prank our grown children with, if they've forgotten their key. Hee-hee. I also like the fact that our community can share information with each other on the app.This was a great purchase and we are adding multiple devices around our property. I would absolutely recommend this product to everyone I know!
by
Customer review from influenster.comAug 18, 2023
For safety and practicality
I started with the battery operated and switched to hardwired after the battery died (it's rechargeable) when we were away on vacation. I love being able to talk to the person at the door when I'm miles away.
by
Customer review from influenster.comMay 1, 2023
Ring Doorbell
I got my first Ring doorbell cam about 10 years ago. I didn't know anyone else that had one. Now, everyone has a Ring doorbell or comparable device. I like the Ring doorbell, and highly recommend it.
by
Customer review from influenster.comMar 15, 2023
A well updated device saving battery and catching
I have been using this Ring device for more than 2 years and it has been doing great jobs of taking videos of anyone/ anything approach my front door. It's updated to save battery so that I don't have to remove the battery to get it charged frequently. The battery takes about 8 hrs to be fully charged, and with it the device can work for 3-4 weeks. It's amazing and superior to other products in the market.
by
Customer review from influenster.comDec 28, 2022
10/10
I use this product for my front door, and love it! The battery life is great. I’ve had it since August, and did not have to charge it till the end of November. Audio is great and I the camera lens is wide enough to cover not only my front door but the garage area. Only hang up is sometimes it lags or will say unavailable then you have to exit the app and get back in.
by
Customer review from influenster.comDec 11, 2022
Ring doorbell
I get notified if someone is at my door and even if there is a package. Easy to keep track of deliveries coming in. Peace of mind. They have cute covers for the door bell. We got a snowflake for winter ❄️
by
Customer review from influenster.comNov 17, 2022
2nd Ring
This is our second ring doorbell. The first one we got for our front door and we fell in love with it so much that we decided to get one for the back door. The ring doorbell gives me such a peace of mind that I didn’t have before. I’m home with the kids all day and it does make me nervous and gives me anxiety but having the ring has helped with that greatly!
by
Customer review from influenster.comNov 9, 2022
Highly recommend it!!!!!
It's excellent video camera!!!!
by
Nov 9, 2022
I See You
Easy to install. Had to edit previous location to connect to wifi.
by
Jul 11, 2022
Don’t worth buy it
The problem with my ring door bell when it is recorded and only recorded in black, it is not clear if it was an assault or an accident. I feel like I am wasting my money paying the door bell to record, and the only thing it does is record and screen is black from the recording , the battery die real quick, is more better buy cameras cause all day record and is no any problems when you need to record when is a emergency and what you get is a video with black screen
by
Response from RingJul 11, 2022
Hello Mabele,
We are thankful for your feedback. We are constantly pushing ourselves to develop products to empower users with an affordable, effective way to monitor and secure their home. In pursuit of our mission to make neighborhoods safer, when applying technologies to our business, we always consider our three pillars of customer security, privacy, and user control. We understand how important it is to have your devices working as intended as it offers a level of security in your home.
Based on your review, it seems that you are not fully satisfied with your Ring Video Doorbell. If your device is not working as intended we recommend resetting your device. To reset your Ring Video Doorbell press and hold the setup button for 10-15 seconds and release. Once the white light on the front of the device stops spinning proceed with the setup process. Please see our help center article for further help: https://support.ring.com/hc/en-us/articles/360041353291-Setting-Up-Your-Ring-Video-Doorbell-2020-release-in-the-Ring-App.
If you still have the Ring device in your possession, we invite you to reach out to us at https://community.ring.com/. We look forward to hearing from you, if you have any further feedback regarding your overall experience.
Thank you,
Jamila with Ring
Feb 24, 2022
This is a small
This is a small price tag for your safety and well-being. I bought this ring doorbell for my investment home and it just gives me peace of mind knowing who is going to my house while I’m away. Ring Video Doorbell 2
by
Customer review from influenster.comFeb 22, 2022
Ring Chime Pro
Super easy to install
by
Feb 7, 2022
I have one if
I have one if these at both entrances of my house. It’s easy to install and has a good picture quality. I felt safer with my Ring Doorbells until my son’s bicycle was stolen out of our yard in the middle of the day, and the incident wasn’t recorded. I had the required subscription and configured my settings to record motion, too. This is good as a doorbell to see who’s at your door, and the two way audio is awesome; however, I recommend using another camera in conjunction with this one if you want to have better reliability. Note: That’s the weather causing that fog on the camera. The resolution can be adjusted but takes my battery life the better it is.
by
Customer review from influenster.comJan 19, 2022
This Ring camera came in handy when I’m away from...
This Ring camera came in handy when I’m away from home. I can see, hear and talk to someone, using this Ring camera. I really like it.
by
Jan 18, 2022
THIS WILL NOT WORK WHEN YOU NEED IT MOST.
This is the second time now my ring doorbell has not recorded my car getting broken into. The ring team has said that my wifi was working, it never shut down, and all of my sensor settings were good. They still had my case from when the first time this happened. My ring did not pick up any footage from 9Pm - 5 AM. At 5 am, great picture and sound quality shows me running out to my car to see it has been broken into.We pay for the subscription that allows us to rewind and save all video footage. It is hard to do that when it captures nothing. The ring team said they could not explain what happened and that everything was good on my end. Again, they already had my info from the last time this happened. They said in about 5 days I will get an exact copy of the ring I have and for my to go out there at 3 AM to see if it work it just won't capture what it is supposed to: Criminals.
by
Response from RingJan 19, 2022
Hello Tyler,
We take the sense of security of our customers’ extremely seriously. We want to assure you that at the core of Ring, and guiding every action we take, is respect for the privacy and security of our customers. Thank you for taking the time to share your experience with us directly, we appreciate it. We'd love to work with you and provide you with solutions to resolve the device recording concerns you mentioned in your review.
Ring is always working toward improving your home security experience. In addition to the Motion Zones control, there are two other tools that can help you adjust the motion alerts you receive:
Motion Scheduling: The motion scheduling control allows you to schedule coverage to avoid receiving alerts triggered by a regular occurrence. For example, if you know your garbage gets picked up between 7:30 AM and 7:45 AM on Tuesdays, you can schedule your motion detection to turn off during that time. **Please ensure this feature is not enabled, in your case.
Motion Frequency: Motion Frequency allows you to tweak your motion detection protocols to provide a balance between consistent alerts and preserving battery life. Ring's Smart Alert algorithm is an internal program that runs inside your Ring device. It analyzes the traffic patterns of detected motions, looking for repetitive patterns. When it detects such a pattern, it essentially "sleeps" your device for a certain period of time, cutting down the number of motion alerts you'll get from the same set of stimuli. The more times a repetitive pattern of motion continues, the longer the time between issuing motion alerts. There are three settings to choose from:
Frequent: Your Ring device will capture all events. This option has the shortest battery life.
Standard: Captures and notifies you about motions less often. This option has a standard battery life. We recommend starting here if you are unsure of which option to choose.
Light: Captures and alerts you to motion less frequently. This option has the maximum battery life.
Here is a helpful article that elaborates on the settings of your device and how to program them to catch the activity you are missing: https://support.ring.com/hc/en-us/articles/360041248971-Using-Motion-Zones-with-your-Ring-Video-Doorbell-2020-release-.
Do you have steps leading up to your doorway? If so, a Ring Wedge or Corner Kit may be needed to properly angle the device toward the driveway and capture the area your car is parked in nightly.
At Ring, we are constantly innovating on behalf of our customers to develop products that best meet their home and security needs, and provide them with as much customization as possible. Ring Community is our first peer-to-peer community forum, giving our customers the ability to help one another and share their feedback and experiences directly with Ring. We invite you to reach out at https://community.ring.com/ if you have any additional questions or feedback regarding your Ring Doorbell (2020 Release) product. We look forward to hearing from you!
Thank you,
Alexis with Ring
Jan 12, 2022
No more missing packages
Easy to set up and it’s great no more packages missing get alerts a soon as someone get near my front door
by
Nov 2, 2021
It was a second location for my Ring. Works...
It was a second location for my Ring. Works perfectly and easier to set up than the one I bought 3 years ago.
by
Jul 20, 2021
Quick release battery does NOT work with this Ring model doorbell/camera
This is a wired/wireless doorbell camera with a NON-removable, rechargeable battery. To recharge the battery you have to un-snap and remove the doorbell camera unit and plug it in to the usb charging cable. That means you have no doorbell while it's charging. Charging can take up to 30 minutes. How long before you forget it's on the charger for who knows how long, or, you go somewhere and forget to put the doorbell back on the door? Quick release battery only works with Ring Doorbell 3, 3plus, or 4.
by
Response from RingJul 23, 2021
Hello Gek,
At Ring, we recognize your desire to have your home security up and running as intended. As a consumer, you expect a product to perform optimally so you can rely on it to help secure your home.
While batteries in Ring devices can go months between recharges with normal use, this is dependent on a number of factors in your home's environment such as the local weather and the number of activities captured. The more events captured by your Ring Video Doorbell (2020 release), the more your battery is used to power the live 1080p HD video stream to your device.
You can optimize your motion detection for your home after answering a few quick questions through the Motion Wizard. We highly recommend you use this as a starting point to set up accurate motion detection for your Ring device. This can eliminate unwanted events and help prolong the battery life of your device.
We would love to ensure your device is set up for optimal performance, and help restore your confidence in the choice you made for your home's security. Please reach out to us today at https://community.ring.com/ for additional tips and support. Ring Community launched in March 2019 to help deliver the most current news and educational information to our customers. This peer-to-peer forum allows our neighbors to share their feedback and experiences to assist each other in resolving their concerns.
Thank you,
Antonio from Ring
Mar 29, 2021
We just purchased this earlier today (3/29/2021) We’re already seeing the benefits as we have 5 k...
We just purchased this earlier today (3/29/2021) We’re already seeing the benefits as we have 5 kids who’s buses drop them off at 3 different times... It was very easy to setup and the 30 day trial RING Plus ($10 month) is great.. I will update this in a few months..
by
Jan 25, 2021
IMPRESSED!
Picked up this doorbell today and got it set up. I’m using mine on it’s internal battery really exited to be able to see visitors when we aren’t home!
by
Frequently Bought Together
Best Seller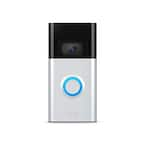
Price:
$54.99
$99.99
Save $45.00 (45%)
Compare Similar Items
Bell Button Connection Type | |||
|---|---|---|---|
Wireless | Wired, Wireless | Wired, Wireless | Wireless |
Features | |||
Built-in Speaker | Built-in Speaker | Built-in Speaker, Motion Activated, Wall Mountable | Built-in Speaker |
Power Connection | |||
Wireless | Wired | Wireless | |
Included | |||
Battery Charger, Mounting Hardware | Battery Charger, Mounting Hardware | Battery Charger, Installation Kit, Installation Tools, Mounting Hardware | Batteries, Battery Charger, Mounting Hardware |
Works With | |||
ADT Pulse, Ring, Samsung SmartThings | ADT Pulse, Ring, Samsung SmartThings | ADT Pulse, Ring, Samsung SmartThings | Alexa, Ring |


