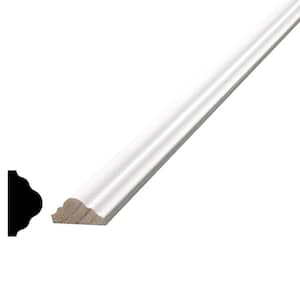
0.63 in. D x 1.34 in. W x 96 in. L Finished Polystyrene Wall Panel Moulding, Un-assembled Picture Frame Trim Moulding

- Lightweight polystyrene construction ensures durability
- Pre-primed surface allows easy painting or staining
- Ideal for creating custom picture frame accents and wall paneling
- View More Details
Free & Easy Returns In Store or Online
Return this item within 90 days of purchase.
Ask about this product
Get an answer now with AI
Magic Apron Assistant is an AI virtual assistant. By proceeding, you consent to the recording and use of your information by The Home Depot (and authorized third parties). More information
Product Details
About This Product
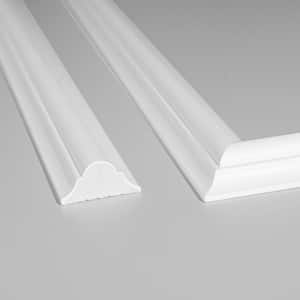
Elevate your walls with our **Picture Frame Trim Moulding**, designed to add timeless elegance and sophistication to your interior spaces. Crafted from lightweight and durable polystyrene, this 4-piece unassembled set offers endless design possibilities. Each 8ft. trim can be customized to create beautiful picture frame accents, wall paneling, or architectural details. Perfect for DIY enthusiasts and professionals, this moulding provides a quick and affordable way to transform any room.
Highlights
- Lightweight Polystyrene Material: Durable and resistant to warping, cracking, or moisture, making it perfect for long-term use in any environment.
- Unassembled Design: Offers maximum flexibility to create frames of any size or shape, allowing for complete creative control over your project.
- Easy Installation: The lightweight construction ensures hassle-free cutting, fitting, and mounting using standard adhesives or nails.
- Customizable Finish: Comes in a pre-primed surface, ready to paint or stain to perfectly match your interior decor.
- Versatile Application: Ideal for creating custom picture frame accents, wall paneling, or enhancing the architectural details of living rooms, dining areas, and offices.
- Return Policy
Product Information
Specifications
Dimensions
Product Depth (in.) | 0.63 in |
|---|---|
Product Length (in.) | 96 in |
Product Width (in.) | 1.34 in |
Details
Color Family | White |
|---|---|
Decorative Moulding Type | Geometric |
Durability | Moisture Resistant, Split Resistant |
Finish Type | Finished |
Installation Type | Adhesive, Glue |
Interior/Exterior | Interior |
Material | Polystyrene |
Moulding Cut | Full Stick |
Moulding Features | Flexible, Moisture Resistant, Paintable |
Moulding Type | Panel Moulding |
Moulding Use | Wall |
Pack Size | 1 |
Returnable | 90-Day |
Warranty / Certifications
Manufacturer Warranty | support21@art3d.com |
|---|
Questions & Answers
Is this flexible to create an arched moulding? If not, is there a pliable moulding to match this product?
Hi. The product you asked about is not a flexible molding. Here’s another product for your reference. https://www.homedepot.com/p/336384826
How many pcs. per pack? And are EACH of the pieces 96in. long?
4 pcs per pack. Yes, each one is 96 inches long
How many come in one packet?
Hi. Four per pack.
Is it easy to install? Cut?
Cutting the Moulding: -Use a Miter Saw: For clean, precise cuts, set your miter saw to 45° for standard corner joints. - Inside Corners: When dealing with inside corners, you might need to cut one piece at a 45° angle and then use a coping saw to trim the profile of the adjacent piece for a perfect fit. - Test Cut: Always make a test cut on a scrap piece of moulding to ensure the angle and fit are correct before cutting your actual pieces. Installing the Moulding: - Prepare the Surface: Ensure that the wall or surface is clean, dry, and free of dust to allow for good adhesion. - Adhesive and Fasteners: Depending on the type of moulding and the surface, you can use a strong construction adhesive along with finishing nails. - Align and Secure: Place the moulding in position and secure it. If using nails, pre-drill holes if necessary to avoid splitting the moulding. - Final Touches:After installation, fill any nail holes with caulk or wood filler, then sand lightly if needed. Finally, you can paint or stain the moulding to match your décor.
Viewing 1-4 of 4
Customer Reviews
4.3 out of 5
Loading Recommendations
Related Products
0.375 in. D x 3/4 in. W x 84 in. L Pine Wood Finger-Joint Panel Moulding Pack (16-Pack)
Elevate your interior with the Alexandria Moulding Chair Rail Panel Moulding. This versatile chair rail not only protects your walls from scuffs and marks but also adds a sophisticated touch to any room. It creates a stunning tiered effect when installed one-third up the wall, parallel to the baseboards. Whether you're aiming for a traditional or colonial aesthetic, this chair rail serves as a key decorative element, enhancing the elegance and charm of your space. Transform your home with this timeless piece that combines functionality with classic design.
0.6 in. D x 0.9 in. W x 56.3 in. L Finished Polystyrene Pre-assembled Moulding Frame, Pre-Cut Wall Molding Set of 6 pcs
Add a touch of sophistication to your walls with our **Pre-Assembled Picture Frame Moulding**! Crafted from durable polystyrene, this simple yet elegant moulding is designed to create perfectly symmetrical picture frame accents on your walls. Its lightweight construction and pre-assembled design make installation quick and hassle-free. Whether you're upgrading your living room, dining area, or office, this moulding adds depth and style to any space with minimal effort.
20 in. W x 24 in. H x 1/2 in. P Ashford Molded Classic Wainscot Wall Panel
Save time and money with our easy to use wall panel moulding. Pair with matching crown moulding, baseboard, or door and window casing for a harmonious complete look. Polyurethane decorative wall panels come factory-primed and can easily be painted or faux finished to match doors, furniture or walls. These lightweight panels resemble their traditional wood counterparts, except these won't warp, split or splinter making them a lasting upgrade to your home.
LWM 135 0.375 in. D x 0.875 in. W x 96 in. L Unfinished Polystyrene Flat Astragal Panel Moulding 192 LF (24-Pack)
Our plain panel mouldings are manufactured from 100% recycled high impact Polystyrene polymer. American Pro Decor's Recycled Polystyrene panel mouldings have the strength and impact durability of solid red oak. Our panel mouldings are designed to add a clean and decorative focal point to any wall or ceiling surface. Our Panel mouldings can be used alone or in combination with other mouldings to create elegant sharp depth, character and style.