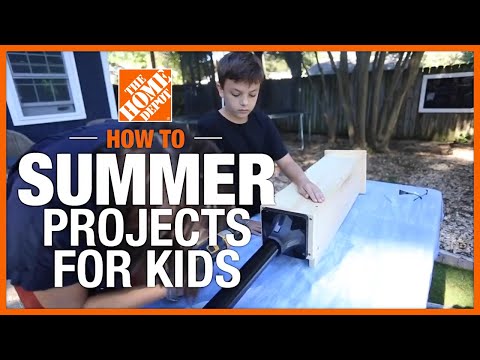
Summer Projects for Kids
Last updated September 7, 2023
From butterfly houses to marshmallow cannons, we have fun DIY projects to keep the kids busy all summer long. Each project requires only a few affordable supplies and can be completed in less than a day.
Tip: For any project involving sharp objects, an adult should always be present.
Difficulty:
Beginner
Duration:
Under 2 hours
Table of Contents
Make a Marshmallow Cannon
Build a Ballpit
Build an Outdoor Chalkboard
Build a Butterfly House
Make a Marshmallow Cannon

Whether they’re challenging the neighbors to a duel or just practicing their aim in the backyard, here’s how to make a marshmallow cannon.
Supplies:
- 27 inches of a 1/2 inch (slip or non-threaded) PVC pipe.
- 2- 1/2-inch PVC 90-degree elbow joints
- 2-
1/2-inch PVC T-joints - 2-
1/2-inch PVC caps - Pipe cutter
- Measuring tape
Steps:
- Using your pipe cutter, cut your PVC pipe into seven different sections (you will need to cut five 3-inch pieces, one 5-inch piece and one 7-inch piece).
- Next, lay your pieces out into the shape of a gun to make sure all sections are accounted for.
- Then, insert the sections into one another. They should all fit tightly.
- Now, load up your marshmallows and have fun.
Tip: A pipe cutter will make cleaner cuts on PVC than a hacksaw.
Build a Ballpit

Perfect for any time of year, a a ballpit is not only simple to create but also extremely mobile, making it easy to keep kids entertained no matter the weather.
Supplies:
- Inflatable pool
- Pump
- Ball Set
Choose an inflatable pool, or kiddie pool, that will fit in the space of your choosing. Using a kiddie pool also makes this a multi-purpose project, since you can turn it into a place to splash at a moment's notice.
Once you have inflated the pool, begin filling it with the balls. The amount you fill the pit with will depend on the volume you want. If you want kids to be able to jump in, opt for more balls.
When it's time to pack up and move to a new room, simply deflate the pool and pack the balls back up into the box they came in, or store them in reusable trash bags.
For a bit more fun, consider adding a plastic kid's slide on the outside of the pit, or add some beach balls into the mix.
Build an Outdoor Chalkboard

Using just a few water-resistant items and a bit of imagination, you can carve out space in the backyard for kids to express their creativity. Perfect for drawing, writing and keeping score during cornhole, basketball and more, this summer project will require a fence for attaching the board.
Tip: If you live in a high-moisture climate, use sealant and caulk. Then apply one more coat of paint to cover any putty, caulk or sealant.
Supplies:
- MDF, plywood or water-resistant hardie board
- Chalkboard paint
- Exterior, weather-resistant latex paint
- Unsanded grout in a coordinating color
- Painter roller and pan
- 2-inch wood screws
- Level
- Chalk line
- 1 x 4 inches flat trim
- Sandpaper, 150 grit or finer
- Chalk
Steps:
- Place the board on sawhorses or a level surface to paint.
- Mix about 2 tablespoons of unsanded grout into the paint and, using your roller, apply two even coats to your board.
- Use your level and chalk line to mark the area where your board will go.
- Attach the board to the wall or fence with your wood screws
- It’s now time to add trim to your chalkboard. Measure and cut your framing to fit on the front of the board and paint it with your color of choice.
- Using finishing nails, attach the trim to the front of the board and fill any gaps with wood putty.
- Before using the chalkboard, you'll want to cure it. Using sandpaper, lightly sand the chalkboard to remove any bumps. Cover the entire board with chalk and then use your chalk eraser to rub chalk directly into the board.
- Lastly, use a wet sponge to remove the chalk dust.
Tip: If using a hardie board, be sure to use the smooth side as your chalkboard.
Build a Butterfly House

A fairly easy project that gives your backyard or garden an extra ounce of appeal, a butterfly garden also gives those friendly fliers somewhere to visit and take shelter during bad weather.
With just a few pieces of wood and some paint, your kids can create a little guest house for butterflies.
Supplies:
- Jigsaw
- Hammer
- Nails
- Safety goggles
- Gloves
- 1 x 8 x 8 piece of untreated pine wood
- 1 x 10 x 4 piece of untreated pine wood
Steps:
- Use your measuring tape and pencil to mark three equal sections (measuring about 30 inches in length) for the back and sides of the butterfly house. The leftover piece will act as the floorboard for the house.
- Use your jigsaw to cut out each piece of wood and set it aside.
- Next, create the roof, roof block and front of the house by measuring and cutting the 1 x 10 x 4 board.
To make the front, measure and cut 30 x 5 5/8 inches. Lastly, measure and cut 9 1/2 x 8 5/8 for the roof. - The front of the house will need slats for the butterflies to get in and out. On the front piece you’ve created, measure and mark six vertical slats, each about 4 inches long and 1/2-inch wide. Use your drill to drill a hole in the top and bottom of the slats you’ve marked. Then, using your jigsaw, cut the slats between the holes.
- It’s time to assemble the house. Lay your back piece on a flat surface and press a side piece against it, creating a 90-degree angle.
- Using your wood screws and a screw gun or screwdriver, attach the side piece to the back edge. Do the same on the other side of the house.
- Next, place the floor against the bottom and sides of the house and attach it with wood screws. Stand the house up and attach the front piece to the sides and bottom of the house. Lastly, screw the roof to the back piece of the house.
Tip: Making slats too large can encourage other insects/animals to enter the house. To attract butterflies, place ripe fruit inside the house. You can also make it cozier for them by adding twigs.
Summer is the time to have fun with your kids and create lasting memories with cool activities. Need supplies for each project? The Home Depot delivers online orders when and where you need them.