DIY S’more Tray & New Fire Pit for Holiday Hosting

Last updated August 21, 2024

Tyson Moore is a simple guy building things in a small town south of Atlanta. His greatest passion is his family, his church, and the middle school where he teaches and coaches soccer. He also has a great love for woodworking, photography/videography, and inspiring others to build something too! He is a husband, dad to four kids, teacher by day, and a woodworker and content creator in the space between. You can see his latest projects shared daily on Instagram (@tyson\_moore) and find other helpful woodworking plans and ideas on his website www.tysonmoorebuilds.com.
A Note From The Home Depot
Looking to have fun with friends/family on a cool summer evening or cold winter night? This fire pit is sure to bring warmth and joy to all. Keep reading to see how Tyson Moore from Tyson Moore Builds puts together a cozy backyard space to gather around an easy-to-build fire pit & make s’mores with the help of The Home Depot!
Table of Contents
DIY S’more Tray & New Fire Pit for Holiday Hosting
DIY S’more Tray
Prepping Patio for Fire Pit
DIY S’more Tray & New Fire Pit for Holiday Hosting


Hello everyone! My name is Tyson Moore, and I’m excited to show you how I made a wooden s’more tray that is perfect for hosting a holiday gathering around a campfire. Speaking of roasting s’mores over a fire, I will also show you our new patio fire pit as well! This tray was made with materials and tools found at my local Home Depot.
DIY S’more Tray
The inspiration for this serving tray came from my good friend Jeremy at @jericho_home on Instagram. He has designed trays for years and does amazing work. I will be adapting his design here to be used for s’more supplies.

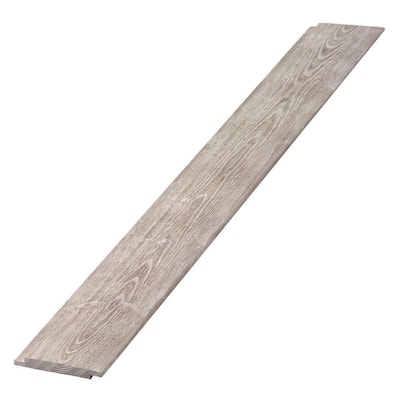
Although you can use any type of wood for a serving tray, I used a single piece of weathered wallboard found at my local Home Depot so that it would have a rustic, rough-cut feel.

I measured and crosscut three pieces 18” long on my miter saw. If you don’t have a miter saw, you can crosscut wood with any type of saw (circular saw, jigsaw or a hand saw). These three pieces will serve as my tray base.

Back at my table saw, I ripped the remaining length of the board in half to make the sides for this tray. If you do not have a table saw, you can carefully rip the board in half using a circular saw or a jig saw and a straight edge to help keep the cut straight. If you do, make sure your board and the straight edge are clamped well and safe to cut.
Because these are shiplap boards, I rotated and positioned these boards so that they laid together like this and then cut the outer edges off so that they would be flat against the tray sides.

I measured and cut my tray sides to the proper lengths and then began to prepare for assembly.

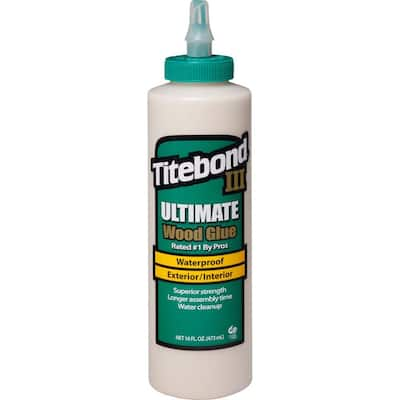
I used wood glue in all of the joints and prepared to nail it all together using a brad nailer. You could use a hammer and nails or a driver and screws.

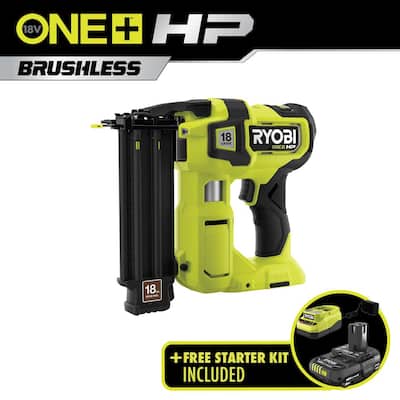
I bought this Ryobi 18GA Brad nailer at my local Home Depot because it came with a free battery. This was my first experience with an 18V battery-powered nailer, and I was impressed. I will use this all the time now!

I put on my safety goggles and then assembled the tray with 1 1/2” brad nails. This nailer made this part so easy! No loud air compressor and it was so convenient!

After the tray was assembled I used a similar colored stain to color the edges of the wood where I cut. I also lightly brushed the paint across other areas of the tray to blend in the colors. I also cut a few scrap pieces to serve as dividers and stained them as well.

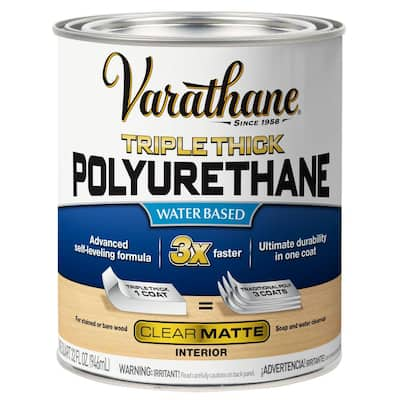
The next day, the stain was completely dry and it was time to apply polyurethane. Because this S’more tray will be in contact with food, I wanted to make sure that any wood or stain was covered. You would not want to use polyurethane on a cutting board because a knife can cut into the finish and bring tiny pieces of finish into your food, but polyurethane is a perfect finish for a serving tray after it has fully cured. The directions state that this polyurethane will be fully cured in 7 days.

I used a triple thick polyurethane which said it was the equivalent of three coats of normal polyurethane. The application was simple and I was very pleased with the results.

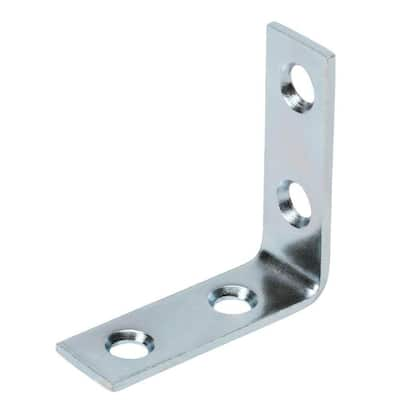
I grabbed a few L-brackets from the hardware aisle in my local Home Depot and also picked up this Behr Premium Paint and Primer Black Spray Paint.

I put on my safety respirator and then simply spray-painted the L brackets. The paint went on smoothly and adhered to this metal with no problem! These brackets will go on the edges of the tray after they dry. I left the polyurethane and the spray paint to dry for the rest of the day.


The next day I proceeded to assemble my dividers using the Ryobi Brad nailer and then positioned them inside the s’more tray. I chose to not permanently attach the dividers to the tray so that I could remove them and use the tray for something else if we wanted to.


I used black carpet tacks to attach the spray-painted L brackets to each corner. I then used a piece of painter's tape to mark the holes on my handles and then positioned the tape on the side of the tray. This is a great way to transfer hole locations for drilling.


I used a drill to make the holes and then attached the handles. I think the look of the hardware on the corners and the handles really ties everything together!
Prepping Patio for Fire Pit


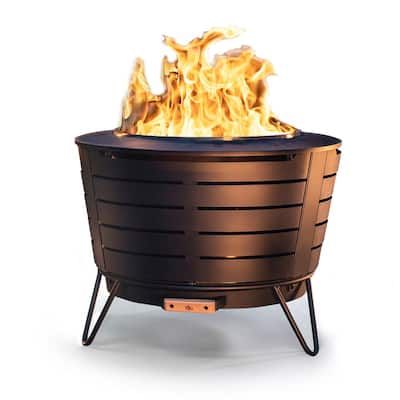
After assembling the tray, my wife and I brought out our new Tiki 25” Black Metal Patio Fire Pit that we purchased from The Home Depot. This fire pit has a removable ash pan that will make clean-up so easy! This Tiki Patio Fire Pit is highly rated on homedepot.com and will be perfect for hosting our outdoor holiday events.

The same day I bought the Ryobi 18V Brad nailer mentioned above, I also decided to pick up this 18V 10” Cordless Battery Chain Saw. I knew it would be perfect for cutting up trees laying around the property, and it proved to be an excellent tool for cutting firewood for my patio fire pit.


I carefully split the wood using my hatchet and then proceeded back inside to grab the s’more supplies!


Now that everything is set with our DIY s’more tray and our new patio fire pit, we are more than ready to host this holiday season!
To find more holiday inspiration visit DIY Holiday Home Projects & Gifts.
This post was created in partnership with The Home Depot. The author may have received compensation for this article and associated images or video, potentially in the form of products and/or services. All expressed opinions and experiences are the author’s own words.