Product Images
8 in. H x 64 in. W Garage Tool Storage Lawn and Garden Tool Organizer Rack with Galvanized Steel Pegboard and Black Hook

- Perfect for storing rakes, ladders, brooms, shovels, and more
- Includes pegboards, brackets, U-hooks, C-brackets, and more
- Comes with mounting hardware for hassle-free setup
- View More Details
Free & Easy Returns In Store or Online
Return this item within 90 days of purchase.
Ask about this product
Get an answer now with AI
Magic Apron Assistant is an AI virtual assistant. By proceeding, you consent to the recording and use of your information by The Home Depot (and authorized third parties). More information
Product Details
About This Product
The Wall Control Garage Storage Lawn and Garden Tool Wall Organizer Rack is easy to install, attractive and ideal for storing ladders, rakes, brooms, weed eaters, trimmers, edgers, shovels, pitch forks, hedge clippers, saws, extension cords, rope, sledge hammers, axes, mops, garden spades, lawn and gardening hand tools, long handled lawn garden tools and folding chair storage. Steel Pegboards are over 10X stronger than conventional wooden pegboard, guaranteed to last a lifetime and will not warp or fray over time like traditional pegboard. The wall boards can even be wiped clean with a damp rag. Wall Control Garage Tool Storage Systems are attractive, adding a WOW factor to any garage, shed or tool wall. The Garage Tool Rack Lawn and Garden Wall Organizer includes 2 Wall Control 8 in. T x 32 in. W Metallic Galvanized Steel Pegboards with Black Hooks that can be used side by side to create a total tool storage area that is 8 in. T x 64 in. W or the Pegboards can be used in separate locations for 2 separate wall-mounted tool storage areas. The Tool Storage Wall Rack includes an assortment of over a dozen of Wall Control's most popular black metal pegboard hooks and brackets to tackle any tool storage need. Wall Control Hooks have adjustable stabilizing tabs for added stability. The Wall Control Garage Wall Storage and Gardening Tool Organizer Rack Set works with any Wall Control pegboard hooks, brackets, shelves and attachments so expanding is easy. Mounting hardware included.
Highlights
- Easy to install garage storage tool organizer: mounting hardware is included for easy installation, garage tool storage pegboard mounting hardware includes screws, drywall anchors and Wall Control garage tool storage organizer installation instructions
- Garage storage rack lawn and garden tool organizer includes: 2 metal pegboards 8 in. T x 32 in. W each (8 in. T x 64 in. W total coverage), two 9 in. brackets, two 6 in. brackets, two 4 in. U-hooks, two 12 in. heavy-duty hooks, two 2 in. x 2 in. C-brackets, 1 handle holder bracket
- Ideal for storing ladders, rakes, brooms, weed eaters, trimmers, edgers, shovels, pitch forks, hedge clippers, saws, extension cords, rope, sledge hammers, axes, garden spades, lawn and gardening hand tools, long handled tools and folding chair storage
- Wall Control garage storage pegboard organizer system is modular, meaning you can grow and expand your system as your garage storage and garden tool organization needs change, buy 1-unit or many units and grow your tool storage space as needed
- Over 10 times stronger than conventional garage wooden or pressboard pegboard, more strength equals more garage storage and wall mounted garden tool organization with a strong and durable 20-Gauge steel pegboard construction that lasts a lifetime
- Maximum garage pegboard versatility, Wall Control garage pegboard panels accept conventional 1/4 in. pegboard pegs as well as Wall Control slotted pegboard hooks, brackets, shelves and supplies for maximum garage and garden tool storage versatility
- Patented hook engagement of Wall Control slotted garage pegboard hooks creates a more secure peg hook engagement over conventional garage pegboard pegs which helps prevent hooks from falling out when garage or gardening supplies are removed
- Wall Control metal pegboard garage storage panels accept magnets, magnets and magnetic tool accessories will adhere to Wall Control metal pegboard panels for easy attachment of magnetic garage tool holder accessories and lawn and garden tool attachments
- Easy to install with no sharp edge on your garage or garden closet wall, installs in minutes thanks to the garage pegboards preformed 3/4 in. return flange that separates the panel storage surface from the wall for garage peg hook pass through clearance
- Wall Control galvanized steel pegboard panels for lawn and garden garage tool storage offer an attractive finish that is rust, corrosion and scratch resistant for long-lasting attractive garage and garden tool storage that wipe clean with a damp rag
- Wall Control garage tool storage steel pegboard's construction prevents the peg board holes from fraying and wearing out over time unlike conventional wooden, pressboard or plastic garage pegboards so these pegboards will never need replacing
- Wall Control lawn and garden garage tool organizer also works great in other areas of the home or shop for general home improvement storage and organization, this unit is an ideal folding chair holder rack, pool equipment organizer and more
- When properly anchored and with weight evenly distributed the Wall Control garage storage rack lawn and garden tool organizer can support up to 200 lbs. for heavy-duty commercial grade garage and garden tool pegboard storage and organization capabilities
- Wall Control pegboard panels accept 1/4 in. pegboard pegs and all Wall Control pegboard accessories but please check with individual hook manufacturers before purchasing other hooking systems to ensure compatibility with Wall Control pegboard panels
- Wall Control garage pegboard and garden tool organizers can be utilized as a shelving system by adding Wall Control's modular shelves to them in any location, wall storage organization is completely customizable with Wall Control garage pegboard
- Heavy-duty tool organizer set installs fast, lifetime warranty, complete garage tool organizer set: 64 in. W total storage area, 200 lbs. capacity, 13 strong steel hooks and brackets
- Expandable Wall Control garage tool storage system: add-on with Wall Control brand pegboard panels and accessories at any time, accepts traditional 1/4 in. round peg board pegs and all Wall Control brand peg hooks
- Wall Control lawn and garden garage tool organizer offers unmatched pegboard style wall mounted tool storage and organization and is backed by fantastic customer service and support
- Return Policy
Product Information
Additional Resources
Shop All Wall ControlSpecifications
Dimensions: H 8 in, W 64 in, D 12 in
Dimensions
Pegboard Hole Diameter | 0.25 in |
|---|---|
Product Depth (in.) | 12 in |
Product Height (in.) | 8 in |
Product Width (in.) | 64 in |
Details
Color Family | Silver |
|---|---|
Color/Finish | Metallic Galvanized Pegboard with Black Hooks |
Included | Accessories, Hardware, Hook(s), Mounting Hardware, Pegboard, Screws, Support Brackets |
Material | Metal |
Number of Pegboards Included | 2 |
Package Quantity | 1 |
Pegboard Accessory Type | Brackets |
Returnable | 90-Day |
Style | Designer, Industrial, Modern, Traditional, Transitional |
Warranty / Certifications
Manufacturer Warranty | Limited Lifetime Warranty. Includes Manufacturer Defects. Excludes Normal Wear and Tear. |
|---|
Questions & Answers
Does the pegboard have any "flex" to allow an install on a wall that is slightly curved?
Thanks for the question! Unfortunately the panels do not have any flex as they are quite rigid. We would not recommend trying to install on a curved surface.
Can you mount this tool rack on a cinder block wall.
Thanks for the question! Yes, you can! You would just need to purchase mounting hardware that allowed for such an installation. We would recommend blue Tapcon screws as those have been successful in mounting these pegboards into concrete walls for many customers.
Is there any way to buy just the hooks and not the pegboard with this set?
Thanks for the question! Unfortunately there is no "kit" or package that only contains these accessories but Wall Control does offer individual accessories directly from the mfg website incase that is helpful. Thanks!
I am going to attach this to a cinder block wall. What size of tapcon screws should i use?
Thanks for the question! We would recommend at least 1-1/4" length and possibly longer depending on the quality of your concrete wall. If the wall is very porous you might want to go a little deeper just to make sure you have ample grip at each contact point. If the wall is very smooth with little to no variation then the 1-1/4" length should work just fine. Our blanket recommendation would be 3/16" x 1-3/4" but again, what is required varies wall by wall based on quality of the mounting surface.
Can this be attached to cement garage walls
Thank you for your inquiry. Wall Control products can be installed on a concrete block wall by using blue Tapcon Screws or by attaching two (or three) horizontal rows of 2"x4"s along the wall where the top, bottom, (and middle if you wish) mounting holes are located on the panel. This is what we found works best because it requires you to drill less holes in your concrete wall and gives the panels a very even surface to mount to. So for instance, if you wanted to span a width of 4' you would use (1) 8' long 2"x4" and cut it in half and you would mount the first half horizontally at the height you want the top of the panels to be using about 4 concrete or masonry anchors. Then you would mount the second 2"x4" about 32" on center below the top 2"x4" so that it lined up with the bottom row of mounting holes in the panels, again using about 4 concrete or masonry anchors. You could also mount a third 2"x4" in-between these two because the panels actually have a center row of mounting holes but when mounting to concrete this third row may be overkill depending on your application. Once the 2"x4" are up you can simply attached each panel in a series along the 2"x4"s with the attachment screws provided with the panels. What we have found is that if you're only installing a couple of panels then the blue Tapcon screws for concrete you can pick-up at your local hardware store typically make the most sense but if you're installing a bunch of panels it is usually easier jus to put up the 2"x4" or 2"x2"s first because that can save you some time when it comes to installing the individual panels.
Viewing 1-5 of 5
Customer Reviews
4.5 out of 5
Loading Recommendations
Compare Key Features
Product Snapshot | |||
|---|---|---|---|
Ideal for heavy-duty garage storage, this metal pegboard system (64 in. W) holds up to 200 lbs. and is easily expandable. | Built for heavy-duty tool storage, this metal pegboard kit offers versatile organization with a 200 lb. capacity. | Built for heavy-duty tool storage, this metal pegboard kit offers versatile organization with a durable, high-capacity design. Ideal for professionals and DIYers. | Built for heavy-duty tool storage, this metal pegboard kit offers versatile organization with a durable, high-capacity design. Ideal for professionals and DIYers. |
Weight Capacity | |||
200 lbs. | 200 lb. | 200 lbs. | 200 lbs. |
Size/Dimensions | |||
8 in. H x 64 in. W x 12 in. D | 48 in. W x 32 in. H | 48 in. W x 32 in. H (three 32 in. x 16 in. panels) | 48 in. W x 32 in. H (three 32 in. H x 16 in. W panels) |
Material | |||
Metal | Metal | Metal | Metal |
Hole Spacing | |||
1/4 in. | 1/4 in. | 1/4 in. | 1/4 in. |
Weather Resistant | |||



Related Products

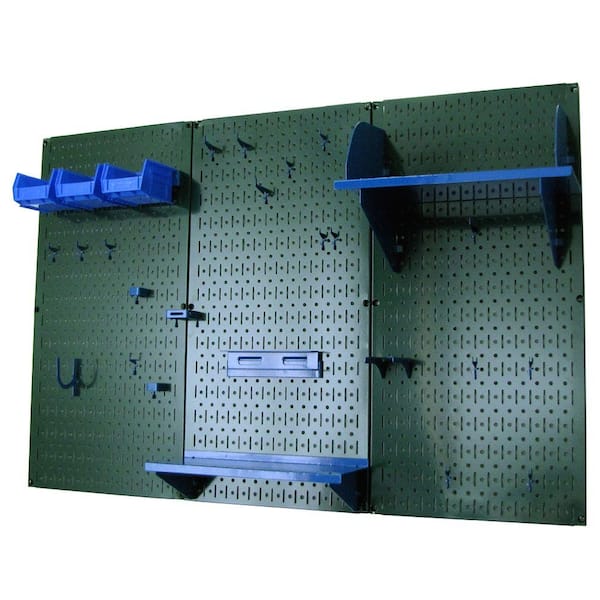
32 in. x 48 in. Metal Pegboard Standard Tool Storage Kit with Black Pegboard and Black Peg Accessories
The Metal Pegboard Standard Workbench Tool Storage Organizer Kit offers maximum toolboard storage versatility and strength with over 10.5 sq. ft. of pegboard storage space. Three 16 in. x 32 in. Black powder-coated pegboard panels combine for a total tool storage area of 48 in. x 32 in. The attractive Metal Pegboards are great for heavy duty toolboard storage needs due to their 20-Gauge steel construction that will not warp, fray, or crack and are over 10 times stronger than conventional pegboard creating an industrial grade tool storage solution that will last a lifetime. Wall Control metal pegboards offer both slots and holes to accept slotted toolboard accessories as well as conventional 1/4 in. pegboard hooks making this pegboard extremely versatile by giving the user multiple options with toolboard accessory selection. The patented engagement of the slotted toolboard hooks included improves hook security for more hassle free tool storage. These versatile, durable and high strength metal pegboard panels are an easy-to-use tool storage solution for any garage, shop, or tool crib. The metal pegboard panels are easy to install into studs or flat surfaces with pre-drilled mounting holes to install on 16 in. studs. A built-in frame return flange provides ample hook clearance and full access to all holes without requiring additional framework or using up pegboard holes for mounting. Mounting hardware is also included.
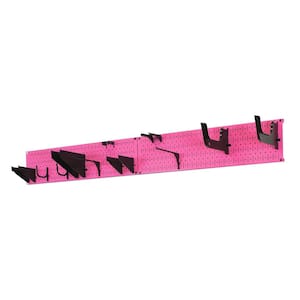
8 in. H x 64 in. W Garage Tool Storage Lawn and Garden Tool Organization Rack with Colorful Pink Pegboard and Black Hook
The Wall Control Garage Storage Lawn and Garden Tool Wall Organizer Rack is easy to install, attractive and ideal for storing ladders, rakes, brooms, weed eaters, trimmers, edgers, shovels, pitch forks, hedge clippers, saws, extension cords, rope, sledge hammers, axes, mops, garden spades, lawn and gardening hand tools, long handled lawn garden tools and folding chair storage. Metal Pegboards are over 10X stronger than conventional wooden pegboard, guaranteed to last a lifetime and will not warp or fray over time like traditional pegboard. The wall boards can even be wiped clean with a damp rag. Wall Control Garage Tool Storage Systems are attractive, adding a WOW factor to any garage, shed or tool wall. The Garage Tool Rack Lawn and Garden Wall Organizer includes 2 Wall Control 8 in. T x 32 in. W Pink Metal Pegboards with Black Hooks that can be used side by side to create a total tool storage area that is 8 in. T x 64 in. W or the Pegboard Rails can be used in separate locations for 2 separate wall-mounted tool organization areas. The Tool Storage Wall Rack includes an assortment of over a dozen of Wall Control's most popular black metal pegboard hooks and brackets to tackle any tool storage need. Wall Control Hooks have adjustable stabilizing tabs for added stability. The Wall Control Garage Wall Storage and Gardening Tool Organizer Rack Set works with any Wall Control pegboard hooks, brackets, shelves and attachments so expanding is easy. Mounting hardware is included.
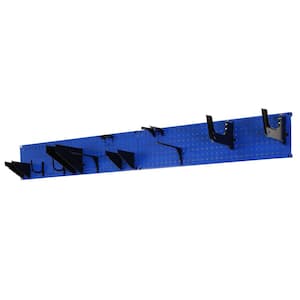
8 in. H x 64 in. W Garage Tool Storage Lawn and Garden Tool Organizer Rack with Blue Metal Pegboard and Black Hook Set
The Wall Control Garage Storage Lawn and Garden Tool Wall Organizer Rack is easy to install, attractive and ideal for storing ladders, rakes, brooms, weed eaters, trimmers, edgers, shovels, pitch forks, hedge clippers, saws, extension cords, rope, sledge hammers, axes, mops, garden spades, lawn and gardening hand tools, long handled lawn garden tools and folding chair storage. Metal Pegboards are over 10X stronger than conventional wooden pegboard, guaranteed to last a lifetime and will not warp or fray over time like traditional pegboard. The wall boards can even be wiped clean with a damp rag. Wall Control Garage Tool Storage Systems are attractive, adding a WOW factor to any garage, shed or tool wall. The Garage Tool Rack Lawn and Garden Wall Organizer includes two Wall Control 8 in. T x 32 in. W Blue Metal Pegboards with Black Hooks that can be used side by side to create a total tool storage area that is 8 in. T by 64 in. W or the Pegboard Rails can be used in separate locations for two separate wall-mounted tool organization areas. The Tool Storage Wall Rack includes an assortment of over a dozen of Wall Control's most popular black metal pegboard hooks and brackets to tackle any tool storage need. Wall Control Hooks have adjustable stabilizing tabs for added stability. The Wall Control Garage Wall Storage and Gardening Tool Organizer Rack Set works with any Wall Control pegboard hooks, brackets, shelves and attachments so expanding is easy. Mounting hardware included.

8 in. H x 64 in. W Garage Tool Storage Lawn and Garden Tool Organizer Rack with White Metal Pegboards and Black Hook Set
The Wall Control Garage Storage Lawn and Garden Tool Wall Organizer Rack is easy to install, attractive and ideal for storing ladders, rakes, brooms, weed eaters, trimmers, edgers, shovels, pitch forks, hedge clippers, saws, extension cords, rope, sledge hammers, axes, mops, garden spades, lawn and gardening hand tools, long handled lawn garden tools and folding chair storage. Metal Pegboards are over 10X stronger than conventional wooden pegboard, guaranteed to last a lifetime and will not warp or fray over time like traditional pegboard. The wall boards can even be wiped clean with a damp rag. Wall Control Garage Tool Storage Systems are attractive, adding a WOW factor to any garage, shed or tool wall. The Garage Tool Rack Lawn and Garden Wall Organizer includes 2 Wall Control 8 in. T x 32 in. W White Metal Pegboards with Black Hooks that can be used side by side to create a total tool storage area that is 8 in. T x 64 in. W or the Pegboard Rails can be used in separate locations for 2 separate wall-mounted tool organization areas. The Tool Storage Wall Rack includes an assortment of over a dozen of Wall Control's most popular black metal pegboard hooks and brackets to tackle any tool storage need. Wall Control Hooks have adjustable stabilizing tabs for added stability. The Wall Control Garage Wall Storage and Gardening Tool Organizer Rack Set works with any Wall Control pegboard hooks, brackets, shelves and attachments so expanding is easy. Mounting hardware is included.