DIY Outdoor Projection Screen
Last updated September 7, 2023
Presented by Rachel Metz of Living to DIY
Enjoy an outdoor movie night at home with this fun DIY project. This project will show you how to use a drop cloth, tarp and a few simple tools to build a large projection screen for outdoor use.
Difficulty:
Beginner
Duration:
Under 2 hours
Table of Contents
Gather Your Materials
Lay Out Screen Back
Lay Out Screen Face
Glue Screen Pieces
Cut to Size
Attach Top Rod
Gather Your Materials

For this project, you’ll need an outdoor tarp with grommets, a drop cloth, construction adhesive and a wooden dowel. To install the screen, you’ll also need large hooks, eyehooks and two bungee cords.
The tools required are only a caulk gun, a drill, heavy duty scissors and needle and thread.
Lay Out Screen Back

- Clear work area large enough to spread tarp and drop cloth out completely.
- Lay tarp out with inside surface facing up and smooth it out.
Lay Out Screen Face

- Align the drop cloth on top of the tarp’s inside surface.
- Use the silver outline as a guide to keep it straight and between the grommets.
Glue Screen Pieces

- Load a caulk gun with construction adhesive.
- Lift up one side of the drop cloth and dispense adhesive evenly onto the exposed tarp.
- Press and smooth out drop cloth over the tarp to adhere.
- Continue to glue the rest of the screen in the same manner.
Cut to Size

- Measure up from the bottom of the screen to determine your desired length, and mark a cut point.
- Use heavy duty scissors and trim the screen to your desired length.
Attach Top Rod

- Place a long bead of construction adhesive roughly four to five inches down from the side where you cut across.
- Lay a dowel across the screen above the glue line, then fold the screen edge over the dowel and adhere to construction adhesive.
Stitch to Secure

Sew by hand along the glued edge for extra security.
Tip: Add waterproof sealant tape to the back to protect your stitches.
Attach Holder

- Decide where you will hang up the screen. For stability, you will need to choose a location that will anchor the top and sides of the screen.
- Install two top hooks far apart enough for the projection screen to rest securely onto them.
Attach Eye Hooks

- Install two eye hooks down below on either side of the area where the screen will be supported.
- Insert bungee cords into grommets of the tarp and then hook them into the eye hooks.
- Once the screen is stable, fire up the projector and start your movie night.
Tape for Storage

- To store the screen, roll it up from the top with the tarp side out.
- Use a piece of waterproof tape to secure the roll.
Storage

- The screen can be stored rolled, but to prevent warping, lay the roll flat rather than standing it on end.
- You can also store it rolled outside in the screen hanger. It should remain weatherproof.
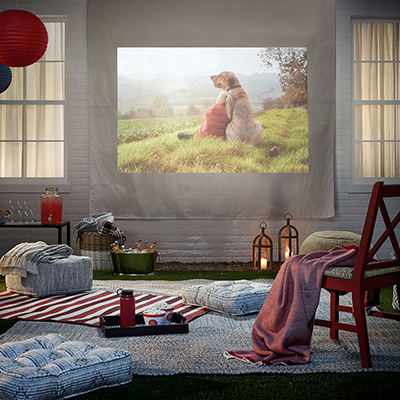
Enjoy Movie Night

Once you have set up your projection screen, add a projector, grab some snacks and get outside for a showing of your favorite films, TV shows or videos.
This DIY projection screen is a great starter project because it uses only a few tools and techniques and takes less than two hours. However, the result is a satisfying and fun addition to your home entertainment options.
Ready to start your project? The Home Depot delivers online orders where and when you need them.