How to Build a Cold Frame

Last updated September 7, 2023
You can extend the growing season in your garden with a cold frame. Think of a cold frame as a simple greenhouse that sits close to the ground. To allow light in, the top of the cold frame may be made of glass, fiberglass or plastic. The cold frame helps to hold the sun’s warmth overnight, shielding plants from frost and freezing temperatures.
This guide will show you how to build a cold frame with wood and plastic sheeting.
Difficulty:
Intermediate
Duration:
2-4 hours
Table of Contents
Gather Tools & Materials
Cut the Wood
Make the Base of the Cold Frame
Cut the Wedges
Attach the Wedges
Lay Out and Measure the Top of the Cold Frame
Gather Tools & Materials

A DIY cold frame can be constructed in several different ways. Some cold frames are made with upcycled window frames. Others look like tiny tents and sit on top of your plants.
For this project, you will use wood and sheets of plastic to build a cold frame.
Materials list:
Two 2- x 6-inch x 8-foot cedar boards
Two 1- x 4-inch x10-foot cedar boards
3-inch exterior screws
3/4-inch exterior screws (may be provided with hinges and handle)
Exterior wood glue
24 mirror clips
Six 8- x10-inch pieces of clear plastic
2 Hinges
1 Handle
Tools:
Pencil
Tape measure
Straight Edge
Speed square
Circular saw
Table saw (optional)
Drill with 1/8-inch bit for pilot holes and driver bit for screws
Sharp chisel
Hammer or mallet for chiseling
Cut the Wood

Cut List for the Cold Frame
- Begin by measuring and cutting the two 2- x 6-inch x 8-foot cedar boards to three pieces at 24 inches and three pieces at 33 inches. These will be the sides of the cold frame.
- Cut the two 1- x 4-inch x10-foot cedar boards to three pieces at 36 inches each and four pieces at 24 inches.
Make the Base of the Cold Frame

This cold frame will be 36 inches in the front and back and 24 inches on each side.
- To make the base of the cold frame, lay the two 36-inch pieces of wood parallel to each other, about two feet apart. They will serve as the front and back of the cold frame.
- Place the 24-inch pieces of wood on either side of the two 36-inch pieces to make a rectangle.
- Use 3-inch screws to connect the side pieces to the front and back pieces.
Cut the Wedges

You'll need to cut wedges to sit on top of the base of the cold frame. These wedges will make the cover of the cold frame sloped. This downward slope will let rain run off the cold frame.
Diagonally cut one of the 24-inch long pieces of 2- x 6-inch cedar. This will make two wedges, one for each side of the cold frame.
Attach the Wedges

Screw the wedges to the sides of the cold frame base using 3-inch screws.
Lay Out and Measure the Top of the Cold Frame

- Lay out the four of the 24-inch 1- x 4-inch wood pieces for the window frame top.
- They should be placed in a window-pane configuration. The 36-inch boards should be placed horizontally and the 24-inch boards should cross them vertically.
- The space between the wood pieces of each pane of the top of the cold frame should be just smaller than the 8- x 10-inch clear plastic pieces.
- Use a square to make sure the wood pieces are properly placed.
- Use a pencil to mark the locations for the half lap joints.
Cut the Joints

Cut the joints by setting your saw’s cut depth to half of the material’s thickness. For example, half of 3/4-inch is 3/8-inch.
Chisel the Wood

Make multiple cuts to weaken the wood. Then use a chisel to clean out the waste.
Glue the Pieces of the Top in Place

Once you have the parts of the top of the cold frame cut and in place, glue the 36-inch wood pieces to the 24-inch pieces to make the panes. Gluing the wood will make a nice flush cover for the cold frame. Clamp each joint as you glue.
Attach the Window Panels

- Drill a hole in the corners and in the center of the sides of each of the 8- x 10-inch plastic panels. You will drill a total of eight holes in each one of the panels.
- Place screws in the holes of each panel. Attach the screws to the underside of the window-pane top of the cold frame.
- You can use fiberglass or glass panels instead of plastic sheeting. However, if kids or pets play will be playing near the cold frame, don't use glass. It can be easily broken.
Place the Top of the Cold Frame on the Base

- Attach the hinges to the window top of the cold frame first. Place the top on the cold frame and check to make sure it is lined up corrected.
- Then screw the hinges to the cold frame base.
- The finished cold frame will measure 36 inches at the back and 24 inches on each side.
Add a Handle

When you’re done building a cold frame, you can add a handle to it to make it easier to open and close. Attach the handle to the lid close to the bottom edge, in the center. Use 3/4 screws to fasten the handle to the cold frame.
Choose a Place for the Cold Frame

After putting a handle on your DIY cold frame, choose a place to put it. The ideal spot will receive sun all day and will usually be in the south-facing side of your yard.
Tips for Using a Cold Frame

- Raise the lid on your cold frame when the temperature hits 40 degrees F or above, so the heat doesn’t build up and cook your plants.
- Close it in the afternoon to trap warmth overnight.
- Use a stick to prop the lid open for ventilation on warm, sunny days. Cut notches in the stick so you can control how high to raise the lid. If needed, use a shade cloth to lower the temperature of the cold frame.
- Don’t use glass for your cold frame if your area gets snow or ice. The built-up of snow or ice could break the glass. If you have children or pets, avoid using glass to build your cold frame, as well.
- Automatic vents aren’t recommended where snow and ice may keep the vent from operating.
- Angle the cold frame so that the back is higher than the front. This setup helps capture more light and lets rain run off the roof.
- For extra protection, place the cold frame next to a building.
- For additional insulation, dig 6- to 8-inches into the soil and build your cold frame partly below ground. If you’re concerned about flooding, add a layer of gravel underneath.
- When the temperatures drop to 20 degrees F or below, protect the cold frame by layering old blankets on top. You could also use electrical heating cables to warm your cold frame.
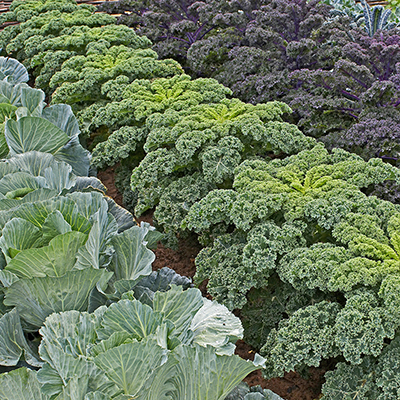
When you know how to build a cold frame, you can expand the growing season for fresh produce in your yard. During the colder months, spinach, lettuce and other greens can thrive in a DIY cold frame. Other vegetable that are well suited for a cold frame include carrots, radishes and leeks. In the spring, a cold frame can serve as a place to start seedlings.
Ready to get the tools and materials to build a cold frame? The Home Depot delivers online orders when and where you need them.