How to Make a Dog Organization Station

Last updated September 7, 2023
Presented by Charlotte Smith of At Charlotte's House.
A puppy or dog can help fill a home with more than love. There’s treats, toys and other equipment that’s needed. Get your furry family member organized with a fun project for the whole family. Use this guide to create a DIY dog organization station. The hooks and storage shelf makes it easier to keep everything you need for your pets up and out of the way.
Difficulty:
Beginner
Duration:
2-4 hours
Table of Contents
Gather Materials
Cut Plywood & Dowels
Sand & Attach Dowels
Attach the Shelf
Add Wood Dowels Above Shelf
Add Hooks
Gather Materials
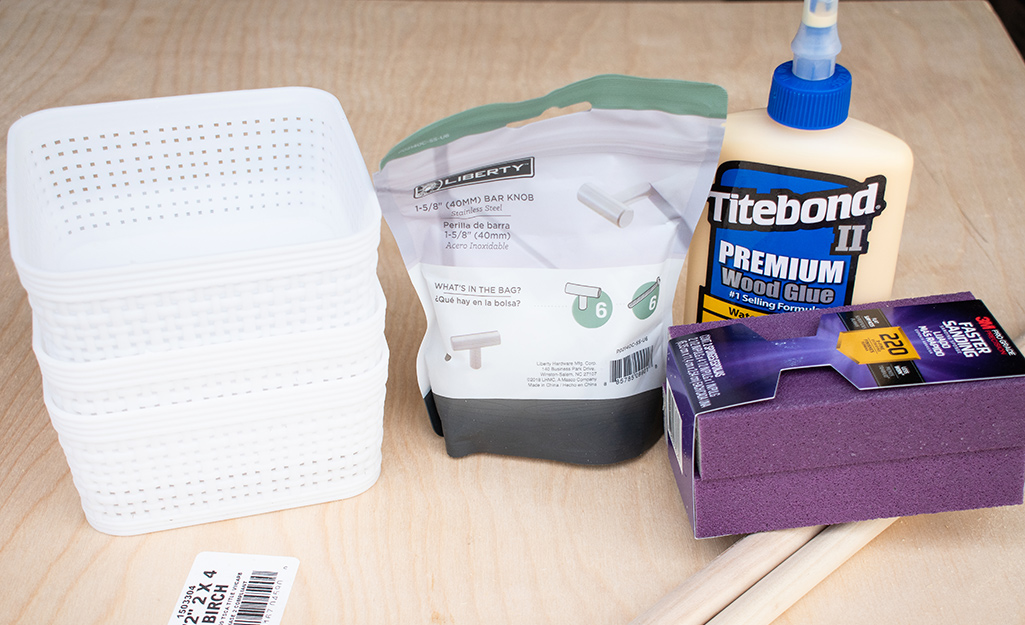
You will need 1/2-inch sanded plywood to create the 24-inch x 8-inch unit and its 24-inch x 5-inch shelf. Get plenty of wood dowels to cut into different lengths. You will also need wood glue, a sanding sponge, paint, three cabinet pulls and 2 D-rings with screws.
Safety Tip: Wear eye protection when operating power tools.
Cut Plywood & Dowels
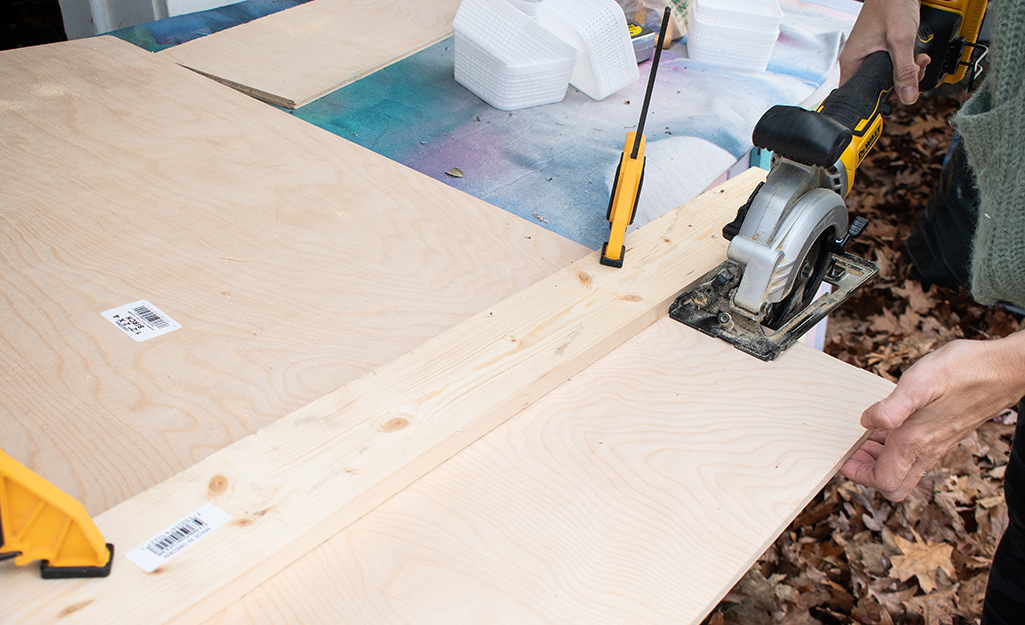
You can use a miter saw or a miter box with a hand saw to cut the wood pieces. If you’re using a miter saw, clamp a straight board in place as a guide.
Measure and cut a 24-inch x 8-inch piece of plywood. This will be the back of the organization wall unit. Measure and cut a 24-inch x 5-inch piece of plywood. This will be the attached shelf. Sand pieces lightly to smooth any rough edges.
The decorative pattern for this DIY wall unit is made using different lengths of wood dowels. Cut several dowels into 4 3/4-inch pieces, 3 1/4-inch pieces and 1 1/5-inch pieces for the main pattern. Measure and cut three longer dowels to frame the unit.
Sand & Attach Dowels
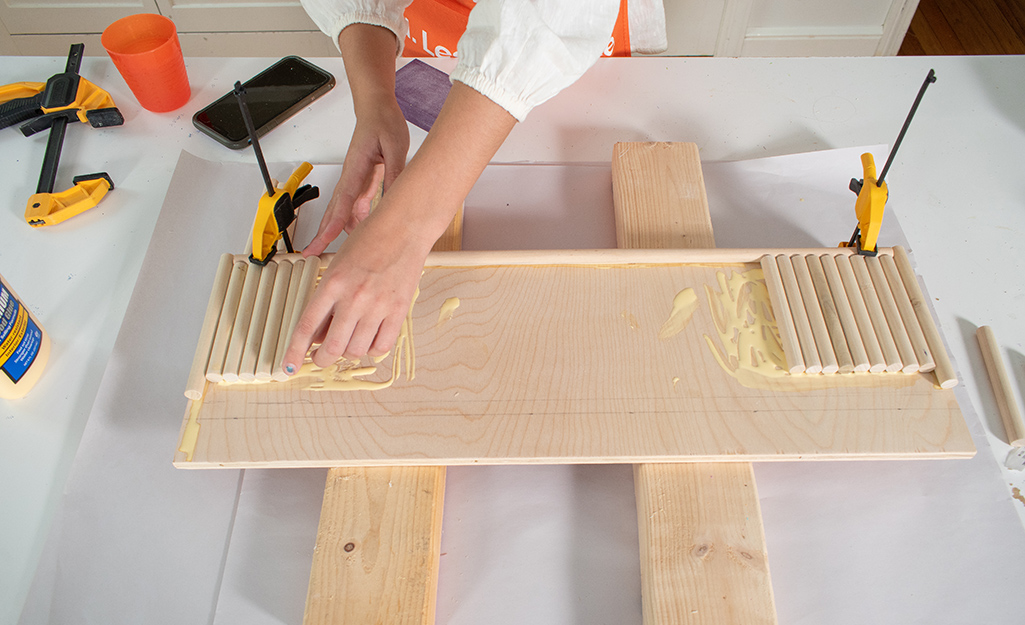
Sand the ends of each dowel. Lay the dowels out and play with the pattern you want. Once you decide on a pattern, apply wood glue to the plywood. Set the dowels in place. These dowels fit pretty well, but there may be a few places where you need to trim or cut longer individual dowels to close up any gaps. Let the glue dry for 2 to 3 hours before installing the shelf.
Attach the Shelf

Set the shelf about 3 1/2 inches from the top of the unit. It should fit snug against the last row of decorative dowels under it. Carefully measure and mark the pilot holes for the screws. These pilot holes will be on both the back of the unit and at the end of the shelf. Make sure to predrill straight into the shelf.
Use 2-inch finish screws to securely attach the shelf to the back piece of the unit. Glue the shelf to the unit first to make the shelf a bit stronger.
Tip: The shelf on this DIY dog organizer will be plenty strong enough for lighter items. Opt for a few boxes of small treats or dog toys. Heavier items are not recommended.
Add Wood Dowels Above Shelf
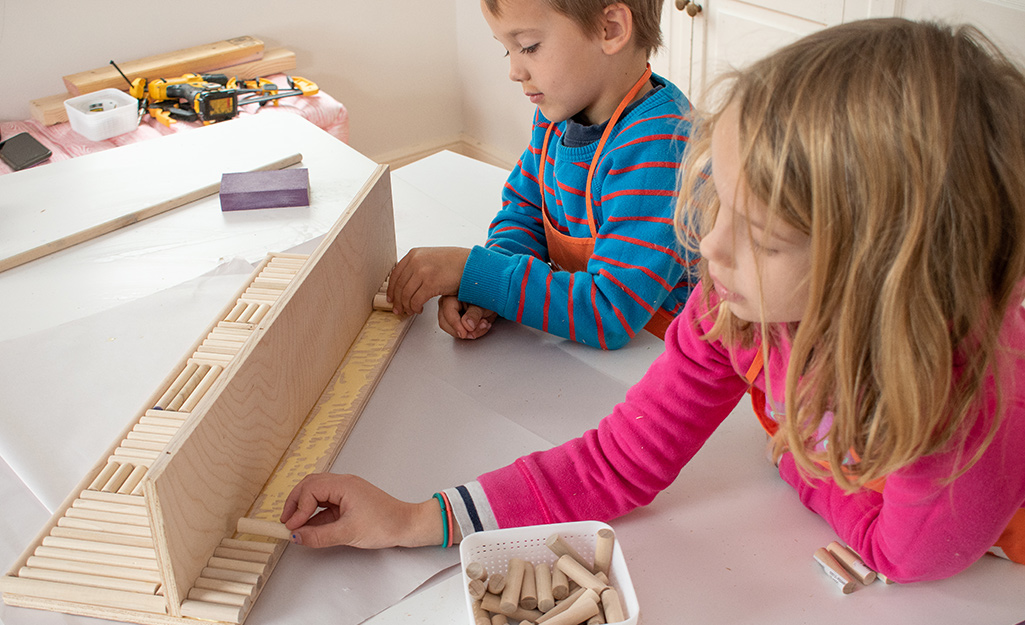
Once the shelf is in place, glue the dowel pattern in above the shelf. Use the 3 1/4-inch dowels pieces. Finish the unit by gluing the dowel across the top. Measure the top edge and cut a dowel to fit. Hold it in place with painter's tape until it dries.
Add Hooks
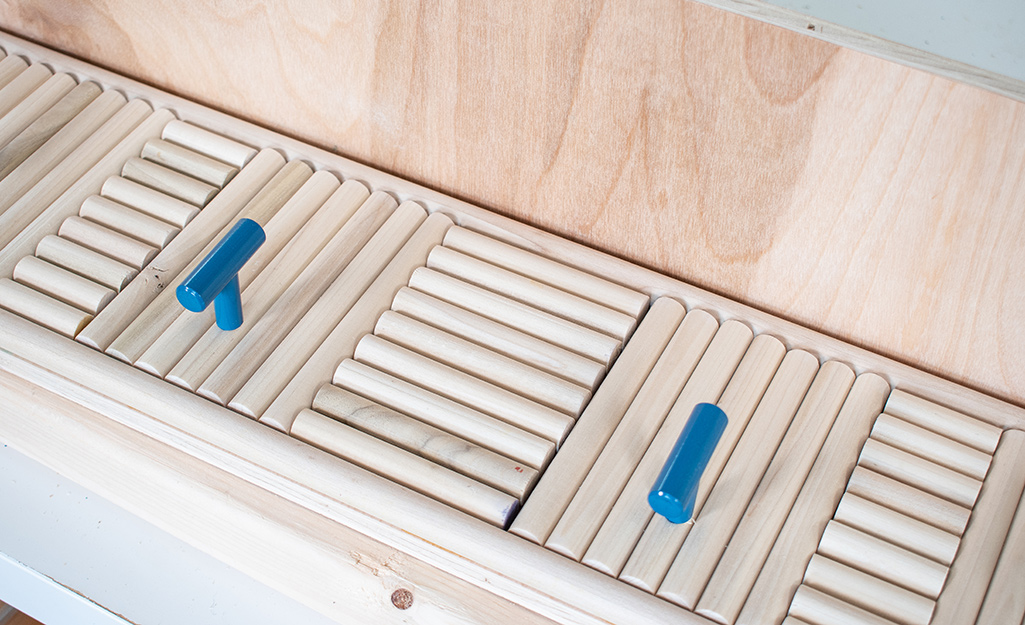
You can choose almost any cabinet drawer pull to hang leashes or keys on. The hooks in this example are actually drawer pulls painted blue. Use an acrylic paint for durability.
To attach the hooks, carefully predrill through the back of the plywood with a countersink drill bit. Hold the hooks in place and secure with cabinet screws through the back of the plywood.
Hang
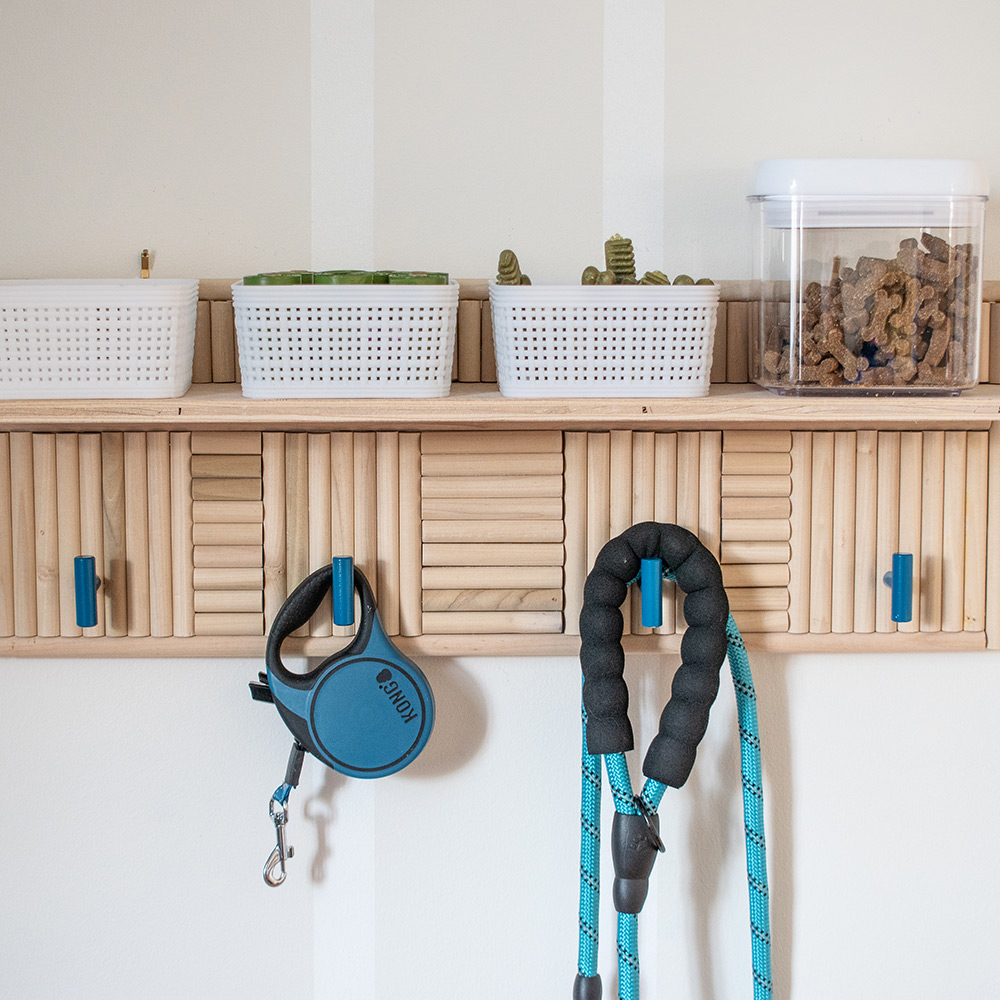
Measure, pre-drill and screw in two D-rings into the back of the finished organizer. Use a stud finder to locate the studs in the area you’ve chosen to place your wall unit. Draw a level line on the wall, marking where your finishing nails or anchor nails will go. Hang your unit.
A space-saving and attractive wall organizer takes pet clutter out of the picture. This DIY Dog Organizer has a shelf and hooks to keep keys, treats and leashes organized. It makes a great addition to a mudroom or installed next to an outside door. Kids of all ages will enjoy its rustic, natural look and making the fun pattern.
Ready to get your puppy organized? Find what you need for your project in your local store. Use The Home Depot app to locate products and check inventory. We'll take you to the exact aisle and bay.
