DIY Holiday Decoration Ideas

Published December 17, 2024

Tyson Moore is a simple guy building things in a small town south of Atlanta. His greatest passion is his family, his church, and the middle school where he teaches and coaches soccer. He also has a great love for woodworking, photography/videography, and inspiring others to build something too! He is a husband, dad to four kids, teacher by day, and a woodworker and content creator in the space between. You can see his latest projects shared daily on Instagram (@tyson\_moore) and find other helpful woodworking plans and ideas on his website www.tysonmoorebuilds.com.
A Note From The Home Depot
With the seasons changing we’re nearing the best time of year to revamp your space and add personal touches to your home to spread that holiday cheer and spirit. Keep reading to see how Tyson Moore of Tyson Moore Builds uses items found around his home to create the most amazing Christmas decorations and add some finishing touches with items found at The Home Depot!
Table of Contents
DIY Holiday Decoration Ideas
DIY Live Evergreen Garland
DIY Wooden Trees (Outdoor)
DIY Scrap Wood Trees (Indoor)
DIY Wood Slice Ornaments
Christmas Tree & Yard Decorations
DIY Holiday Decoration Ideas


Hello everyone! My name is Tyson Moore, and I’m excited to kick off this Holiday season with a few decorating ideas! Whether you are looking for DIY ideas or products to purchase, I will show you how we used various materials and products found at my local Home Depot in order to decorate our home for the Holidays.
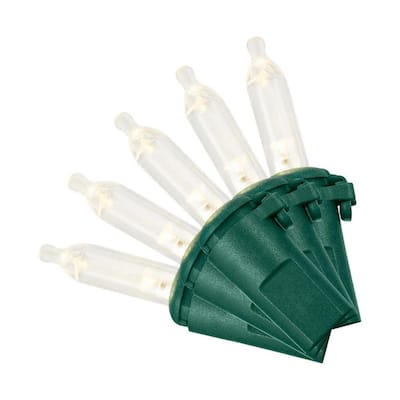
DIY Live Evergreen Garland

My wife and I recently bought this amazing 30” Prelit Woodmore Wreath for our front door, and my wife thought it would look more festive if we made our own garland to go around our front door as well. We have several large evergreen trees on our property that need to be trimmed back so this will be an excellent way to repurpose some of these cut-offs. Free garland is great, but if you decide to create your own, make sure you aren’t removing limbs from public trees or trees belonging to a neighbor! ;)

We started by cutting off a few low-hanging branches with a reciprocating saw. We were planning to trim these back in the summer but decided to leave them until now so that we could make our own garland.

You can use loppers to trim off branches or you can use a reciprocating saw like this Ryobi 18V ONE+ HP BL Reciprocating saw paired with a Milwaulkee Saw Blade Set to make it a quick and easy task.

After gathering together many small sections, we bundled together a few branches at a time using wire. You can also use floral tape or twine if you prefer. We then laid out all of the little bundles of branches in a line to determine how long we wanted our garland to be. We then used a long piece of wire and wrapped it around each bundle of sprigs so that they were all connected together.

After making our garland, we simply draped it over the door and held it in place using a few small nails. Of course, if you do not have access to evergreen branches you can always purchase some of the many styles of Pre-lit Artificial Garland for use in your home.
DIY Wooden Trees (Outdoor)

For this next affordable DIY idea, I used pieces of cedar-textured engineered wood siding to create a set of wooden trees to place next to our front door.

We first used a piece of cardboard and created a template that would make it easy to trace the shapes we wanted. There is no specific shape or format to follow, we just made up a design that looked good to us.

We then used a jigsaw to cut out our tree shape. You could use a bandsaw or a jigsaw like this Ryobi One+ HP 18V Brushless Cordless Jigsaw to easily cut out shapes in wood.


For the base, I cut out another piece identical to the bottom of my tree and traced the width of that piece onto the bottom center of my tree. I then cut out a channel with the jig saw so that the tree easily slides onto the base. We chose to not glue ours together so that we can easily break it down for easy storage after the holidays.

We used a little gold and white spray paint to make the three trees look slightly different, and then we wrapped tiny battery-powered copper wire fairy lights around the trees. Again, this is a very affordable and easy way to make a set of front porch decorations!
DIY Scrap Wood Trees (Indoor)

Now here is a DIY idea that is completely free to make if you already own a saw, wood glue, and any scrap wood pieces! These little trees look great on a mantel or anywhere else you want to display them!

We used our miter saw for this project and decided to start with a 25-degree miter. We cut out a triangle on one end of the scrap wood. You can certainly use a jig saw or a hand saw, but a miter saw makes this part so quick and easy!

After making our first cut, we flipped our scrap piece over, lined it up with the first triangle, and marked wherever it looked natural. After making the second cut, you can see the tree beginning to take shape. We continued this process for as many pieces as we wanted.

You can adjust your angle as well to make the trees look different. If you set your miter saw to a wider angle (like 45 degrees), it will make the trees shorter and wider; a narrower angle (like 10 degrees) will make the trees taller and narrow. There is no right or wrong angle to cut your scrap trees!

We used various pieces of scrap wood so that the trees would look different, and we glued all the pieces together with wood glue. If you notice, we also just cut a couple of single triangles out of pieces of scrap wood as well to add variation. This is also a great project to make with kids!
DIY Wood Slice Ornaments

Another DIY decoration idea is making your own wood slice ornaments! If you do not have access to a miter saw or a small wooden log to make your own, then you can always order pre-cut wood slices online. Not only is this another easy and affordable way to decorate for the holidays, but it also can make a great gift!

For this project, we used our miter saw to slice a smaller log into multiple wooden circles. I will say that if you decide to cut your own, make sure to use an old dried-up log that has been down for a long time. If a log is too green and has a lot of moisture in it (recently cut down), then your wood slices can warp and crack almost overnight! Ask me how I know! ;)


I decided to paint the inside of my wooden circles with dark paint and then let them dry. I then used my Dremel Stylo+ to carve away whatever designs I wanted. I absolutely love my Dremel Stylo, and I think the look of the dark paint and the natural wood really ties together perfectly!

I then used my Ridgid 18V SubCompact Drills and my Milwaukee Drill Bits to make holes in the tops of these DIY ornaments. We added some twine and called it a day! Again, you can custom-make these DIY ornaments any way you choose and this is also a great project to do with kids!
Christmas Tree & Yard Decorations


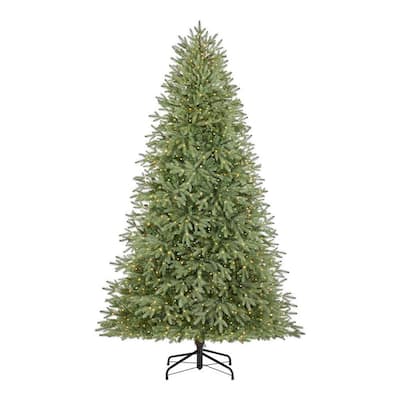
While we were at our local Home Depot gathering a few supplies for our DIY projects we noticed this pre-lit artificial 7.5 ft. Jackson Noble Christmas Tree. I am including a close-up picture of this tree because my wife and I were shocked at how realistic it looked.
It has over 4,000 branch tips and 1,200 LED lights that can either stay warm white or multi-colored. The kids absolutely loved this tree so we decided to bring it home with us!


While we were in our local store we decided to gather a few more supplies to finish everything off. We were so thankful that The Home Depot had all of our decorating needs in one place! From extension cords, LED lights, and yard decorations like this 5.5 ft. Warm White LED Nativity Set, we easily found everything we needed to prepare our home for this Holiday season.
Merry Christmas everyone! To find more holiday inspiration visit DIY Holiday Home Projects & Gifts.
This post was created in partnership with The Home Depot. The author may have received compensation for this article and associated images or video, potentially in the form of products and/or services. All expressed opinions and experiences are the author’s own words.