How To Get Outdoor Entertainment Ready

Last updated May 8, 2025
Matt Buchheit, a high-end Architectural Designer and the content creator behind @thebuchaus, is a new dad who recently moved from New York with his family into their dream home in Charleston, SC. Inspired by the community that social media has allowed him to connect with, he's taking his experience and delivering fun, fresh, beautiful content of renovations and redesigns of the home.
A Note From The Home Depot
Want to know how you can give your outdoor space the touch up it deserves? Follow along as Matthew Buchheit of The Buc Haus walks you through his fun patio makeover.
Table of Contents
How to Get Outdoor Entertainment Ready
Step 1: How to Spruce up Your Garden Bed
Step 2: How to Give Your Outdoor Space the Deep Cleaning it Deserves
Step 3: How to Bring Your Wood Back to Life
Step 4: Let There Be Light
Step 5: Make a Plan
How to Get Outdoor Entertainment Ready

Hello everyone! My name is Matt Buchheit and as a designer, every project for me starts with a plan and a design. Luckily, my local Home Depot is always my one stop shop for the various materials, products and finishes I use for all of my home projects. When seeking that high end design look at budget friendly prices, The Home Depot checks every box.
Living down in Charleston, South Carolina, the importance of quality outdoor living is equally as important as the indoor. We get to utilize our spaces for all four seasons which means I must do a killer job designing for multi-functional, adaptable use. It’s easy to look around your yard and get lost in the same old furniture you’ve had forever and just accept that that green color on your siding gives it “character” but I am here to tell you that you can bring your current outdoor space from zero to hero with the help of the Home Depot.
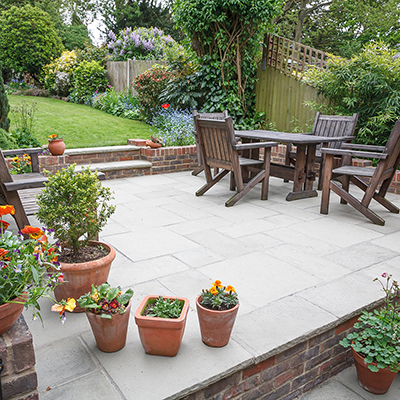
Step 1: How to Spruce up Your Garden Bed
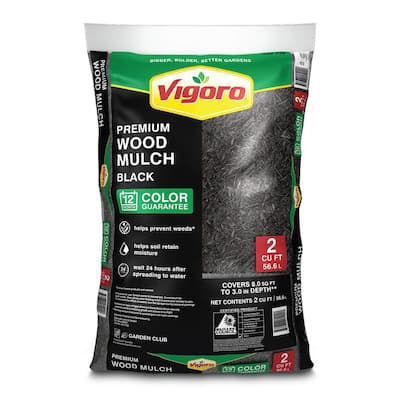
Starting out with this overgrown garden bed, I am going to be pulling weeds, defining the edge, raking, trimming and adding mulch. I start with the removal of the weeds for two reasons. One, I hate weeding and two, it lets me see what I am working with. Once weeding is complete, it’s time to gently rake the existing soil to loosen it while avoiding any plant roots. Make sure you have your HD leaf bags to collect all weeds, excess dirt and trimmings. Now it’s time to prune the bushes as pretty as possible which is not always easy, but we do our best. Once the trimming is done and everything is cleaned up, take your edger and define the edge of the bed. Once you’re happy, further define and deepen the line with a shovel. This will make the mulching process easier. On homedepot.com, I used the square foot calculator to figure out how many bags of Vigoro mulch I was going to need for this area. I highly recommend using this feature because it’s not only easy but it saves me trips back to the store, so it’s a yes for me! Generously spread the mulch all over the bed right up until your lawn line for a finished look. Spray the plants with your Melnor hose nozzle to top it off and you have a beautiful garden, party ready!


Step 2: How to Give Your Outdoor Space the Deep Cleaning it Deserves
Arguably, pressure washing is the most satisfying DIY project you can do at home. Pressure washing exposes dirt you didn’t even know existed and once you start, there is no turning back! In my opinion, you need to pressure wash your house at least once year to keep the siding in good shape and to keep your neighbors from talking about you. Clearly, or should I say, greenly, it is time for me to pressure wash! I am using the RYOBI 2300 PSI 1.2 GPM High Performance Electric Pressure Washer to take care of the mildew and dirt covering the back of my house and my entire deck, railings and all. This is one heavy duty machine that will take care of any amount of dirt with ease but is less harsh than a power washer, making it the better, safer choice for a residential cleaning. For the best results, keep the nozzle bout 6” – 12” away from whatever you’re spraying and start from the top of surface and work your way down. This method helped remove all that gross windowsill pollen and the green marks that the tree frogs leave after hanging out all night and we are just getting started. The amount of dirt build up on my deck was shocking once I started spraying! The before and after’s are almost embarrassing but that’s how I know I did a good job, so I’ll share them with y’all! Words of wisdom for pressure washing… you’ll know when you’re done and even when you’re done, it’s so addicting you might keep going!


Step 3: How to Bring Your Wood Back to Life
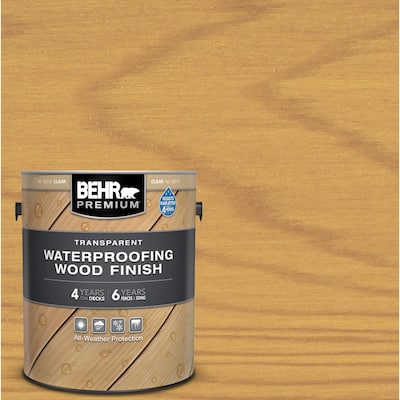
Once the wood is pressure washed, it not only looks like actual wood again but also becomes full of splinters that are just begging to be sanded. So, that is exactly what we are going to do! Wood is great, beautiful, stylish and affordable but with all of that comes maintenance. I will say, if you do a really good job sanding and sealing, the deck will look great for a few years. My few years is definitely up, so here we go. I started with an orbital sander and focused on the top rail. I find small victories is the best way to get through a tedious project like this so one section at a time helps. Once the entire deck is sanded, we are ready to start applying the seal. I will be using BEHR Premium Clear Transparent Waterproofing Exterior Wood Finish. They recommend using a 3/8” nap roller so that is what we will use to generously apply the seal. I went with a clear finish because I am going for a coastal vibe in my backyard so the more natural the wood, the better. But, BEHR also offers a huge variety of stain colors so the options of finishes are endless. Once your first coat of seal is applied, wait two hours and apply one more and watch your deck instantly pop!


Step 4: Let There Be Light
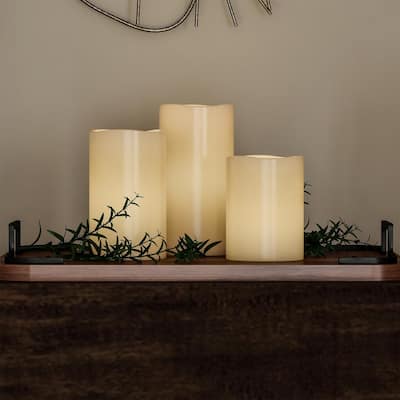
Lighting is one of the important elements when it comes to designing a space…outdoors included! When you’re enjoying outdoor entertainment that continues after the sun goes down, there is nothing that says “home” like string lights. I will be using the Hampton Bay string lights to give the space a defined height and mimic the stars. There are 24 single bulbs on this set so for the size of this space will be just right. I also wanted something that was shatter resistant and weatherproof so I wouldn’t feel obligated to take them down every time it rains. This set does not come with mounting tools so plan before you get started. I will be using am existing hook on my house, my gutter and my pergola as the third anchor to create a triangle. In addition to the lights up above, the Hampton Bay Wood and Glass lantern will stay near the stairs to softly light the walkway. The lantern houses twoLED flameless, battery-operated candles that are controlled by a remote so I can turn these on before I even step out of the door.


Step 5: Make a Plan
Now that we have this place looking brand new, it’s time for the fun stuff! This deck will host friends, stay at home date nights, morning coffee and be an extension of our home to create new memories. With all that said, we’ll need some furniture and décor to make that possible. But, before you start buying furniture and accessories for a space, understand your space restrictions, your must haves and your color palette. Focusing on the functionality and how you are going to live in this space is key to any planning process. Luckily, the Home Depot carries everything I’ll need to make the ultimate entertainment space and I mean everything. Did you know they carry tableware, too? It makes me look like a superhero when I come home with everything from a couch to acrylic drinking glasses all at affordable prices! Now that we have a goal in mind, let’s get started.
Step 6: Come Stay A While
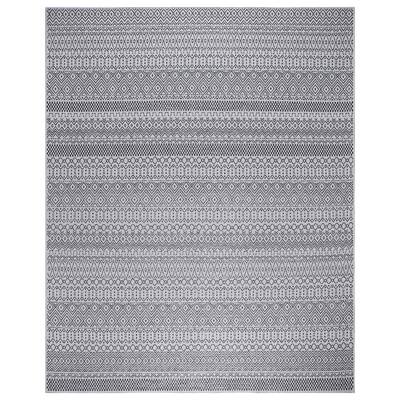
Starting from a functional standpoint, I measured the deck and decided that an 8x10 rug would define the lounge space and leave a clear walking path from the door to the stairs. Price, material and durability where all of the deciding factors when choosing the Home Decorators Collection Rhapsoday Gray rug. This Polypropylene pile rug will stand up to the elements and the foot traffic I am expecting on an exposed deck. When choosing design, look at what is permanent and the main furniture it will be complimenting. In my case, the Trex decking was the permanent backdrop for this rug and the sofa and firepit would be the two main elements it needed to compliment. So with those colors and textures in mind, I found this design to be just right.

A V-shaped sectional was the best option for maximizing seating while still allowing a space for a fit pit. The StyleWell Oakshire 3-Piece Steel Outdoor Patio Sectional Sofa can fit four adults and one child comfortably so for a mid-sized deck, I feel like that is a victory. This sofa is super stylish. It’s when mid century modern meets patio furniture and made this beauty. Since the sofa is the main event of outdoor living, I wanted this piece to pack a big punch at an affordable price and it does just that. It’s light brown wicker and tan cushions are on point with my coastal palette and the low back is the perfect height in relation to the deck railing. Remember, size matters when planning for your own space so keep every measurement in mind. You never want the sofa to overtake the space, you just want it to be the star of the show.
For increased comfort and added texture, I chose two different accent pillows and a throw blanket. Keeping on theme, I’m using two Wendy Frost Blue Woven Solid Throw Pillows as my accent color and two Interwoven Jute Off - White / Tan Latticework Cozy Throw Pillowto add to the light, bright coastal vibe. The throw blanketis lightweight but makes a bold statement by tying in the dark color from the decking into the sofa.

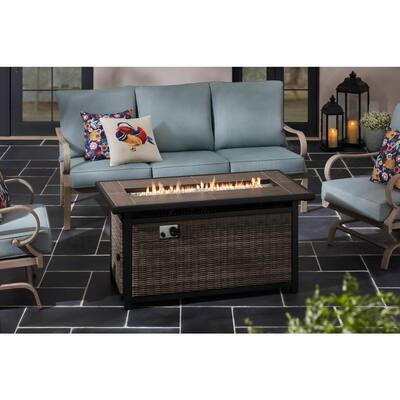
There are a ton of beautiful, affordable firepits on homedepot.com to choose from so make sure you have your lists of musts while browsing. I knew I wanted a fire pit for night that doubled as a table use, long enough to be accessible to all couch occupants and have hidden storage for the propane tank. The Corden 44.9 in. Outdoor Steel Propane Black Gas Fire Pit Table checks all of my must have boxes. As far as function, the hidden tank door is easily accessible, it’s very user friendly to turn on and off and it has the flame area cover to give it the ability to be a table, as well. The firepit comes with large, oval, clear marbles to decorate near the flame but I wanted to make the area pop with my blue accent, so I added Turquoise Fire Pit Glass Rocks. This compliments my throw pillows and my pool and completes the coastal palette.


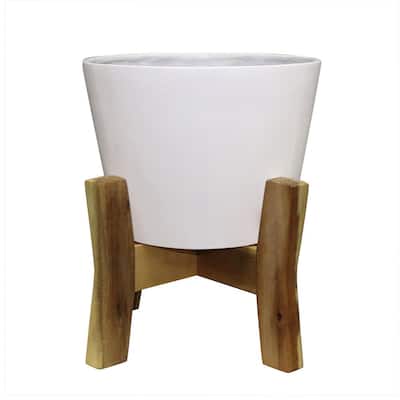
To truly embrace the feeling of home, what better way than a standalone plant? I chose the Southern Patio indoor/outdoor Contemporary, White Resin Planterwith Wood Stand to host a lush, tropical Fiddle Leaf. Be sure to research a plant that can survive and thrive in your climate or find a place that the plant will spend half of the year indoors. The Fiddle Leaf will do great in the South Carolina weather and aesthetically I was looking for something tall to bring some height to the space. Since many of the finishes chosen are elongated, I wanted to add a vertical element to grab your eyes' attention.

This space will be used all year round and with some annual maintenance and a few trips to The Home Depot, it will continuously look great for years to come!
This post was created in partnership with The Home Depot. The author may have received compensation for this article and associated images or video, potentially in the form of products and/or services. All expressed opinions and experiences are the author’s own words.