How to Make a Modern Giving Tree

Last updated August 21, 2024
Matt Buchheit, a high-end Architectural Designer and the content creator behind @thebuchaus, is a new dad who recently moved from New York with his family into their dream home in Charleston, SC. Inspired by the community that social media has allowed him to connect with, he's taking his experience and delivering fun, fresh, beautiful content of renovations and redesigns of the home.
A Note From The Home Depot
Jump into the holiday season with this fun DIY christmas tree project. Follow along as Matthew Buchheit of The Buc Haus walks you through this cool twist on a Holiday classic!
Table of Contents
How to Make a Modern Giving Tree
Step 1
Step 2
Step 3
Step 4
Step 5
How to Make a Modern Giving Tree

Hello everyone! My name is Matt Buchheit and as a designer, I am here to help you modernize your Christmas with a simple DIY project using various materials and products all found at my local Home Depot as part of the Orange Tank competiton.

My family and I recently moved down to Charleston, SC and after a few seasons, I have fully embraced that year-round, outdoor living is really a thing and my style will perpetually be Modern Coastal! Now, don’t get me wrong… there will always be a beautiful, lush green Christmas tree in my home but the modernist in me needed something fresh. This fun DIY can be built together as a family for a lifelong keepsake and may even become a part of a new tradition. The Giving Tree can be used to collect gifts to donate, as a beautiful addition to your outdoor decorations, to display gifts in your home or the tree itself would even make a wonderful gift. I assure you; this tree will be the wow factor in your home this Holiday season and its easily collapsible design will eliminate any stress when it comes to storage. Merry Christmas and Happy DIY!

Step 1
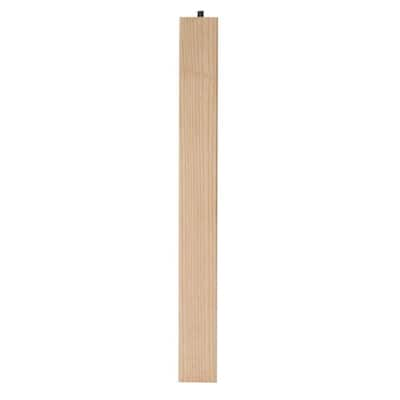
Taking my round Pine Edge board, I took my Top Side and drilled a ¼” hole in the center. Then I flipped the base and used my Forstner bit at the underside to create a secondary void around the cored hole. This allowed for my Tee Nut to comfortably sit in and attach to the hanger bolt that came preinstalled in the wood Parson leg.


Step 2
Next, on the opposing side of the Parson Leg I marked an “X” to properly determine the center. I predrilled a ¼” hole to allow for my added hanger bolt to fit inside the Parson Leg. Then I fastened the Parson Leg to the base using the preinstalled hanger bolt and tee nuts.
*Note: To install the new hanger bolt you may need to use a nut and hand tighten with a wrench to sink the hanger bolt into the Parson Leg.
Now the base of the tree is complete.


Step 3
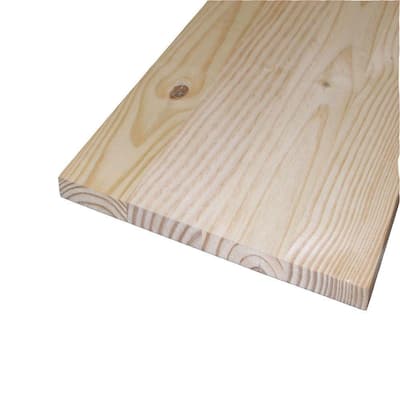
Taking my 24”x48” Wood Panel Board, I then cut out a 24”x24” square to act as my first “platform” of the tree. I cut all additional platforms at this time; one at 18”x18” and another at 12”x12”. I used a table saw but you could also use a circular saw with a straightedge.


Step 4
Taking my remaining 24”x48” wood panels, I cut strips of 12”x48”. These pieces ultimately acted as the vertical “walls” of my tree. I took my strips of wood and laid them diagonally against my platform to determine the overall length of my “wall”.


Step 5
Using my miter saw, I cut the pieces to the appropriate length. I drew an “X” from corner to corner to find the center. Then using a straight edge, I marked my center horizontally from left to right. Next, I measured the thickness of my board offsetting half the dimension on either side. Using my miter saw, jigsaw and chisel, I removed the center void of my wall. Repeat for each level of the tree.


Step 6
This created a solid connection that crisscrossed and interlocked at the center and allowed the platforms to become stable when stacking.

Step 7
Next, I secured the interlocked “walls” to our platform. Again, I drew an “X” from corner to corner as a guide for my walls. Then I measured 3” off each corner of my platform along the newly drawn “X” and using a ¼” Forstner bit I drilled holes halfway deep through the wood platform to allow for my wood dowels to securely sit in.


Step 8
Taking the base of my wall, I laid it on its side diagonally against my platform along my drawn “X”. I positioned and marked the outside of each dowel on the bottom of the wall to find the exact location of where to core my holes. Core the holes with a ¼” Forstner bit and secure the walls to the platform.


I repeated for each level of the tree and stacked each of the platforms. Then I marked the location of the platform above on each wall. I disassembled and using a straightedge, I drew a line to the bottom corner. This created an acute angle of +/- 60 degrees. I created this cut using a circular saw, but you can use a table saw or miter saw to give you the final profile for your tree.


We are just about finished! I then reassembled each of the pieces. Feel free to sand, stain or paint as you wish. I am leaving our tree au natural this year and may spruce it up in the years to come. Lastly, I added felt pads to the base of the tree to protect the floors in my home and voila. I now have a functional and beautiful tree that can hold gifts and can be decorated any way we decide.

This post was created in partnership with The Home Depot. The author may have received compensation for this article and associated images or video, potentially in the form of products and/or services. All expressed opinions and experiences are the author’s own words.