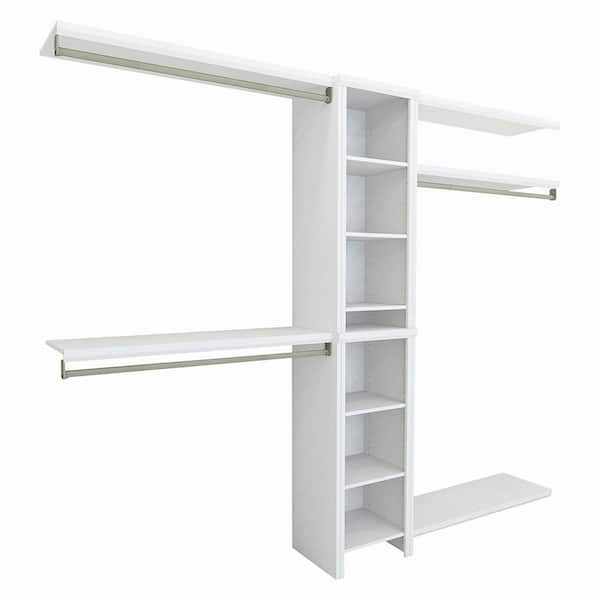
Decide for Yourself - I usually write a long review for items costing around $500 or more (I bou...Decide for Yourself -
I usually write a long review for items costing around $500 or more (I bought 2 of these units). Here's another -
I'm not sure if 2 or 3 stars is appropriate so I'm going with 2 because of how cheaply the finish is applied to all the wood of this entire product. Anyone would expect higher quality for the price paid for this mass produced product.
The shelves are 5/8" thick particleboard (NOT MDF, explained here https://homeguides.sfgate.com/difference-between-particle-board-medium-density-fiberboard-99189.html) but the veneer woodgrain finish is a cheap plastic-like super-thin paper that is poorly
attached to the shelf, very noticeable even on the front finished edges (which have the same poorly applied veneer). Out of the box, there were larger chips in the unfinished ends of some shelves but luckily I needed to shorten most shelves 2 inches so they were cut off.
The narrow trim pieces you dowel + glue or screw to the front bottom edge of the shelves and face of the tower are MDF with the same super thin smooth paper finish glued to them. If you bump them with anything even minimally sharp, it will cause a rip which is very noticeable on a dark finish.
The metal brackets, installation hardware, and instructions are good. However, be sure to use a rubber mallet to install the top entry cam locks, bottom nuts, and dowels, NOT a regular hammer.
If you are extremely careful with handling these wood pieces and do the touch-ups I did as explained below, the finished product can look very nice - but I suspect it will look pretty bad over time if you are not careful to prevent bumping it with objects having sharper edges, or put too much weight on the minimally supported shelves.
Installation Recommendations:
1. Be sure to have a dark Mohawk touch-up pen (for chocolate color units) for cleaning up all the
white marks along finished edge of every (yes, EVERY) wood piece where the super thin paper
veneer did not bind well to the "finished" edges of the wood, or to fix a small nick in a shelf or piece
of MDF.
2. If you cut the baseboard so the tower sits flush to the wall, be sure to mount the
2 hang bar brackets as per the instructions to provide a full 12" from the center
of the hang rod to the wall behind the tower. When not cutting the baseboard,
consider adding a 1 1/2" angle bracket at the bottom of each side of the tower fastening
it to the baseboard for stability. Be sure to level the assembled tower front to back and side-to-side
before fastening.
3. When cutting shelves, wrap the shelf (tightly) on both sides along the cut line with blue painter tape. Use a radial arm saw (best since the board remains stable while cutting) or table saw to cut the shelves. You should get a cleaner cut on the top side, but the bottom side of the shelf will still have chips and some flaking on the super thin paper veneer, even with a super-sharp blade. If you use the supplied 11" shelf brackets, and you can see the flaking on the exposed 1" ends not sitting on the bracket - touch it up with a super-thin coat of black latex paint (buy a Behr black sample paint) before installing the shelf (Mohawk pen won't work on these larger uneven gafs). Unfinished (ends) of particleboard swell when too much water is absorbed so keep paint and other coloring liquids to a minimum.
4. Walls are typically never a perfect 90 degree angle - some angles can be significantly wider.
Measure the shelf at the back and the front edges then cut the shelf on an angle to avoid unsightly gaps on the wider edge. Always cut on the wall side since the tower side should be (mostly) squared to the back wall it is mounted to and the cut will be less noticeable. Cut the MDF trim piece after the shelf is properly fitted by installing dowels in the holes on each end of the shelf, insert the trim onto the dowels (unglued) and mark the excess overhang with a pencil to get the correct cut-off point (the trim is easily removed using only 2 dowels). Install the trim with all the dowels and glue after cutting.
5. According to ClosetMaid's replies to HD consumer questions about how much weight one of the 4 foot shelves can hold, they have indicated the limit as 30 lbs (in 2019), 25 lbs (2018), and 10 pounds on 12/12/2016 (total weight, likely to prevent sagging), no clear consistent answer. When asked, ClosetMaid would not disclose the particleboard type (LD low denity, MD medium density, HD high density) which effects the shelf strength. If 10 pounds is correct, that's quite a low limit considering 2 pair of men's dress shoes in the original cardboard box weighs almost 4 lbs.
Part of the limit is from using the hollow wall anchors supplied, but the main reason is the shelf being made from particleboard and having shorter 11" brackets to support it, particularly along the rear edge. To increase the weight limit and prevent long-term sagging, I used 1x4 (ripped in half) along the entire rear edge of the shelf, turned the 11" center bracket 90 degrees, and fastened it to the 1x4 with a steel 1 1/2" angle bracket. The center support greatly increases the weight capacity as does the full length rear shelf support (see PDF link below). The ripped 1x4 under the rear edge is nailed to studs, and I used a 1x6 on the end wall (nailed to the stud in the corners + glued on the back with construction glue) for superior strength (see photos), increasing the weight capacity above 50 lbs and eliminating the possibility of sagging for typical shelf weight or more.
This official CPA Technical Bulletin PDF contains simple charts detailing the weight limit based on the (5/8" thick particleboard) shelf width and (single vs. multiple ) bracket support http://web.arauco-na.com/_file/particleboard-and-mdf-for-shelving.pdf The charts makes it apparent why a low weight limit on the shelf may be the better long term limit for the out-of-the-box installation of a 4 foot shelf. Review the chart footnotes too.
6. Before installing the shelves in the tower, consider darkening the shelf peg holes using Minwax Jacobean stain on a q-tip for a nicer finished appearance (chocolate color units). Dip the q-tip in the stain, then into the hole, and wipe away the excess stain with a clean rag or paper towel. This is easiest to do prior to assembly of the tower.
7. When installing on carpet, consider removing the carpet, padding, and tack strip under the tower and replacing it with a piece of hardwood (poplar, oak) so you don't need to remove and reinstall much of the closet system to replace the carpet. That would avoid the aggravation of trying to line up wall screw holes and level everything when reinstalling on potentially thicker or thinner carpeting.
ClosetMaid could make these improvements to make this unit a super product:
1. Use a better grade of particleboard that does not chip too easily when cut or bumped
2. Use a better formica-like grade shelf finish that cuts cleanly and is not so easy to damage
3. Use stained hardwood for trim, not MDF
Hope these details help.
by silverago