Build a Kids Combination Locker

Last updated September 7, 2023
Presented by Serena Appiah of Thrift Diving.
Follow along to build a simple combination locker that can hold anything your little one's heart wants. From their favorite toys to crafting supplies, this locker is fun and handy!
Don't have a kit? Jump to Step 12 to get started on your home version of the DIY locker from cardboard and paint.
Difficulty:
Beginner
Duration:
Under 2 hours
Table of Contents
Set Up Your Workspace
Apply the Stickers
Align & Hammer In
Attach the Latch Disk
Attach the Wooden Hinge
Nail Together
Set Up Your Workspace

Lay all your pieces down to make sure everything is accounted for.
You should have:
- 5 screws
- 14 nails
- 1 door
- 1 black peg
- 1 orange dowel
- 1 dial knob
- 1 cylinder
- 1 latch disk
- 1 wooden hinge
- 1 narrow side
- 1 wide side
- 1 back
- 1 top & 1 bottom
- 1 sticker sheet
You also need a hammer, some wood glue, a piece of fine-grit sandpaper and a #2 Phillips screwdriver (the star-shaped one). Don’t forget to put on your safety glasses.
Tip: Before you begin to build, start with sanding each wood piece to remove any rough edges. Remember to sand in the direction of the wood grain.
Glue and nail the pieces together. Allow glue to completely dry.
Apply the Stickers

Lay the door and dial knob down. Carefully match the holes and apply the stickers.
Align & Hammer In

Stand the cylinder with the bigger hole on top. Place the door and dial knob on top with the peg holes matching. Carefully hammer the black peg into the holes.
Attach the Latch Disk
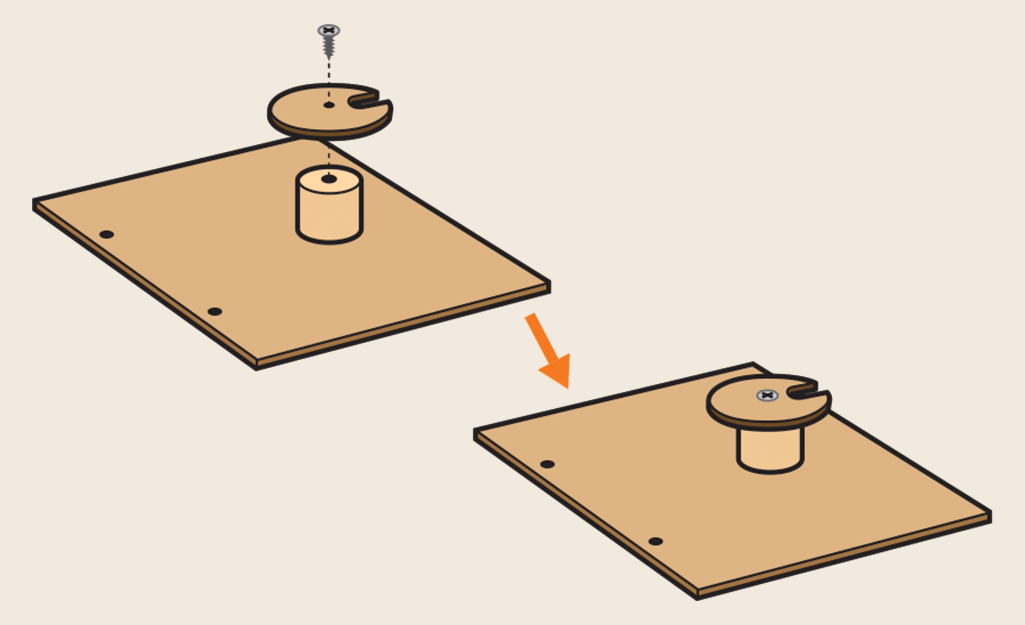
Turn it over. Using a #2 Phillips Screwdriver, attach the latch disk to the cylinder with a screw. Choose a number and adjust and match the cutout in the latch disk to the number on the dial knob.
Attach the Wooden Hinge

Turn it over. Attach the wooden hinge to the door with 2 screws to complete the door.
Nail Together

Stand the narrow side piece on the long edge. Place a side edge of the back piece on top. Make sure edges are even. Nail them together with 3 nails.
Hammer in the Dowel

Lay the wide side piece flat with the dowel hole on top. Carefully, hammer the orange dowel into the hole. Stand the wide side piece on the long edge with the orange dowel close to the bottom.
Nail In
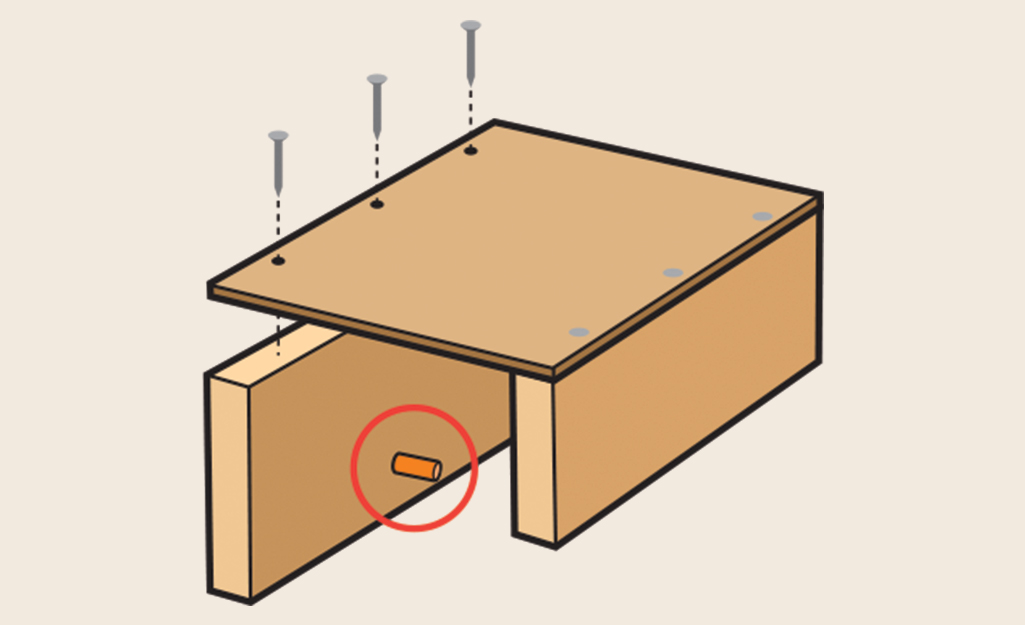
Place the other side edge of the back piece on top. Make sure the orange dowel is on the inside. Make sure edges are even. Nail them together with 3 nails.
Nail In the Top Piece
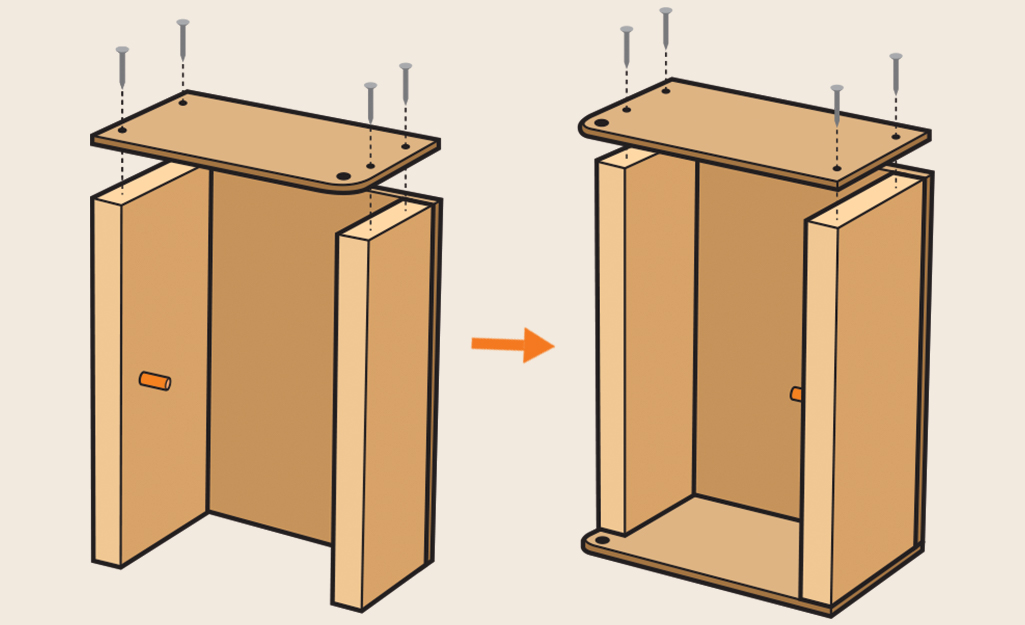
Stand the project up. Place the top piece on top. Make sure edges are even and there is a space for the hinge under the rounded corner. Nail them together with 4 nails. Turn the project over and repeat to attach the bottom piece to form a locker.
Attach the Door
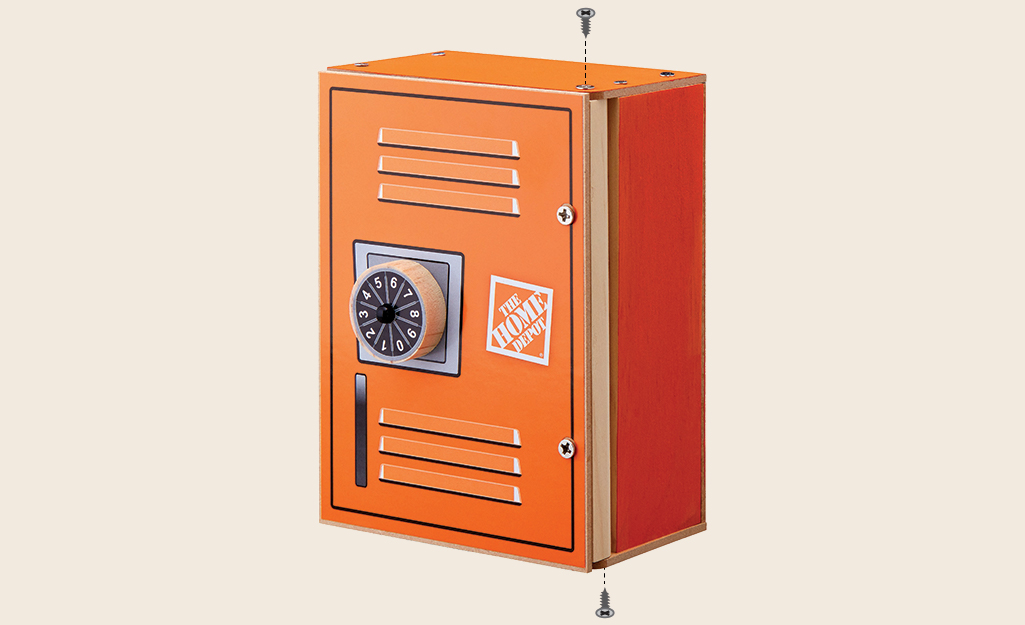
Slide the hinge end of the door into the space between the rounded corners of the top and bottom pieces. Make sure the screw holes are matching. Attach the door with 2 screws. Adjust the screws so that the door is not too loose or tight. You can open the locker by matching your number to the arrow on the lock pad.
Tip: If you are painting the project, paint only the outside of the locker. Don’t paint the door or the inside of the locker. Allow the paint to dry completely.
Enjoy Your New Game!
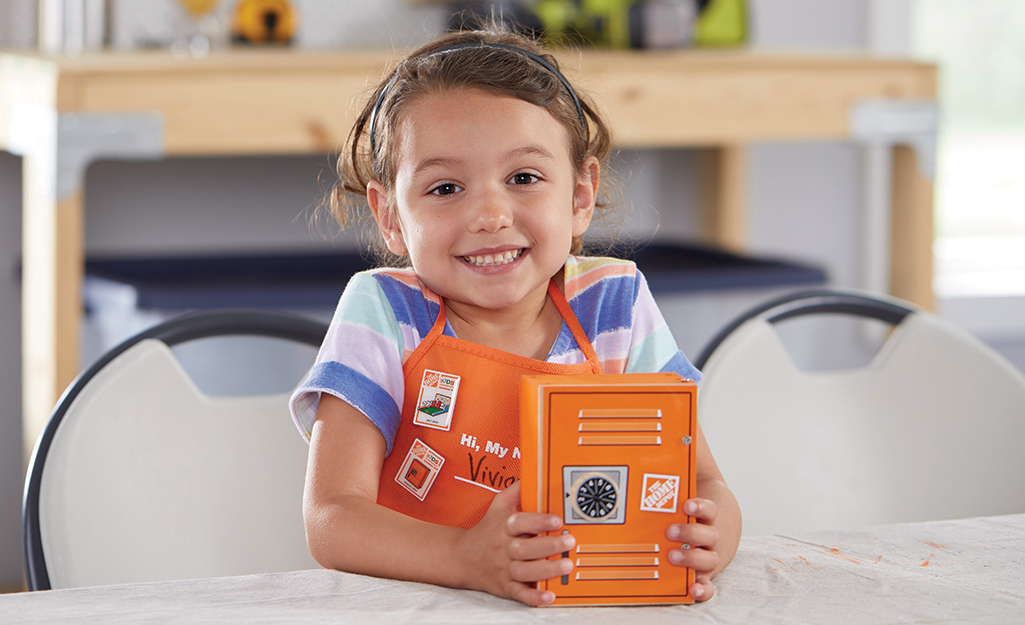
Congrats, you've successfully built your combination locker! Store anything you want inside!
Make a Home Version
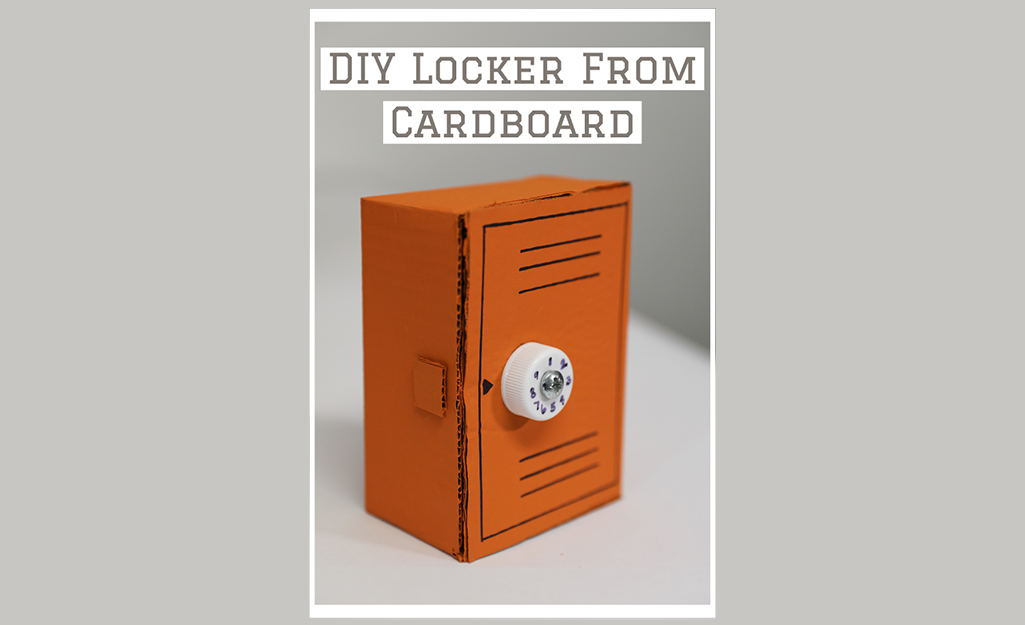
When it’s time for summer to end and for the kids to get ready for a new school year, what’s better than building their own locker! With just materials around the house, you can create this fun project with kids as young as 5-years-old, or even older, for an hour of creativity!
Tools & Materials Needed

Make sure you have these on hand:
- Cardboard
- Scissors or utility knife
- Hot Glue Gun or tape
- Pencils
- Machine screw or another blunt end screw or bolt
- Screwdriver
- Plastic cap from half gallon container of milk
- Pencil
- Paint (optional)
- Paint brush
- Marker
Cut Pieces of Cardboard
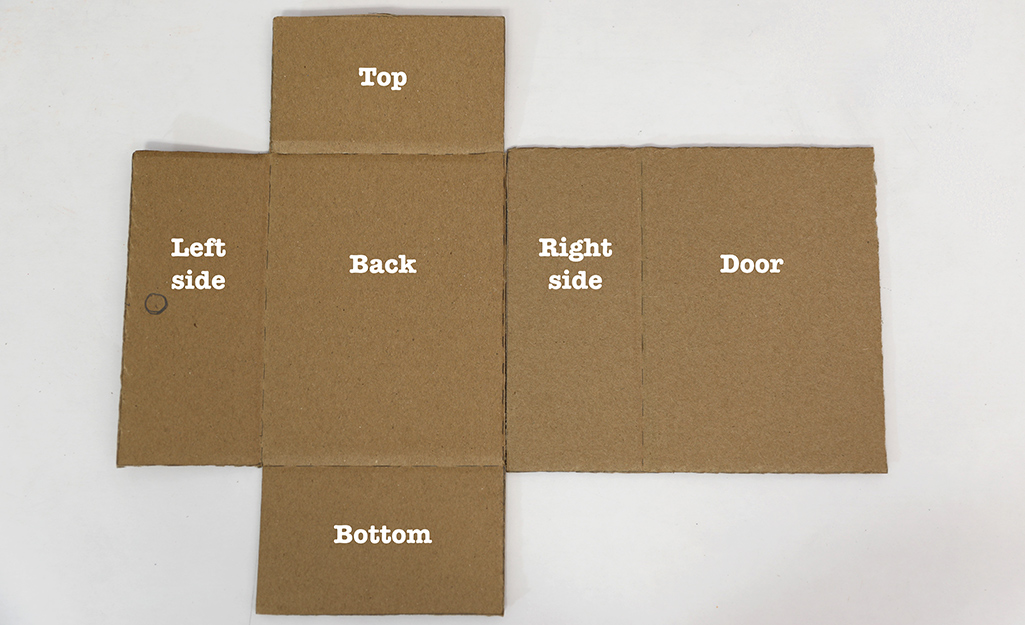
Cardboard is perfect for creating crafts where wood isn’t readily available. For this combination locker project, you’ll need a piece of cardboard that can easily create this shape (see above). It doesn’t have to be a particular size, but you want to make sure that the top and bottom are equal in size, and that the left and right side are equal in size. The door must be the same size as the back.
Score the Fold Lines

In order to create an origami-like locker, use your fingernail to gently score along the fold lines without tearing the paper of the cardboard. It’s helpful to draw dotted lines where you plan to score.
Fold the Cardboard and Secure
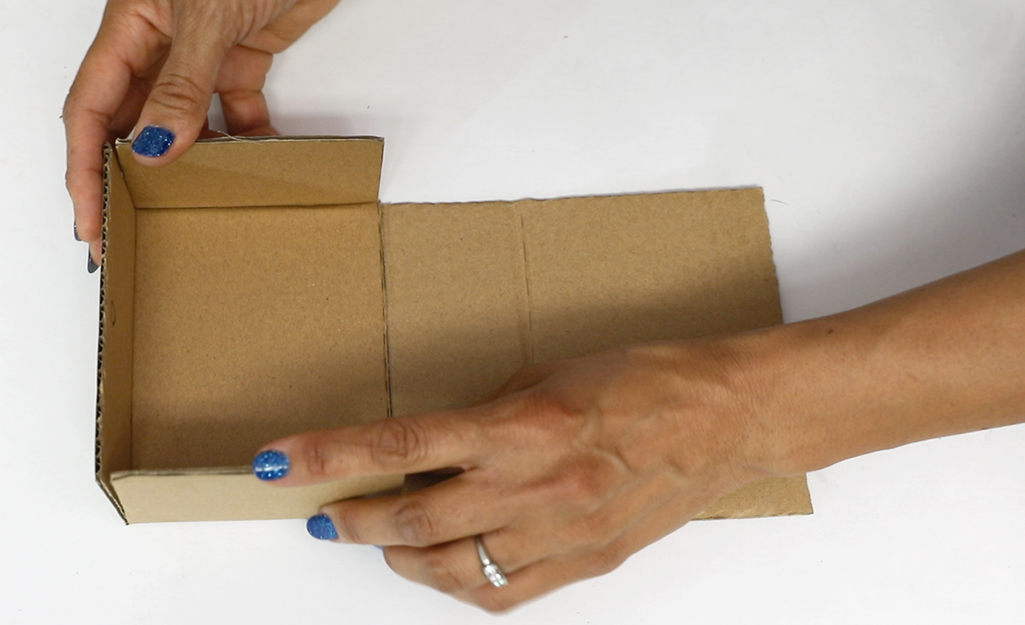
Fold the cardboard into the shape of the locker and use tape or hot glue to secure the box. Tape is safer and easier to use and if you use a chalk-based paint, it’s possible to paint over tape to disguise it.
Create Holes for the Peg and Dial Knob

Your locker will need something to turn in order to open the locker, and you’ll also need something for it to latch onto to lock it. Place one hole on the left-hand side of the locker, about 1/2 from the edge. Place the other one on the door, about 2 inches from the left edge, centered along the edge.
Poke a Hole Through the Plastic Cap
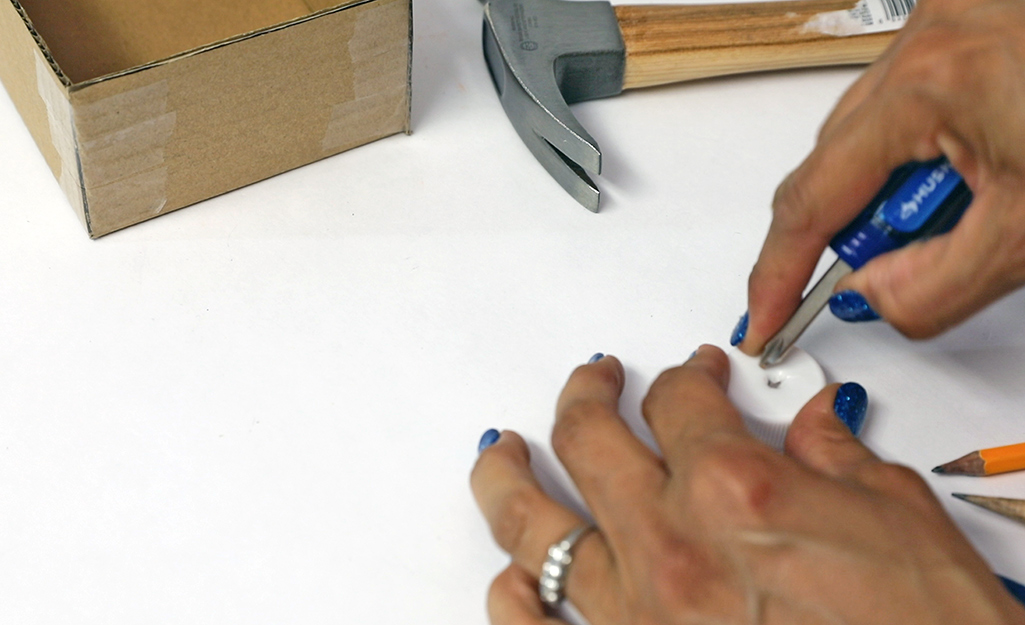
Mark the center of the plastic cap and use a screwdriver or something sharp to poke a hole through. Use a pencil to widen the hole and then slip in a screw to act as a peg.
Insert the machine screw through the hole in the door. Use a black marker to add numbers to the dial knob.
Create a Cardboard Latch Disk
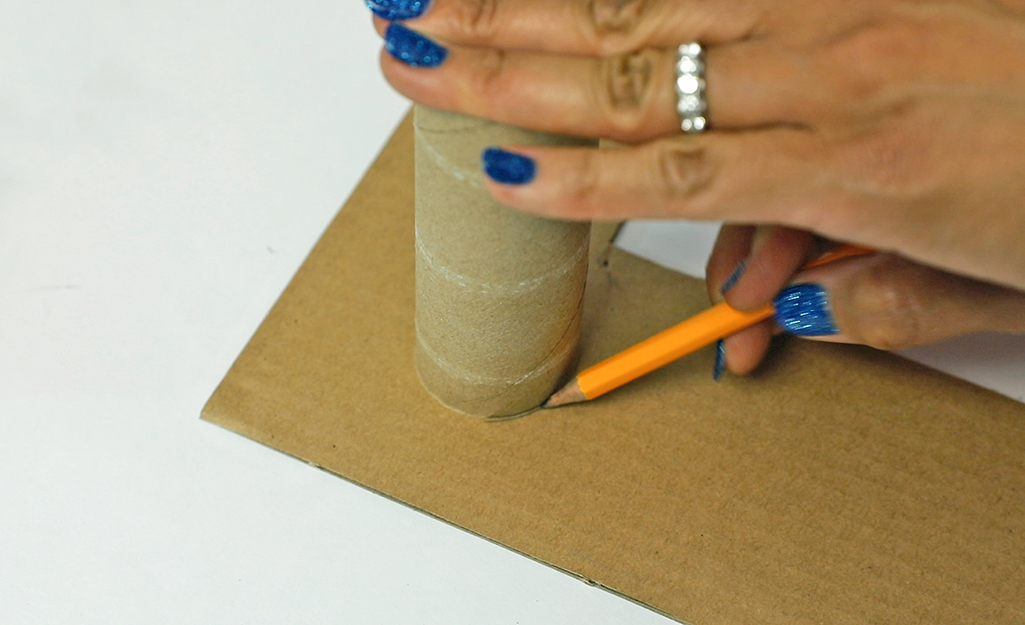
Use a cardboard insert from a toilet paper roll or another round object about 2 inches in diameter to create the latch disk. Be sure to trace and cut a small section for the cutout.
Use a pencil or screwdriver to poke a hole in the center of the latch disk. Then hot glue the latch disk to the end of the machine screw. You may also add hot glue to the machine screw to help secure it, yet when the glue dries, it will still allow for the dial to turn without falling loose.
Be sure to select a number from the dial knob for your “combination number” and match up with number to the cutout in the latch disk.
Add a Pencil for the Locking Peg
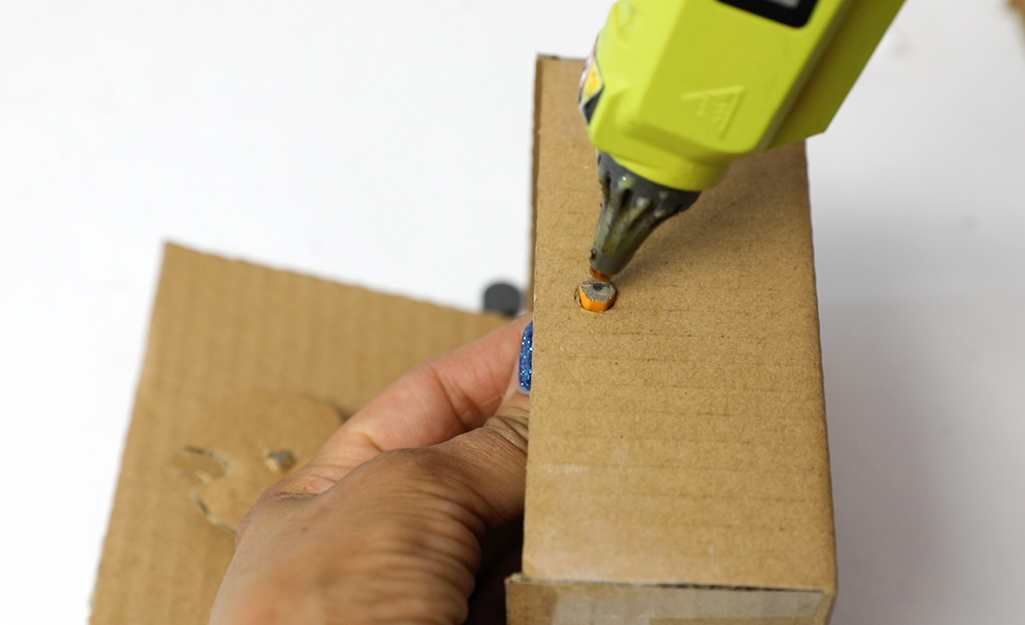
Using a utility knife, cut a small 1-inch piece of pencil to insert into the hole that you previously created in the side of the locker. Add hot glue to secure it, and then place a small square of cardboard over it to disguise it.
Add Magnets
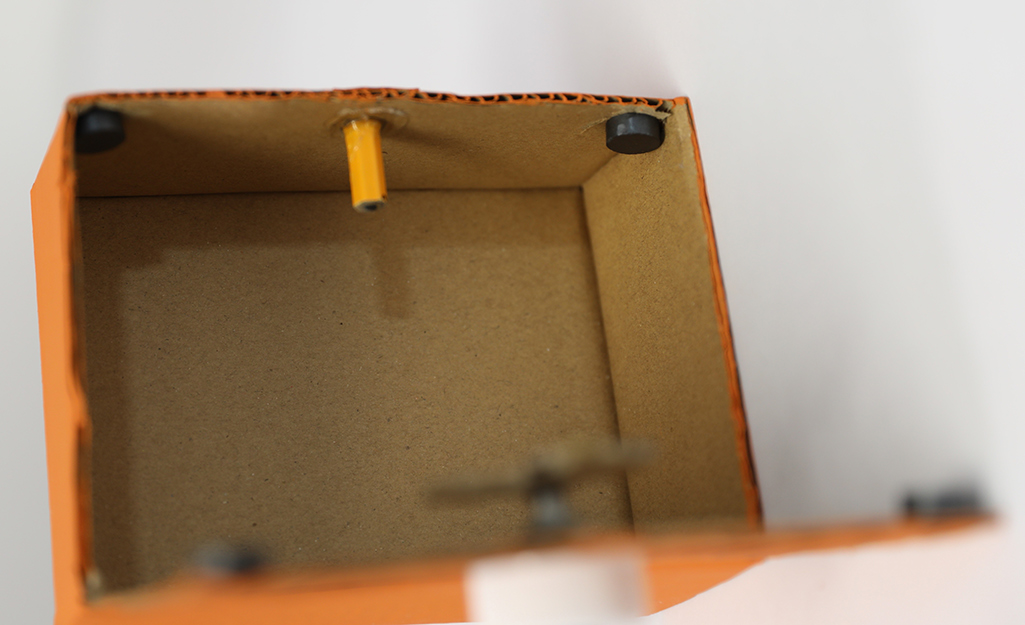
For extra closure of the cardboard door, hot glue a small magnet at the top and bottom of the inside of the locker and add corresponding magnets to the door.
Paint Your Locker
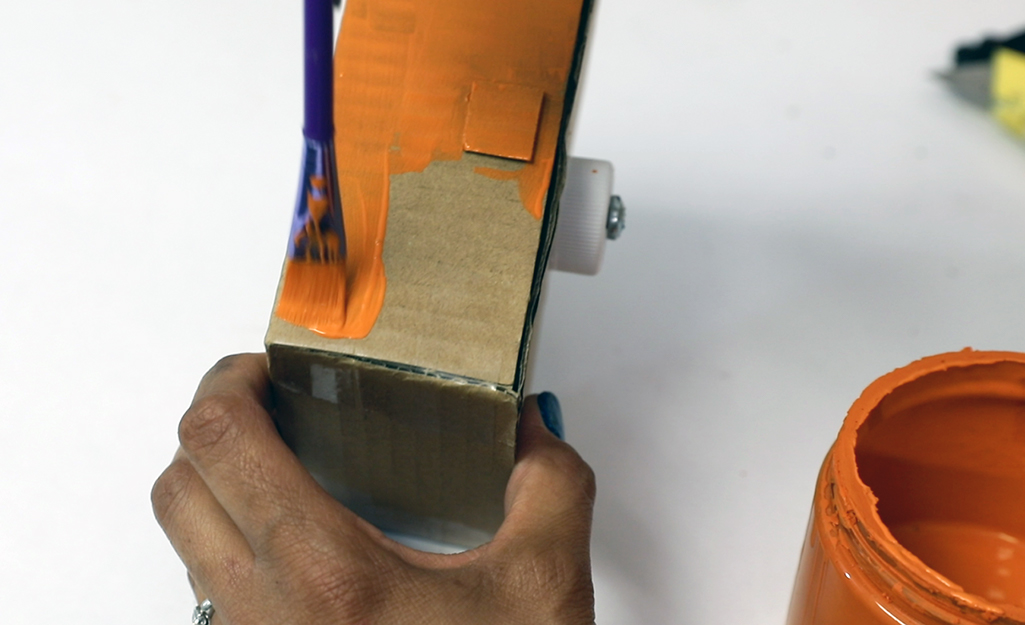
Chalk-based paints work well over tape, as previously mentioned. Add two to three coats, allowing the paint to dry in between. It should cover the tape very well.
Complete!

For more project ideas for kids be sure to visit homedepot.com for all your project needs!
With our kit and a few basic tools, you and your child can build this combination locker together. Or get creative and gather some household supplies for a real DIY build. Then, store what you need in either version of the locker.


