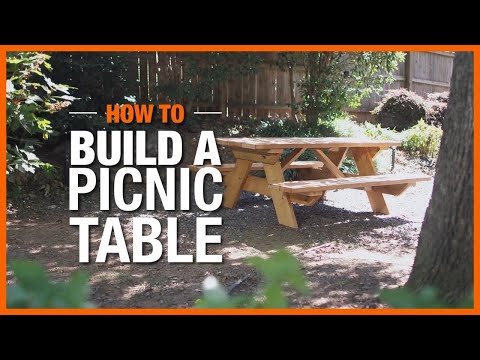
How to Build a Picnic Table
Published November 8, 2023
Learn how to build a picnic table to enjoy outdoor meals with family and friends. With the right lumber and basic tools, you can transform your backyard or patio into a casual dining space with this DIY picnic table. Read this guide for instructions on how to build a picnic table that seats six and has attached benches. As you learn how to build a picnic table, remember to pay close attention to details like measurements.
Difficulty:
Intermediate
Duration:
Over 1 day
Table of Contents
Gather Tools & Materials
Measure & Cut Table Pieces
Build Picnic Tabletop
Trim & Clamp Legs
Attach Table Legs
Attach Bench Supports
Gather Tools & Materials

Building this picnic table starts with selecting the right lumber. Choose a wood that can stand up to the outdoor elements in your area. Hardwood or pressure-treated boards are a popular choice. Pressure-treated lumber is easy to stain, durable and budget-friendly. You can also use cedar or cypress boards, but these can require a higher upfront investment. Most picnic table sizes range as follows:
- 28 to 34 inches high
- 27 to 30 inches wide
- 72 inches long
Allow about a foot of room for each person at the table. For example, a 10-foot picnic table would seat 10 people.
Below is the lumber you’ll need to build a picnic table that’s 6 feet long, 30 1/4 inches tall, and 30 1/2 inches wide. If you’d like for your picnic table dimensions to be smaller or larger, adjust your lumber sizes accordingly.
Materials:
- Six 2 x 8 x 8 Boards
- Six 2 x 6 x 8 Boards
- Three 2 x 4 x 8 Boards
- 1/4-inch-thick Wood Spacers
- Sixteen 1/2-Inch x 3 1/2-Inch Galvanized Carriage Bolts with Washers & Nuts
- 1 Pound 2 1/2-Inch Self-Tapping, Self-Countersinking Exterior Screws
- 1 Pound 3 1/2-Inch Self-Tapping, Self-Countersinking Exterior Screws
- Wood Glue
- Exterior Stain
Tools:
- Screw Bits for the Screw Sizes (listed above)
- Power Drill With 1/2-Inch Drill Bit & 1/8-Inch Bit
- Countersink Drill Bit
- Circular Saw
- Miter Saw
- Speed Square
- Framing or Carpenter Square
- 3/4-Inch Wrench
- Clamps
- Tape Measure
- Orbital Sander
- Respirator Mask
- Level
- Impact Driver (Optional)
- Hacksaw Or Angle Grinder with Cutoff Wheel (Optional)
Measure & Cut Table Pieces

Use the list below to measure and cut the wood pieces you’ll need for this 6-foot DIY picnic table. Make sure to select the straightest pieces of lumber you can find.
Cut list:
- 4 Tabletop Slats: 2-inch x 8-inch x 72 inches
- 4 Bench Slats: 2-inch x 6-inch x 68 inches
- 4 Table Legs: 2-inch x 8-inch x 32-3/4 inches (see detailed instructions below)
- 2 Bench Supports: 2-inch x 6-inch x 61 inches
- 3 Tabletop Supports: 2-inch x 4-inch x 28 3/4 inches
- 2 Upper Leg Braces: 2-inch x 6-inch x 30 3/4 inches
- 2 Angle Braces: 2-inch x 4-inch x 24 inches
- 6 Bench Cleats:
2-inch x 4-inch x 10 inches
The finished lengths of the legs should be 32-3/4 inches along each edge. This may seem difficult, but there's an easy method:
- Cut four 2 x 8 boards to 37 inches.
- Draw a 30-degree line at each end of the legs. These lines should be parallel to each other.
- Before cutting, check to see that each outer edge will be 32-3/4 inches. If not, check the lines to make sure they are going in the right direction.
- Cut each leg at the 30-degree marks with a miter saw or circular saw.
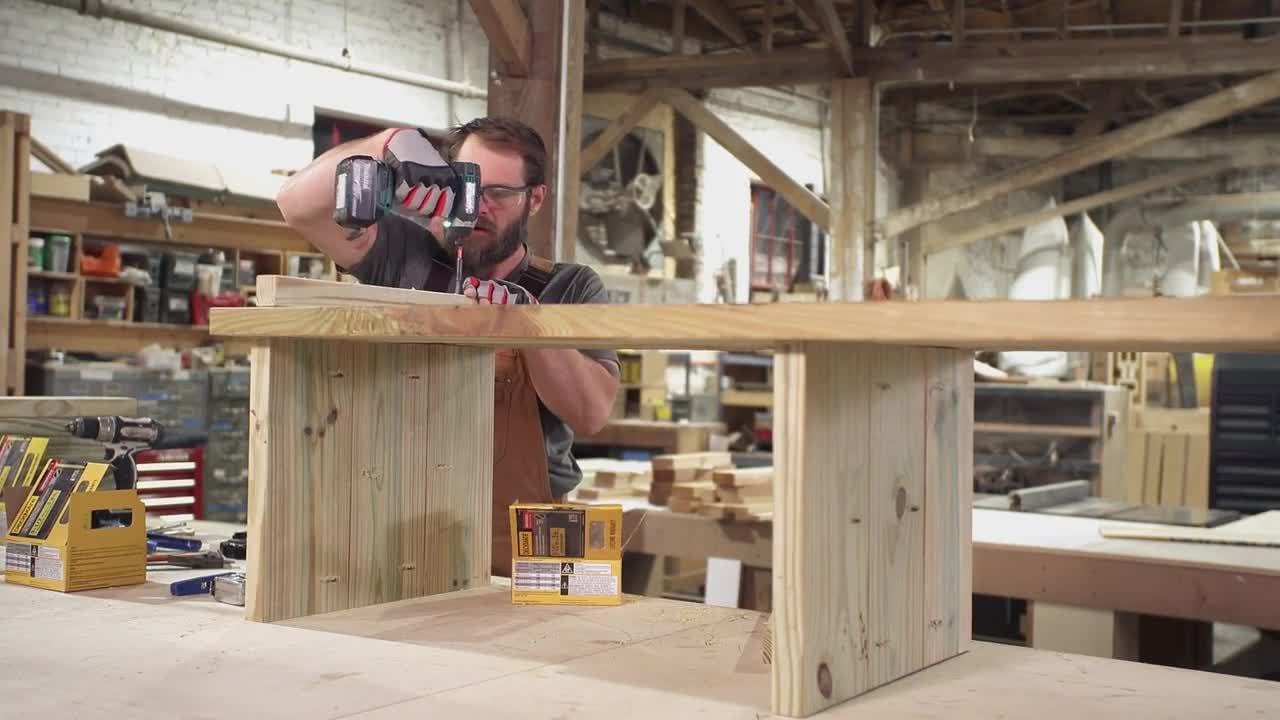
Build Picnic Tabletop

The first step in this picnic table plan is building the tabletop.
- Place wood spacers between the tabletop slats. Clamp the slats together.
- Place the table supports on the slats. Place the end table supports 7 inches from the end of the table. Place the middle table support flat and centered.
- Using a drill, screw the two outermost slats to one another. (You may need to move the support flat later in the construction.)
- Screw both end table supports to the slats with 3 1/2-inch screws.
- Attach the center table support to the slats with 2-1/2-inch screws.
Trim & Clamp Legs

Before you attach each leg, trim its corners. This will make them less likely to trip someone. Make sure to use a square to measure each cut accurately.
- Mark a point 1 1/2 inches from the outside edge of the bottom of each leg. Cut off the corner.
- Butt a combination square against the end of a leg.
- Draw a line from the point to the outside edge.
- Cut off the corner.
- Repeat for each leg.
Next, you will clamp the legs to the underside of the table. First, carefully flip the picnic tabletop upside-down. This may be a two-person job, so get help if you need it. Clamp the legs to the outside faces of the upper support brace or end table supports. Butt together the inside edges of the legs at the gap between the center slats. Make sure they are flush.
Attach Table Legs

Attach each leg using a 3 1/2-inch carriage bolt.
- Drill a hole for a washer and nut.
- Drill clearance holes the same diameter as the bolt shanks.
- Slide each bolt into its hole. Add a washer and tighten the nut.
- If needed, trim the protruding end of the bolt. You can use a hacksaw or an angle grinder with a cutoff wheel.
Attach Bench Supports

Bench supports strengthen your seating area and prevent sagging. This is also a safety feature to keep everyone secure on the bench. Measure, cut and attach the picnic bench supports as follows:
- Lay one arm of a square on the tabletop. Use that to mark the position of the bench supports on the legs.
- Measure up 13 1/2 inches on the other arm. Hold a straightedge across the square. Mark the inside face of the legs.
- Miter-cut both ends of the bench supports to 60-degree angles.
- Drill holes on the outside face of each leg to clamp the bench supports to the legs.
- Clamp the bench supports to the inside of the legs. Align them with the mark on each leg and center them across the table’s width.
- Drill four holes on the outside face of each leg. Fasten the bench supports with 3 1/2-inch carriage bolts.
- Use a hacksaw or angle grinder with a cutoff wheel to trim the protruding end of the bolt, if necessary.
Add Angle Braces

Adding braces to a picnic table will make sure all surfaces are well supported. They also keep your picnic table from tipping or collapsing. Here’s how you cut and insert the table support braces:
- Mark parallel 45-degree angles on each end of the 2 x 4 braces.
- Use the circular saw to cut the angles.
- To fit the center table support, lay out a right-angled notch at one end of each brace.
- Measure 2-1/4 inches on the edge of the brace that has just been cut and marked.
- Drill pilot holes on each brace and then drive in the screws.
- Test-fit the braces. Adjust the notch using sandpaper or chisel it until it fits.
- Drill pilot holes at each end.
- Drive in 2 1/2-inch screws.
Build and Attach Benches

This picnic table plan calls for attached benches. Here’s how to make them:
- Separate each pair of bench slats with 1/4-inch spacers. Clamp each assembly together.
- Cut the two bench cleats to size. Make a 60-degree bevel at each end.
- Place the bench cleats at the center of the bench slats.
- Drill holes on the bench cleats.
- Drive in 2 1/2-inch screws.
- Screw the bench supports to the benches.
Sand Picnic Table

To keep your family free of splinters, it’s important to sand the rough wood and edges well. Sanding and sealing the wood assures your picnic table will last for years.
- Use a hand or belt sander to smooth all rough wood and edges. Take extra care to smooth the edges of the tabletop and benches, where legs and hands will touch.
- Wipe off the sawdust before applying stain or finish.
Staining & Other Finishing Options

Here are some staining tips and other style options for a DIY wood picnic table.
Pressure-treated wood often accepts stain better after it weathers. Wait until the yellow-green wood turns gray, then apply your stain. If you didn’t use pressure-treated wood, stain your DIY picnic table right after it’s finished. Protect it with a weather-resistant polyurethane. Make sure you fully seal all surfaces. Cover the sides, the top and underneath. When staining pine, use a conditioner first to prevent blotching.
Curving the edges of the bench and table gives a finished look to your project. Choose a gentle curve or a rounded 45-degree angle. Here’s how to create a curved edge on top of the table:
- Use a can, a piece of 3- or 4-inch pipe or other round object as a template for the size corner you want. Trace the line on the table and benches with a pencil.
- Repeat these instructions to draw a curved edge on the other end of the table.
- Use a jigsaw to cut the curved edges of the tabletop.
- Repeat above to make a similar curve at each end of each bench.
- Alternatively, a 45-degree line can be made on each corner and cut with a circular saw.
If you’d rather the benches weren’t connected, it’s best not to modify this picnic table plan. The attached benches provide center support for the table. Look for specific instructions for a picnic table with detached benches plan.
Using just a few woodworking skills, you’ve learned how to build a picnic table. This DIY picnic table is the perfect setting for outdoor meals. All you need is the right wood and tools. A standard picnic table is an intermediate woodworking project you can complete in a day. Choose pressure-treated wood that can hold up to the outdoor elements.
Ready to build your new picnic table? From lumber to deck screws, The Home Depot delivers online orders when and where you need them. Find the saw, deck screws or the right color stain you need to get started today.