How to Build an Accessible Bathroom

Last updated May 6, 2025
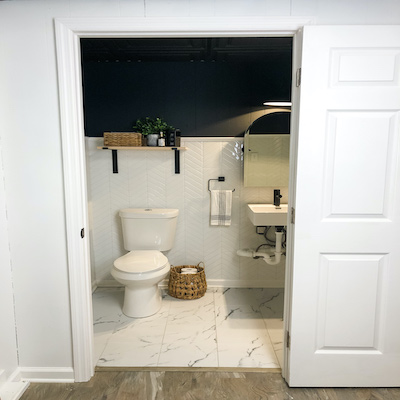
An accessible bathroom will provide comfort and independence to people in your home who have physical limitations. Planning and building with accessibility in mind is smart. Many people benefit from accessible bathrooms as they age or encounter physical challenges over time. An accessible bathroom can also increase a house’s value to future buyers or renters.
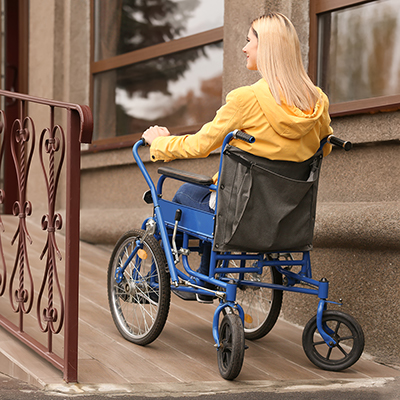
Accessibility goes beyond making room for a wheelchair. Controls, like faucet handles, flush levers and power switches should be easy to reach and operable by one hand. Grab bars, switches and mirrors should be at usable heights. Cabinets and storage should be easy to access. Wheelchairs, walkers and crutches are all mobility aids that should be considered.
This guide discusses creating an accessible bathroom in new construction or in a floor-up renovation. For tips on working on an existing bathroom, see our guide How to Make a Bathroom Accessible.
Difficulty:
Advanced
Duration:
Over 1 day
Table of Contents
Finding Guidelines
Room Size
Switches and Outlets
Grab Bars and Wall Reinforcement
Toilets
Showers and Bathtubs
Finding Guidelines

The Americans with Disabilities Act (ADA) doesn’t have rules for residential construction. It only applies to commercial buildings. However, the guidelines are helpful when designing an accessible bathroom for the home. The Department of Housing and Urban Development (HUD) also provides guidelines that can provide a good starting point.
This guide assumes the home under consideration is a single-family, privately owned house. It will borrow dimensions from ADA and HUD guidelines. However, if your bathroom is being designed for a specific person, it can be customized for their specific needs. For example, if manual dexterity isn’t a problem, a pocket door can be easier to operate than a door that swings. Or, if a lower toilet seat is better, there’s no reason to follow the rules for seat height in a public restroom.
Refer to the current version of ADA and HUD guidelines in case changes have been made since this guide was published. It’s possible that your state or local building code differs. Check before building.
Room Size

Here are some things to keep in mind when deciding how large the room should be.
- There should be enough open floor space to turn a wheelchair in a complete circle. This is generally thought of as a circle with a 60-inch diameter.
- It can also be a “T” shape where a three point turn can be made.
- Keep in mind the rough-in sizes of the sink, bath and toilet.
- The center of the toilet should be at least 17 inches from the nearest side wall.
- Figuring in for a sink, storage cabinet, toilet and shower, the minimum room size would be about 7-1/2 x 7-1/2 feet. This isn’t set in stone. A half bath could be smaller. A full bathroom with a roll-in shower would need to be larger.
Switches and Outlets

- Rocker switches are good for accessibility because of their easy operation. They can be operated with a simple push at the top or bottom.
- They are appropriate for lights, exhaust fans and switched outlets.
- Touch-sensitive switches or smart home switches that are controlled by an app are also good options.
- Switches and outlets should be between 15 and 48 inches from the floor.
- They should also be easy to access, in open spaces on the wall with free, easy access.
Tip: There may be some outlets that are placed in inaccessible locations, such as an outlet that’s intended for use with a heated bidet seat. However, sufficient outlets should be available for the user’s needs.
Grab Bars and Wall Reinforcement

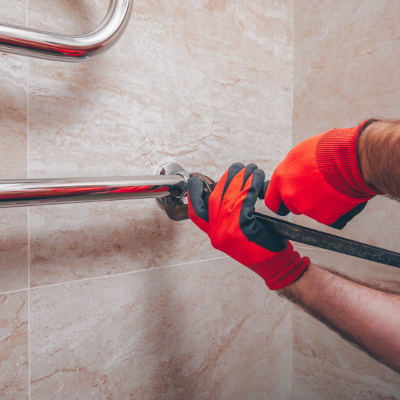
Grab bars can be mounted on drywall with specialized anchors, but screwing directly into wall framing is easier and stronger. Plan for grab bars when framing the walls.
During framing, additional wood called "blocking," should be installed between the studs. This will provide extra structure for solid mounting of grab bars. This blocking is attached between the studs with the wide surface flush to the front of the studs.
Grab bar height is measured from the top of the bar to the finished floor. Figure in the thickness of subfloor, backer board, mortar beds, flooring and tile when determining height.
Grab bars should be mounted 33 to 36 inches from the floor. The flange is often 3 inches in diameter. To accommodate for height variations and the width of the flange, use 2x6 lumber at each connection point at a minimum. For the most flexibility in the future, add 2x12 blocking all the way around the room, with the lower edge at a height of 27 inches.
Plumbing and electrical should be routed away from these reinforced areas when possible. Pipes and wires that pass through framing should be protected by metal plates. Screw lengths for mounting should take into account the thickness of the mounting flange, wall coverings and the blocking itself. Screws of the appropriate types should be included with the grab bars. If they are missing, contact the manufacturer for screws or specifications. Don’t use drywall screws to mount grab bars.
Vertical grab bars should start at 30 inches and go as high as 60 inches. Install blocking for both ends.
For a toilet, side grab bars should start no more than 12 inches from the rear wall and extend 42 inches. There should also be a grab bar over the tank on the rear wall. It should be from 24 to 36 inches long and centered with the center of the toilet.
In a shower or bathtub, grab bars can vary based on the type of tub or shower. A step-in massage bath will need different bars than a roll-in shower. Bars or hand rails may need to be attached to floors or decks of some tubs. Step-in tubs with a shower will need a horizontal bar across the back and a vertical bar on the wall where the shower is entered. A curbless shower can have horizontal bars on facing or adjacent walls. Bathtubs can have an additional bar mounted at a lower height to help someone sit down in the tub.
Folding grab bars are acceptable when other grab bars can’t be used, but the attachment point must be strong enough. Exact specifications will be provided by the manufacturer.
Grab bars can be mounted in other parts of the room as well. They can be helpful for changing clothes or standing at the sink.
Toilets

Toilet seat height can vary based on the individual needs of the user. A seat at the top of the height range may be too high for transferring from a wheelchair. A seat at the lower end of the range may be difficult for someone who uses a walker. The individual’s height and the area around the toilet make a difference, too.
- The ADA specifies a toilet with a seat height between 15 and 19 inches. This can be achieved with a higher or lower toilet, or with seat adapters.
- Keep accessibility in mind when placing the toilet paper holder. Another option is a bidet toilet seat.
- The flush handle should be a lever and require less than 5 lbs. of hand pressure to operate.
Showers and Bathtubs

- The easiest shower to use has a floor that is the same level as the rest of the bathroom. Waterproofing below the tile should extend far beyond the shower because there is no curb to contain water.
- Acrylic and fiberglass shower enclosures are available with built-in seats.
- A custom-tiled shower can have seats built into the framing, then included in the tiling.
- Stainless steel and plastic seats are another option.
- Some seats will fold out of the way.
- If a surface-mounted seat is chosen, install additional reinforcement, as with grab bars, into the wall while framing the room.
- A bathtub may be preferred, depending on the individual. A transfer bench may be used if the user isn’t able to step into the tub.
- Many different types of faucets, spray heads, handles and controls are available. Levers would be the preferred type of control.
- The water heater temperature should be set below scalding temperature.
Sinks

- Standard height of the top sink edge is 36 inches. The sink can be 9 inches deep. There should be at least 27 inches of clearance from the bottom of the sink to the floor. Again, since you are designing a space in a private dwelling for a specific individual, these commercial rules are a starting place.
- The sink should be open underneath.
- If the sink is installed in a cabinet, the space underneath should be free of obstructions.
- A panel may be installed to protect and hide the pipes.
- Doors can also be installed on the cabinet if they can fold completely out of the way.
- A wall-mounted sink should be able to hold up the weight of the user if they need to lean on it, like a grab bar.
- Towel racks should be positioned so that towels don’t hang over grab bars.
- Faucet controls should be levers, not round knobs.
Cabinets, Storage and Mirrors

- Cabinets should have open kneespace where applicable.
- Cabinets that do not require kneespace but require reaching all the way to the back to access outlets, switches or other wall-mounted items should be no more than 25-1/2 inches deep (including countertops) and no more than 36 inches tall.
- Cabinet doors should swing out of the way.
- Drawers are a good option for floor-level storage where reaching below a low shelf would be impossible.
- Mirrors should be mounted at an appropriate height or tilted so they can be used in a seated position.
Doors

- Most standard wheelchairs and walkers will pass through a 32-inch clear opening door. However, a door that is 36-inches wide is preferred.
- The angle of approach should be considered as well. If access to the door is in a small space, like from a narrow hallway, the door should be wider due to the chair entering at an angle.
- When considering the width of the door opening, keep in mind the door itself. A 32-inch doorway that is partially blocked by the door isn’t a clear opening and isn’t wide enough. Special hinges are available to allow the door to swing completely out of the doorway. Or the door may be positioned in the design phase so that it swings all the way open.
- Pocket doors slide into the wall instead of swinging. Pocket door latch hardware is often difficult to use. ADA compliant hardware is available for commercial buildings but is uncommon in residential construction. Pocket doors should only be considered if the user can operate commonly available latches.
- The threshold or transition strip should be as low as possible. Transitions shouldn’t be steep. It’s best for both floors and the transition to all be flush with each other. Floor coverings should be taken into account when designing the framing, subfloor and finished floor types. For example, if a carpeted hallway leads into a tiled bathroom, the bathroom floor’s framing will need to account for the thickness of subfloor, backer board, mortar bed and tile.
Building an accessible bathroom from the floor up takes forethought, preparation and study. The payoff is independence for everyone in your family. Ready to get started? The Home Depot delivers online orders when and where you need them. Need help with your new bathroom? We can help with services like walk-in shower installation.


