How to Fix Cracks in Concrete

Published November 26, 2024
Concrete slabs can crack for many reasons. Repeated freezing and thawing, heavy loads, tree roots and even shifts in the ground can cause damage. When you learn how to fix cracks in concrete, you may be able to stop them before they lead to bigger problems. Fortunately, repairing cracked concrete in driveways and other areas is a simple and relatively inexpensive DIY project.
Wear rubber gloves when handling concrete fillers, mixers and resurfacers. Wear safety glasses to protect your eyes. Long sleeves and long pants will help protect your skin when you’re using a pressure washer or otherwise working with concrete.
Difficulty:
Beginner
Duration:
Under 2 hours
Table of Contents
How to Repair Cracks in Concrete
When to Repair and When to Replace a Broken Concrete Driveway
How to Fill Narrow Concrete Cracks
How to Repair Wide Concrete Cracks
Types of Concrete Fillers and Mixes
Tips for Filling Concrete Cracks in Driveways
How to Repair Cracks in Concrete

Very fine surface cracks, or crazing, occur when a concrete driveway dries too fast. They usually appear soon after it's poured. These fine surface cracks are often cosmetic and not signs of serious structural damage.
If the rest of the concrete is sound and the surface is primarily smooth, repairing cracked concrete can be accomplished by applying a resurfacing product. This puts a thin repair layer over the cracks.
Follow the application instructions on the label. In general, you’ll need to thoroughly clean the existing concrete with a high-power pressure washer and then spread the resurfacer with a long-handled squeegee. Work on one small area at a time because the product will dry quickly. Allow the resurfacer to completely dry and cure as directed on the label before using the driveway.
When to Repair and When to Replace a Broken Concrete Driveway

Hairline cracks or cracks under 1/4-inch wide may not indicate serious underlying damage, but if water gets into them and repeatedly freezes and expands, and vehicles continue to drive over them, the cracks can get bigger and the problem can worsen. These cracks can usually be repaired.
Deep cracks or cracks over 1/4-inch wide usually signal more serious problems. While filling concrete cracks like these can be done, the fix is often temporary.
Uneven cracks bigger than an inch wide occur more often in older driveways than in newer ones, and they almost always indicate underlying structural issues. Consider calling a professional if you have a lot of deep breaks or jagged cracks, or if you see loose gravel. They may even advise removing and replacing the driveway to make it smooth and drivable again.
How to Fill Narrow Concrete Cracks

Wait until the forecast calls for dry weather and the surface of the concrete is at least 50 degrees Fahrenheit before you begin making repairs to your driveway.
- Many concrete crack fillers, sometimes called masonry crack fillers, are designed for cracks up to 1/4-inch wide. Look for a product with a flexible formulation, so it will move with the old concrete and not pull away from it when it freezes and thaws.
- Before you apply the new filler, break up any old concrete patch materials with a hammer or masonry chisel.
- Remove the broken pieces and debris from the cracks with a chisel or slotted screwdriver. Also, remove any old caulking.
- Pull any weeds or grass growing in the cracks.
- Remove leaves and other debris from the driveway with a broom, leaf blower or shop vacuum.
- Now clean the driveway thoroughly. Fill a pressure washer with a concrete outdoor cleaning solution and apply it at low pressure to stains, mold and dirt. Change to a high-pressure nozzle on the pressure washer and finish cleaning the driveway on high power, following the instructions on the cleaning solution.
- Let the area and existing concrete dry before filling the cracks.
How to Repair Wide Concrete Cracks

The use of a concrete backer rod is recommended for filling concrete cracks wider than 1/4-inch since these cracks are usually deep. The backer rod is inserted into the crack to minimize the amount of filler needed and make for a more uniform repair. However, if cracks are 1/2-inch or larger, consult a professional about how to repair cracked concrete effectively.
- Undercut the sides of the crack with a hammer and chisel, giving it an inverted “V” shape.
- Widen the base of the crack and make loose concrete easier to remove.
- Remove loosened debris with a brush or pressure washer.
- Continue to extract particles, along with excess water, using a brush or wet/dry shop vacuum.
- Insert backer rods into the crack to create a base for the filling.
- Follow the manufacturer’s instructions for mixing your concrete patching compound.
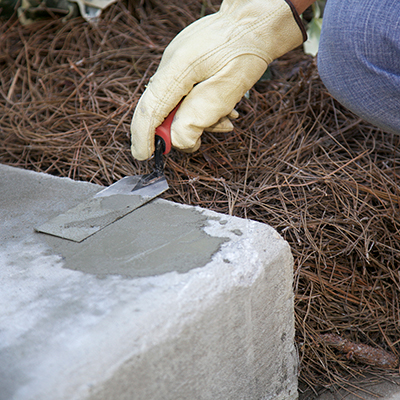
- Using a trowel, fill the crack with the mixture. Use the angled point to eliminate air pockets and push the compound deeply into the area. Fill the crack so it’s level with the surrounding concrete.
- Smooth the mixture or use a brush to make it textured.
- Let the compound cure according to the manufacturer’s instructions.
- Make any finishing touches to the dried compound.
Types of Concrete Fillers and Mixes

Some masonry crack fillers come ready-to-use in pourable bottles or tubes. Some tubes are designed to be used in a masonry caulk gun while others have nozzles that let you squeeze the filler directly into the cracks.
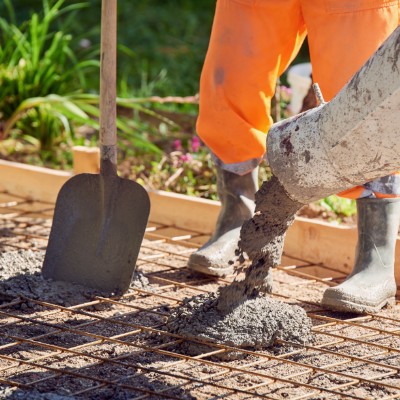
- If you have a lot of cracks, you may prefer to use dry concrete mix or concrete patching compound instead. For big or deep cracks, use a concrete mix or patching compound that contains gravel.
- Put the mix (or compound) in a large bucket and add water as directed on the label. A mixer paddle attached to a heavy duty, low-RPM drill makes mixing easier.
- Pour the wet mix into the cracks and use the pointed end of a trowel to press it in until it's level with the rest of the driveway. Use the flat part of the trowel to blend the new material with the existing material. Scrape off any excess so the patch won’t be noticeable.
- Let the new concrete dry as indicated on the label before you drive or walk on it.
Tips for Filling Concrete Cracks in Driveways

- Use kneepads to cushion your knees if you have to kneel to make a lot of repairs.
- To use the driveway as soon as possible, choose a rapid or fast-set crack filler.
- Some concrete patching compounds will harden in a few hours, but it may take days or a week for other kinds to cure and dry. Curing and drying times depend on the temperature and humidity.
- Some crack fillers are self-leveling, which means the filler settles evenly into the crack. If the filler does not self-level, use a putty knife to spread it smoothly over the crack and then scrape off any excess.
- Textured and concrete-colored products are available to blend smoothly with the existing concrete.
- Consider calling a professional to repair jagged cracks over an inch wide, especially if they are higher on one side than the other due to heaving or sinking. A section or sections of the driveway may need to be broken up, removed and re-poured.
How to Un-Crack Concrete on Steps

The process for how to fix cracks in concrete on steps requires a little more work. Gather a float, wood pieces, a concrete finishing brush and a rub brick. You will use these, along with bonding primer, concrete fortifier and quick-setting concrete.
- As always, cleaning the area is the first step in any concrete repair. Clean the area with soap and water. Leave the area a little damp.
- Create a concrete mold for the step by attaching two pieces of wood together in an L shape using wood screws.
- Create a mixture of quick-setting concrete and acrylic fortifier and stir it until it resembles a thick batter.
- Apply a bonding primer, then the first layer of concrete. Shape it to fit the wooden mold.
- Smooth it out so that the texture matches that of the other steps.
- Wait until the concrete has cured, then smooth out the final surface with a rub brick. This is a brick made from hardened silicone carbide that is used to smooth down concrete surfaces or remove mold marks from cast concrete.
How to Prevent Cracks in Concrete

It’s best to think about preventing cracks during the concrete installation process and the first week of curing.
- The concrete you pour must be high quality, with the proper ratio of water, cement and other ingredients.
- While the concrete is drying during the first week, spray the area with water several times a day so it evaporates slowly. This is especially important if the weather is hot and dry.
- Cold temperatures can also weaken new concrete. Be prepared to cover it with a concrete insulating blanket during the first week if temperatures dip below 50 degrees Fahrenheit. Only uncover it to spray with water once the temperature warms up again.
- To further help decrease shrinking and cracking, consider adding control joints. These are cuts added with the purpose of creating weak spots for future cracks.
- Make sure the base you’re pouring the concrete onto is well compacted.
- Consider reinforcing the concrete with rebar, mesh or other strong materials.
For existing concrete, there are many tips to keep in mind to help prevent cracks.
- Make sure the yard’s drainage works properly, because water and ice can cause damage.
- Clean the area with a power washer annually.
- Reseal the concrete every few years.
- Remove trees that are next to a concrete driveway.
- Avoid using salt for snow and ice control on concrete .
Ready to begin the steps for how to fix cracks in concrete? Find the supplies you need in your local store. Use The Home Depot Mobile App to locate products and check inventory. We'll take you to the exact aisle and bay.