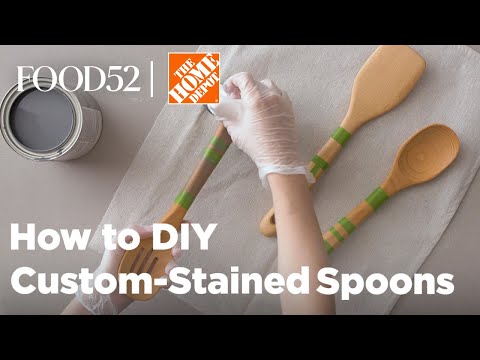
How to Make DIY Custom-Stained Spoons
Published November 17, 2023
Take a set of ordinary wooden spoons and turn them into a one-of-a-kind gift. The best part: You don’t need to be a DIY pro to pull off an expert-looking set – this is an approachable project for all skill levels. This guide will show you how to create custom-stained spoons to give as a gift for the holidays, or to use in your own kitchen.
Difficulty:
Beginner
Duration:
Over 1 day
Table of Contents
Gather Your Supplies
Sand Spoons
Plan the Design
Apply Stain
Remove Tape & Reveal Design
Apply Food-Safe Oil
Gather Your Supplies

With a few items, including wood stain, painter’s tape and food-safe oil, you can give each spoon handle a unique design or pattern.
Here's what else you'll need:
- Fine grit sanding block
- Set of wooden spoons or wooden utensil set
- Tack cloth
- Measuring tape
- Painter’s tape
- Scissors
- Stain sponges
- Fast-drying interior wood stain
- Food-safe oil
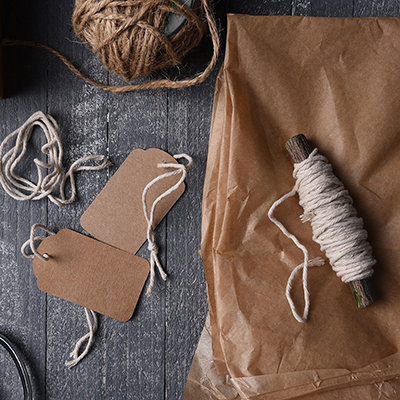
- Twine
Sand Spoons

- Using a fine-grit sanding block or sandpaper, start by gently sanding the lower two thirds of the spoon handles.
- Wipe the spoons with tack cloth or a rag to remove any leftover sawdust.
Plan the Design

Next, it’s time to plan the design.
- Use measuring tape to determine which section(s) of each handle will be stained.
- Now, with painter’s tape, evenly and securely mask the areas on the handle that need to be protected from the stain.
- Try the dipped look on the very ends or create small stripes of stain up and down the lower part of the handle. The whole set can carry the same design or you can mix it up with unique layouts and different stain colors for each spoon.
Apply Stain

- Dip a stain sponge or rag in a small amount of wood stain – a little goes a long way.
- Start at the edges of the tape and softly dab the stain onto the spoon in that area. It’s important that the stain isn’t brushed or pushed up by the tape, otherwise it will bleed under. The rest of the handle can be treated a little more freely with the stain.
- Let dry. Add additional coats, if needed, and let dry.
Remove Tape & Reveal Design

Remove the painter’s tape and wipe down handles to remove any residue.
Apply Food-Safe Oil

- Use a clean stain sponge or rag to lightly apply food-safe oil to the handle wherever it was sanded. This will help finish the wood.
- Let cure according to the package instructions.
Wrap & Gift

- Bundle the spoons like a bouquet and tie together with a piece of twine or narrow ribbon to complete the gift.
- If using in your own kitchen, consider placing utensils in a clear canister to show off your artistic designs.
Learning how to make DIY custom-stained spoons and utensils is a fun way to put a new spin on an ordinary kitchen utensil. It also makes a wonderful holiday, Mother's Day or housewarming gift. The Home Depot is your DIY headquarters. Looking for a product to complete your project? We have options to deliver online orders when and where you need them.