How to Remove Ceramic Tile
Published February 13, 2024
Before installing any new tile or tile flooring, you may need to remove old or damaged tile and mortar. Learning how to remove bathroom tile or tile in any room doesn’t require on-the-job experience. You'll just need a few tools and a fair amount of time. Some subfloor upgrades may be necessary, so plan for those as well. Use this guide to learn how to remove a tile floor or wall, plus get tips on how to remove ceramic tile properly.
Difficulty:
Beginner
Duration:
Over 1 day
Table of Contents
Gather Tools & Supplies
Remove Grout
Remove the Tile
Remove the Mortar
Prepare the Subfloor
Tile Removal Tips
Gather Tools & Supplies

Preparation and allocating enough time will make all the difference in successfully completing this project. Removing tile from walls or floors correctly requires the right tools. You can use manual or power tools. For smaller projects, a chisel and a ball peen hammer are more than adequate. For larger projects, such as removing backsplash tile, consider using power tools.
An angle grinder or oscillating tool are popular choices.
You’ll also need a pry bar, a floor scraper, trash bin and trash bags, shop vac or broom, knee pads and safety glasses. If you’re going to be using power tools, wear safety equipment to protect your ears as well.
Remove Grout

How to remove a tile floor, fireplace tile or wall tile starts with loosening and removing old grout. There are a few ways to do this depending on the tools you have at hand and the size of the project. For small jobs, hand tools can work well. Here’s how to use hand tools for this DIY tile removal:
- Use a ball peen or masonry hammer and cold chisel to tap the pieces free. Always wear safety glasses when removing ceramic tile.
- In some cases, the only way to tear out the ceramic tile is with heavy equipment such as a jackhammer or air chisel.
Got lots of grout or a large space to deal with? That’s not uncommon if you’re working with hallway, living room or kitchen tile. Here’s how you can use power tools to make the job faster and more efficient:
- Use a grout saw or rotary tool to cut along the edges of the grout. Aim to cut as deeply as you can.
- Throw chipped pieces away and wipe up excess dirt and debris. A wet/dry vacuum can be helpful for this task.
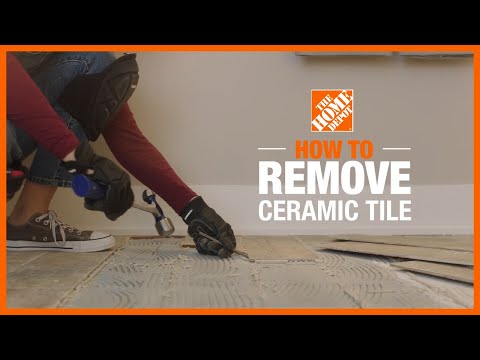
Remove the Tile

Once you’ve taken care of the grout with your hand or power tools, separate the tile from the mortar underneath. Sometimes you can simply pry it up. However, tile usually won’t just come off the floor or wall. Here’s how to remove stubborn tile from a wall or floor:
- Start by scoring the old tile. To do that, put a straightedge across one of the diagonals. Guide a scoring tool along the straightedge, scratching a line in the tile. Repeat until the line is at least 1/16-inch deep. Repeat on the other diagonal.
- Use a long-handled floor scraper to scrape away tile fragments and any old adhesive residue. After all the tiles are removed, you may need to smooth the subfloor with a sander.
Tip: For a particularly difficult tile, strike the center of the tile with a center punch. The tile will begin to break up. Put a cold chisel on the diagonal near the center and strike it with a hammer. Repeat along the entire length of both diagonals until you’re able to remove all of the tile pieces.
Remove the Mortar

After your old ceramic tile is up and removed, clean your workspace of any debris. Next, remove as much of the old mortar as you can. Here’s how you can do that:
- Using a hammer and a bricklayer’s chisel, tap away at the mortar.
- Clean up loosened tile as you go.
- Continue tapping and removing as much mortar as you can. Leave firmly attached mortar in place as long as there is enough room for a new layer of thinset.
Prepare the Subfloor

Once you’ve figured out how to remove a tile floor, take the next step. Evaluate your subfloor for damage. Look for uneven or sunken parts, squeaks and obvious water damage. A good subfloor ensures your new tile lays correctly. If parts of your subfloor need work, here’s how to cut and remove it or any damaged areas:
- Cut the old subfloor into small sections with a circular saw equipped with a carbide blade.
- Pry up the sections with a pry bar. If the old tile was laid on underlayment, cut through the underlayment and mortar but not the subfloor.
- Replace the subfloor. Consider having this work done by a professional floor installer.
Tile Removal Tips

Installing new bathroom tile, kitchen tile or tile in other high-traffic areas is a great idea. Tiles are an easy-to-clean, long-lasting, hypoallergenic and versatile floor or wall covering. Here’s a few more tips on how to remove tile from a wall or floor:
- Start by removing a few tiles to see how difficult the project will be.
- Replacing a few cracked or damaged tiles may be a better plan than replacing an entire floor or wall.
- If the tiles are relatively loose, try using the floor scraper to remove several rows at a time. Wedge the spade under the tiles and “shovel” to break them up.
- Older tile can be firmly attached to the subfloor and very difficult to remove. Consider renting a jackhammer with a chisel when removing a tile floor. Be especially careful to wear safety glasses to protect your eyes from the flying tile and mortar chips.
Now that you know how to remove tile from a wall or floor, you can update your look. Cutting and removing the old tile shouldn’t take long. However, stripping out the old mortar can be a big part of this DIY tile removal project. Allow yourself enough time to do the job correctly. The better you prepare for your new floors or walls, the better the finished results.
Don't worry if you don't own all of the tools required to complete this DIY project either.
Our tool rental team can help you get everything you need. If you’d rather let the pros handle the job, check out our tile installation services.