How to Use a Drill
Last updated May 7, 2025
Learning how to use a drill is an important skill for any DIYer. Power drills may seem intimidating, so start with the basics. They’re fairly simple to operate. Using a drill allows you to take on a greater variety of DIY projects.
This guide will outline the basics of how to use a power drill. It will also cover the parts of a drill. You’ll learn how to change a drill bit as well. Read on to get a handle on this basic DIY power tool.
Table of Contents
Parts of a Drill
How to Choose the Correct Bit
How to Change a Drill Bit
How to Use a Drill
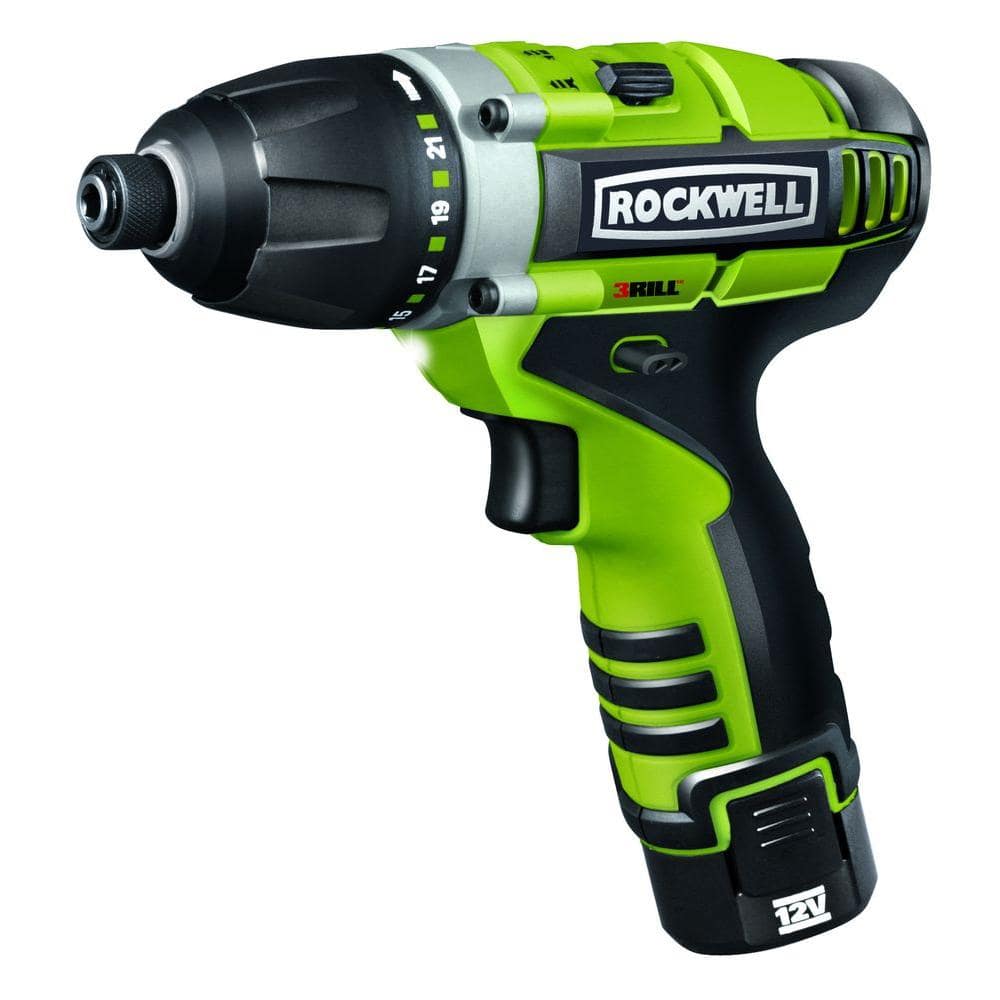
Parts of a Drill

Every power drill has the same basic anatomy. Get familiar with the parts of a drill to feel more comfortable using one.
Here are some terms you’ll come across:
Chuck: This is the adjustable part of the drill that holds the bit.
- Picture a hand with the fingers open wide, then closing to grab something. That’s what the chuck does. It holds the bit so the drill can rotate it.
- Some chucks require a chuck key to change drill bits. Most don’t need any extra tools to swap bits, as you can open and close them by hand. These are called "keyless" chucks.
Trigger: You squeeze this to operate the drill.
- When you squeeze or pull the trigger, the drill chuck rotates.
- When you release the trigger, the drill bit stops rotating.
- Most drills have a variable speed trigger, which means that the speed of the drill's rotation is controlled by how far the trigger is pulled.
- Many drills have selectable speed ranges via a numbered switch. This changes the minimum and maximum speeds the drill can turn.
Clutch torque selector: This selector has a drill icon and numbers.
- The clutch feature is designed to prevent over-tightening of screws and other threaded fasteners.
- When a number is selected, the drill's clutch will slip and begin to click when it meets a certain amount of resistance.
- Higher numbers allow more resistance before disengaging the clutch. Selecting a higher number will drive a screw further into the material or make a bolt tighter.
- Correct use of this feature requires some experimentation to find which number is needed for a specific combination of screw and material.
- The drill icon turns this feature off, so the clutch will stay engaged no matter how much resistance is encountered.
Forward/reverse/lock selector: This is a switch or button that changes the direction of the drill bit’s rotation.
- Keep it forward and going clockwise to tighten screws or drill a hole.
- Toggle to reverse when removing a screw. The rotation goes counter-clockwise in reverse.
- Put the drill in reverse to extract the drill bit from the hole you just drilled.
- The lock position prevents the trigger from being pulled.
Battery or cord: This is the power source for your drill.
- Some drills are corded and plug into the wall.
- Other power drills have a rechargeable battery pack.
The battery is a removable and rechargeable power source. It may be ideal to keep an extra battery pack around. That way, one can charge while you’re using the other one.
Battery charger: Although not technically part of the drill itself, you’ll need this for a cordless drill.
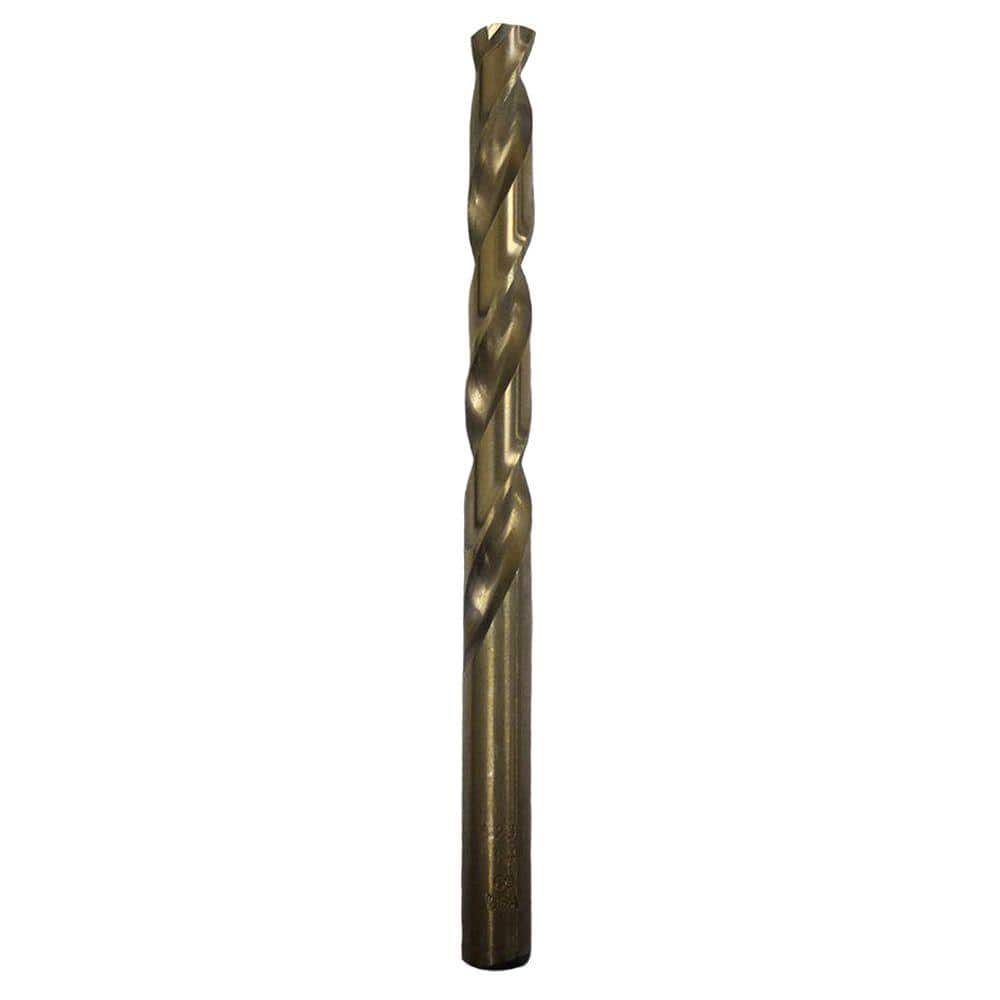
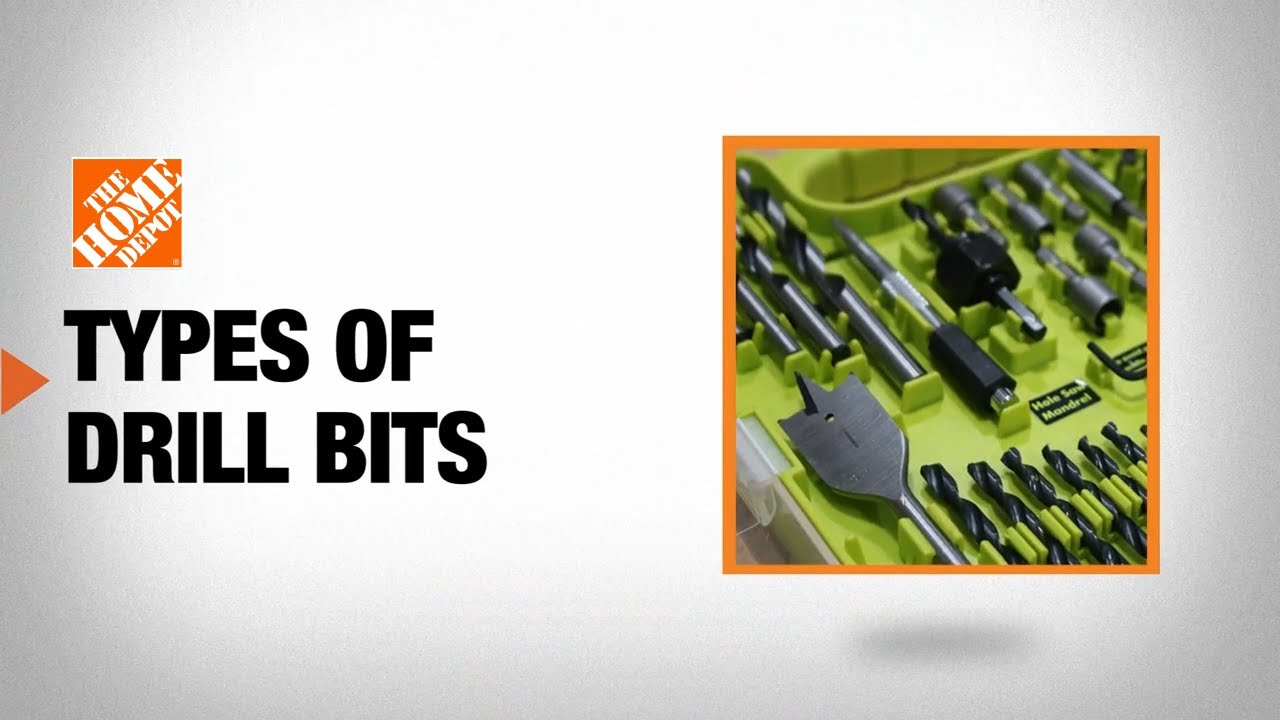
How to Choose the Correct Bit

The drill bit you use will depend on the task at hand.
Keeping a drill bit set in your toolbox means you're prepared for many projects.
Drill bits and driver bits make a drill a tool for two different uses. Drill bits are for making holes in wood, metal, plastic or other materials. Driver bits are for securing threaded fasteners like screws, bolts and nuts.
- Drill bits are available to drill holes in most types of materials.
- The package will state what materials a bit can drill through.
- The most common drill bit is called a twist bit. They have a sharp point and flutes that twist around the bit as they go up the sides.
- The sharp tip cuts into the material and the flutes bring the excess material up and out of the hole.
- Most common twist bits are useful for wood, metal and plastics.
- A full set of twist drill bits is called an index. Most start at 1/16 inch and go up to 1/2 inch, but smaller and larger twist bits are available.
- Another popular style is a Forstner bit, which is used to drill larger diameter holes in wood and plastic. These bits will cut a hole with a flat bottom an cases where the hole doesn't go all the way through.
- Bits are available for masonry, concrete, tile, stone and glass.
- A hole saw has a twist bit in the center and a round saw blade for cutting large holes.
- Many other bit types are available for specific tasks. Auger bits, countersink bits, long bits and jobber bits are a few.
Another use for a drill is driving screws or other threaded fasteners. This requires driver bits that match the fastener that's being used. Most drills that are intended for use as drivers have a clutch mechanism that prevents over tightening. Impact drivers are related tools that function in a different manner.
- Drills are commonly used to drive screws into wood.
- Wood screws usually have a Phillips, square or star drive head.
- They all have several sizes that are indicated by a number. The size number increases as the size increases.
How to Change a Drill Bit

Once you’ve chosen your drill bit, it’s time to insert it.
It's not tough to learn how to put a bit in a drill. In fact, changing a bit is a big part of knowing how to use a drill.
- Remove the battery or unplug the drill before installing or changing bits.
- Open the jaws of the chuck by turning the chuck counterclockwise.
- If using drill with a keyed chuck, use the chuck key to open the jaws.
- Insert the drill bit until it bottoms out in the chuck, then pull it back about 1/16 of an inch.
- To securely lock a drill bit in a keyless chuck, turn the chuck clockwise to close the jaws onto the bit. When you reach the point that you can't tighten further, stop rotating. Then grasp the chuck and turn again. This will enable a ratchet feature that will tighten the chuck enough to hold the bit.
- If using a keyed chuck, just tighten the jaws with the key, remove the key from the chuck and return it to its holder.
Safety Tip: If you’ve just used your power drill, the bit may be hot from friction. Let it cool or use work gloves to remove it.
How to Use a Drill

When using any power tool, take a moment to be sure that you're using the right safety equipment and that you know how to operate the tool properly. Eye protection is nessecary when operating a drill. Also, make sure any loose clothing or long hair won't be tangled in the tool as it operates. Jewelry shouldn't be worn when operating power tools. Read the operator's manual before using a tool so that you know how to operate it and take advantage of its features.
Drilling holes in different materials all have some similarities but each bit and material combination have techniques that produce the best results. For example, drilling through wood and metal might use the same bit, but the speed of the drill, pressure applied by the operator and lubrication are different.
The basic steps for drilling through a piece of construction lumber or plywood with a twist bit are:
- Mark the location of the hole on the workpiece.
- Select and install the drill bit to be used.
- Set the speed range selector (if present) to its fastest setting.
- Place the piece of wood on a work surface that can be damaged when the bit passes through the workpiece. This is often a piece of scrap wood.
- Secure the workpiece with a clamp or sufficient hand pressure.
- Place the point of the drill bit on the mark.
- Push the drill slightly to create a small dent to help drill in the right spot.
- Remove pressure from the drill.
- Pull the trigger to start the drill slowly.
- Put light pressure on the drill.
- As the bit begins to cut, increase the speed of the bit and follow through with consistent pressure as you guide the bit straight through the material.
- Release the trigger to stop the bit from turning.
- Pull the bit out of the wood. It may be necessary to reverse the drill's direction and pull the trigger to rotate the bit in reverse.
To drill through 1/4 inch thick mild steel:
- If the drill has one, install the secondary hand grip.
- Select the drill bit and install it in the drill.
- Secure the workpiece so that it will not move.
- Mark the location of the hole.
- Use a punch to make an indention at the point where the hole is to be drilled.
- Set the speed range selector (if there is one) to the lowest speed.
- Put a drop or two of machine oil on the spot to be drilled.
- Place the point of the drill bit into the indention made with the punch.
- Start the drill at a slow speed and put heavy pressure on the metal.
- Maintain the pressure as the drill speed is increased with the variable speed trigger.
- Observe the cutting progress of the bit and vary the speed until the best cutting speed is reached.
- Add oil as nessecary.
- As the bit breaks through the other side of the steel, there is a tendency of the bit to grab in the material and stop, which can jerk the drill from your hands or cause the material to spin out of control. To avoid this, slow the bit speed.
- The hole will have a sharp burr on it. Remove it with sandpaper or a file.
- Different metals of different thicknesses and hardness will require different techniques.
To use a drill to drive a screw into wood, follow these steps:
- Select a bit that is the same size as the shank of the screw. The shank is the solid portion of the screw if the threads weren't present.
- Install the bit and drill a pilot hole.
- Remove the drill bit and install the correct driver bit for the screw.
- Adjust the clutch to a low setting.
- Begin to drive the screw.
- If the clutch begins to click before the screw is at the desired depth, adjust the clutch to a higher setting and try again.
- Continue this procedure until the correct setting is found and can be used on subsequent screws in this project.
Now that you know how to use a power drill, it’s time to put it to use. Hang new curtains, put up shelves or tighten screws on a rack. Locate products and check inventory with The Home Depot Mobile App. We'll take you to the exact aisle and bay.