DIY Garage Shelves
Last updated May 17, 2024
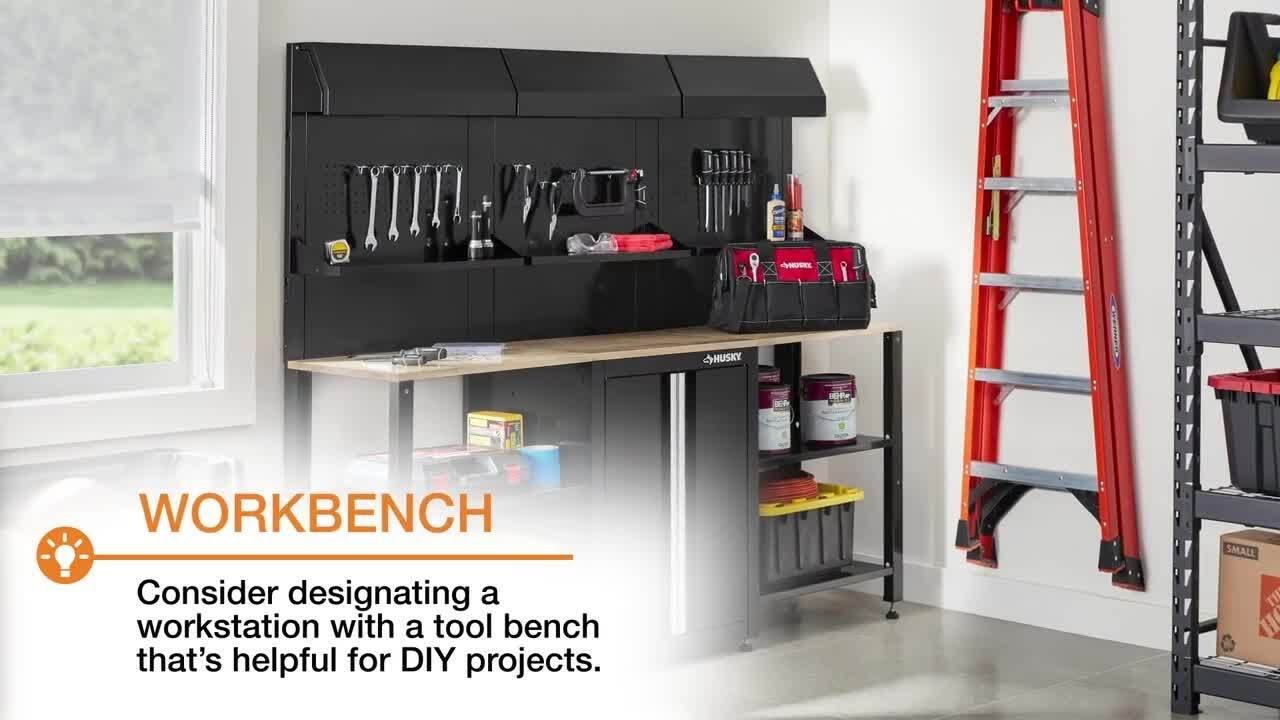
While ready-made storage shelves are convenient, turn your desire for additional storage space into a DIY project, and build a custom shelving unit to fit the exact space you have available.
These DIY garage shelves offer the perfect solution for DIY garage storage and extra spacing to reorganize your space. Additionally, you can dress them up by installing side panels and stock trim molding on the face of the frame. This project guide explains how to build garage shelves and anchor them to the wall and floor for extra support.
Tip: Take your custom garage shelving plans a step further by anchoring it to the ceiling joists and the floor. This will make it sturdier under a heavy load than other garage wall shelving.
Difficulty:
Beginner
Duration:
2-4 hours
Table of Contents
Gather Tools and Materials
Decide on Shelf Design and Select Wood
Measure & Cut
Assemble the Upright Supports
Stand Up the Shelf
Fill in the Shelves
Gather Tools and Materials

Before you begin, gather the following tools and materials:
Tools:
- 6-foot Step Ladder
- Circular Saw
- Track Saw (optional)
- Impact Driver or Drill w/ screw bit
- Hammer or Mallet
- Rafter “Speed” Square
- Tape Measure
- Clamps with minimum 5-inch opening
Materials:
- One 4x8 sheet 3/8-inch sheathing plywood
- Thirty-five 2x4x8 studs
- Four 1x3x8 furring strips
- Five-pound box of 3-inch #10 screws
- Eighteen 1-1/4-inch screws for securing the plywood
- Wood glue or construction adhesive (optional)
Decide on Shelf Design and Select Wood

Garage floors are usually concrete, and concrete can transfer moisture from the ground. Because of this, pressure-treated wood should be used for the parts of the shelf that touch the floor. Untreated wood will be used for the rest.
Moisture and stability are the reasons the bottom shelf on the unit will be just above the floor.
Space the shelves so that the larger, heavier items can go on the bottom.
This spacing will decrease as we go up for smaller, lighter items, and the top shelf will be wide open and flat.
Tip: A thin piece of plastic can also be placed between the foot of the shelf and the floor if you choose not to use pressure treated wood.
Measure & Cut

Start this project by measuring the space for your custom shelves. This one will be 6 feet tall and 8 feet wide with three upright supports.
Here are the pieces of cut lumber you will need to build these shelves:
- Six 2x4x72” PT
- Eighteen 2x4x24”
- Six 2x4x18”
- Six 2x4x16-3/8”
- Six 2x4x3” PT
- Plywood cut into two pieces, one 27x96” and one 21x96”
- 1x3 braces (these will be measured once in place)
Save the off-cut 2x4 pieces to be used as spacers during the assembly.
Tip: If storing heavy loads, or building longer shelf sections, additional upright supports can be added or the horizontal supports can be turned on edge and shelf slats doubled up.
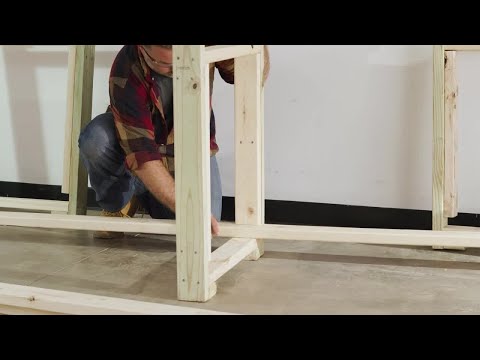
Assemble the Upright Supports

- Place two of the 72-inch 2x4s on your work surface, on their edge and 24 inches apart.
- Lay four of the 24-inch pieces on edge between them, so it looks like a ladder.
- Start at one end and set the first rung 1 1/2–inches – the thickness of a 2x4 – from the end.
- Attach it with two screws through the uprights.
- Attach two 2x4x3-inch pieces below the first rung, flat and flush with the sides and end of the upright. These will be the feet. Drill pilot holes in these small pieces to avoid splitting the wood.
- Place a spacer above the rung on each side, so it makes a 1 1/2-inch gap between the next pieces.
- Place a 2x4x24-inch piece flat against each upright, flush with the edges.
- Fasten the 2x4x24s with 4 screws, placing two from the outside and two from the inside.
- Place the next rung directly on top of the interior supports and secure it with two screws through the uprights and into each end.
- Place the spacer on each rung again and install the next 18-inch interior support.
- Follow this procedure for all three upright supports using the 16-3/8-inch interior supports. The top rung should be 1 1/2-inch from the end of the upright. Repeat this process to build a total of three.
Tip: Nails or screws can be used. Glue isn’t necessary but can be used if it you want. Fasteners should be rated for pressure treated lumber,as regular screws or nails will corrode.
Stand Up the Shelf

- Place four 2x4x8 studs on your work surface, with the ends flush.
- Measure 48 inches to the center and lay a scrap of 2x4 across all four, using a square to make sure it’s straight.
- Stand the center upright up, with the 24-inch opening at the bottom, and place two of the marked 2x4s through it, above the bottom rung with the center marks facing outward. The 2x4s will slide into the gaps between the bottom of the internal supports and the top of the rungs.
- Align the centering marks with the outer edges of the upright and clamp them in place.
- Stand one of the end uprights at the end of these first 2x4 shelf slats and slide them into the gaps. Make sure they’re flush with the outer edges of the upright and clamp them in place.
- Repeat the process on the other side with the remaining upright and drive a screw through the face of the slat and into the rung at each joint.
- Remove the clamps and repeat the process across the top rung, there won’t be a gap, but the top of the 2x4 slats should be flush with the top ends of the uprights.
Fill in the Shelves

- Lay three 2x4s across the bottom rung, spaced roughly 1 1/2 inches apart with the spacers on one end.
- Drive one screw through each slat into the rung.
- Drive a screw through each slat and into the rung on the other end.
- Check for square and make any adjustments if necessary.
- Drive two more screws through all the slats on this end, then add two more screws to each slat at the other end.
- Repeat this process with each shelf, from the bottom to the top.
Tip: Use a step ladder to work on the top shelf. Do not climb on the shelving unit itself.
Diagonal Braces

- Add bracing to make this a solid piece of garage furniture.
- Place a 1x3x8 on the back of the unit, with one end on the lower outside corner.
- Lean the upper end towards the center upright, until it overlaps enough to get two screws through it.
- Clamp the 1x3 in place and mark a line flush with the top shelf.
- Remove the 1x3 and cut it at the line. Clamp the 1x3 back in place and drive two screws at the bottom, into each shelf slat where they intersect, and finish at the top end.
- Repeat this process on the other side to make an “A” shape on the back the shelving unit. The ends of the shelf are braced as well.
- Clamp a 1x3 at the bottom rear corner and lean it towards the top front corner.
- Mark and cut the angle at the top and then attach the side braces like the rear braces.
Plywood Panels

- Set the 27-inch wide sheet of plywood in place as the top shelf.
- Align it with the four upright corners and secure it with three
1 1/4-inch screws into each rung. - Place the 21-inch wide sheet of plywood on the bottom shelf and fasten it with three screws into each rung.
Tip: Additional plywood sheets can be added to the center shelves, but they’re not needed if you’re storing items in bins or boxes.
Move the Shelves in Place

If needed, have someone help move the shelves into position. With your new, custom garage shelves you’ll have a lot of storage space and be able to keep everything organized. A place for everything and everything in its place, the shelves will keep your garage looking tidy and help you access your tools and supplies easily, and there might even be enough room for your car.
FAQs About Building Garage Shelves

Before you get started, review these FAQs on how to build garage shelves.
Q: HOW MUCH WEIGHT CAN GARAGE SHELVES TYPICALLY HOLD?
The weight capacity of garage shelves varies depending on factors such as the materials used, construction quality, and support methods, but they typically can hold anywhere from 50 to 300 pounds per shelf.
Q: HOW HIGH SHOULD I INSTALL GARAGE SHELVES FOR MAXIMUM STORAGE EFFICIENCY?
For maximum storage efficiency, garage shelves should be installed at a height that allows easy access to items while maximizing vertical space utilization, typically around 12 to 18 inches between shelves, depending on the size of items being stored.
Q: DO I NEED TO ANCHOR GARAGE SHELVES TO THE WALL, AND IF SO, WHAT IS THE BEST METHOD?
Yes, it's recommended to anchor garage shelves to the wall to prevent tipping or collapse, especially if storing heavy items. The best method is typically to use wall anchors or brackets secured into wall studs for optimal stability and support.
Q: CAN I CUSTOMIZE THE SIZE AND DIMENSIONS OF THE SHELVES TO FIT MY GARAGE SPACE?
Yes, you can customize the size and dimensions of the shelves to fit your garage space by adjusting the length, width and height according to your specific storage needs and available space.
Q: HOW DO I DETERMINE THE BEST PLACEMENT FOR GARAGE SHELVES IN MY GARAGE?
To determine the best placement for garage shelves, consider factors such as available space, accessibility, and the types of items you'll be storing. Optimal placement typically involves maximizing vertical space utilization, leaving enough room for vehicle parking and ensuring easy access to frequently used items.
Q: ARE THERE ANY SPECIFIC SAFETY CONSIDERATIONS I SHOULD KEEP IN MIND WHEN BUILDING GARAGE SHELVES?
Yes, when building garage shelves, it's important to ensure stability by anchoring them securely to the wall or floor, especially for heavy loads. Additionally, consider the weight capacity of the shelves and distribute weight evenly to prevent overloading and potential collapse.
Q: WHAT ARE THE DIFFERENT TYPES OF GARAGE SHELVES I CAN BUILD, AND WHAT ARE THEIR PROS AND CONS?
Different types of garage shelves include floating shelves, adjustable wire shelving and traditional wooden shelves. Floating shelves offer a sleek look but may have limited weight capacity. Adjustable wire shelving provides flexibility but may be more expensive. Traditional wooden shelves are sturdy and customizable but require more carpentry skills. Choose the type that best suits your needs and skill level.
Q: HOW LONG DOES IT TYPICALLY TAKE TO BUILD GARAGE SHELVES?
The time it takes to build garage shelves depends on factors such as the complexity of the design, your skill level and the tools available. However, for a basic set of shelves, it can take anywhere from a few hours to a full day to complete.
Q: CAN I BUILD DIY GARAGE SHELVES BY MYSELF?
Yes, building DIY shelves is a project that many individuals can handle themselves with proper planning and basic carpentry skills. There are plenty of resources available, including tutorials and guides, to assist in the process. It's a perfect solution to adding new DIY garage storage to your home.
Ready to find the supplies you need in your local store? Use The Home Depot Mobile App to locate products and check inventory. We'll take you to the exact aisle and bay.