How to Build a Horseshoe Pit

Last updated September 7, 2023
Outside activities encourage everyone to have fun and be social. Whether you’re hosting a gathering with friends or creating memories with your family, a horseshoe pit is fun for all ages.
A horseshoe pitching court can be simple: Two stakes driven in the ground 40 feet apart or add them to clay pits, concrete pitching lanes and elevated backstops. We’re going to build a moderate court that’s permanent without dominating your backyard.
This project involves digging, so be sure to “call before you dig” to check for underground utilities. You should also know the location of any underground services that are not part of a public utility, like electrical wires or pipes that extend to a shed or well.
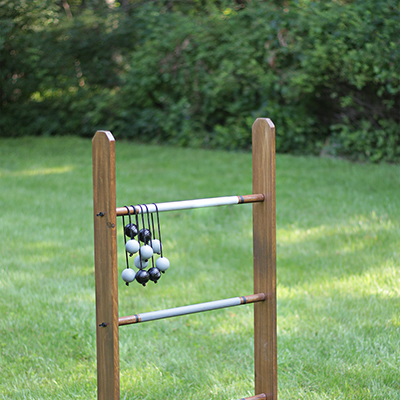
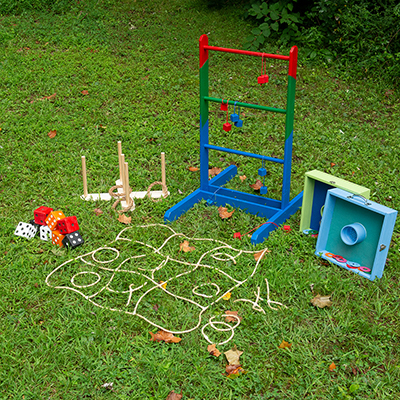
Stay with us to the end and see how to build a little kid-friendly horseshoe set from common PVC pipe and fittings.
Difficulty:
Intermediate
Duration:
Over 1 day
Table of Contents
Materials & Tools
Find The Location
Mark & Dig
Timber Time
Drive the Stake
Pour and Level the Sand
Materials & Tools

The Home Depot offers horseshoe sets with several color combinations and many team logos, so you can choose red or blue, or even represent your favorite team while you compete for backyard bragging rights.
Pressure treated wood uses chemicals that can react with metal, causing it to rust. Any nails and screws should be hot dip galvanized or marked as approved in treated lumber.
- (10) 8’ landscaping timbers
- (12) 12” galvanized spike nails
- (24) 8” galvanized spike nails
- (8) 5” lag screws (if a raised backstop is constructed)
- Landscaping fabric (optional)
- 10 bags of play sand
- Drill with 5/16” bit
- 2 to 3 lb. hammer
- Square shovel
- Post hole diggers – if making raised backstop
- Measuring tape
- Level
- Spray paint or marking chalk
Cut List for landscape timbers:
- (2) 24”
- (1) 36”
- (2) 44”
- (2) 48”
- (2) 52”
Find The Location

For a regulation court, the stakes need to be 40 feet from each other. Add in the size of the pit and an area that’s between 44 inch and 46 inch long is needed. The width only needs to be about 5 to 6 feet, so a perfect place is along a fence or property line.
The pits should be on relatively level ground but the pits will be leveled in the digging process. It is important that there is a level space next to the pits, because this is where the players will be when throwing their shoes.
Mark & Dig

- Decide what size you want the pits to be. Regulation size is anything between 31 to 36 inches wide and 43 to 72 inches long. We’re going to make ours 36 inches wide and 48 inches long. The landscape timbers will be stacked on the ground that is leveled for the pit, so with those dimensions added, the dig will be 44 inches wide and 52 inches long.
- Use four of the 12 inch spikes to mark the corners. Measure both diagonals and compare the distances to be sure the area has square corners. Lay a shovel handle 90 degrees to the tape like you are measuring to help get the corners square. Mark lines between the spikes with chalk or spray paint.
- Go around the perimeter of the pit with the square shovel, cutting straight into the earth, to establish a clean line. The pit doesn’t need to be very deep, about 2 inches is sufficient. Observe the slope of the area, and if one side is higher, dig deeper on the uphill side. Check the progress with a level. If you don’t have a level that’s long enough, sit it on a board, or jump to the next step and cut one of the 43 inches landscape timbers, to effectively make it longer.
Timber Time

- Lumber this size is most easily cut with a reciprocating saw or chainsaw. Of course, you can always exercise your pitching arm by using a hand saw.
- Cut one timber 44 inches long and two 48 inches long. Drill a 5/16 inch hole 6 inch from each end of these timbers. Put the 44” timber across the back of the pit and arrange the other two along the sides.
- Drive a 12 inch spike through each pilot hole and into the ground. Cut one timber 36 inch long and two to 52 inch long. Center the 36 inch timber on top of the one you placed across the back, and overlap the two 52 inch timbers where they lay over the ends of the back and along the timbers that were placed on the sides.
- Drill a hole 12 inches from each end, allowing the drill bit to go through and mark the first course. Lay these timbers aside and drill pilot holes in the lower timbers where the drill bit marked them. Replace the top layer and drive the 8 inch spikes to secure the layers together.
- Cut one timber to 44 inch and two to 24 inch Sit the longer piece on top of the back timber and the shorter timbers on top of the sides. Drill a pilot hole 4 inches from each end, using these holes to mark and drill the second layer, as was done previously. Drive 8 inch spikes to secure the layers together.
Tip: When drilling holes in lumber this size, the bit will often become packed with debris. Back the bit out of the hole several times during the process to clear this debris and prevent the bit from overheating.
Drive the Stake

- The stakes should be 40 feet apart. They need to lean forward a bit, to counteract the force of all those ringers you’ll be throwing. The stake should be 14” above the finished level of the sand, so leave it 16” above the dirt, and it should lean about 3” forward of being straight, toward the other stake. This lean is about 12 degrees. Ask a helper to hold the shovel handle 3” away from the stake to get the forward lean angle correct.
- If the ground isn’t stable enough to hold the stake solidly, there are two easy fixes at hand. One fix is to compact the soil for a foot around the place where the stake will be driven. Pack it as tightly as possible by hammering it, then adding some of the soil that was dug out to make the pit. Keep hammering and adding until you run out of dirt or can’t compact any more.
- The other fix is to cut a foot-long piece of landscape timber and drill a hole at a 12” angle for the stake to fit in. Bury the timber and stake combination and compact the soil. (This is why we set the stake before pouring the sand.)
Pour and Level the Sand

- Ideally, when a horseshoe lands, it will stop where it hits the ground. Tournament pits use a special blend of clay to keep the shoes from bouncing. We’ll use sand in this pit since it’s easy to get and maintain.
- Pour five bags of play sand into the pit area and smooth it with a shovel or a board. This should make the sand about 2 inch deep all over the pit.
Raised Backstop (Optional)

If throwing past the pit is a concern, a backboard can be built by digging a post hole 6 inch from the ends of the back, and standing two 24 inch pieces of timber as posts behind the pit. Cut two more 44 inch and stack them on edge on top of the third layer’s rear timber. Attach these timbers to the posts with 5 inch lag screws. The backstop post height and layer count can be adjusted based on your site’s needs.
Rules of Play

Check out this link to get the rules on how to play horseshoe and make your backyard a place that everyone loves to have fun in.
Creating a horeshoe pit is easier than you think, and you'll love the way it brings everyone together for a little friendly competition. If you don't have all the tools you need handy, The Home Depot offers lawn and garden rentals that don't require you to store or maintain them. If you don't have the time to visit your local Home Depot, you can always order your materials online and they'll be quickly delivered to your doorstep.