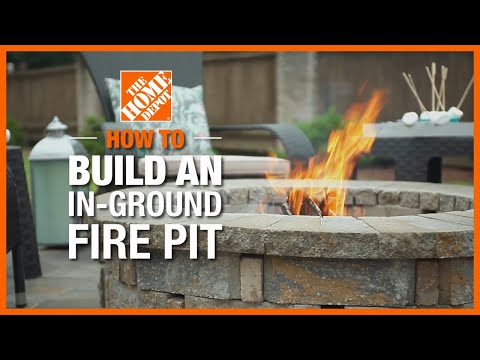
How to Build an In-Ground Fire Pit
Last updated October 4, 2023
When chilly weather comes, a fire pit is a welcome spot in outdoor spaces. Surrounded by chairs or outdoor furniture, a fire pit adds a cozy backyard space for entertaining and more. A wood-burning fire pit needs three things: fuel, air and a source of ignition. If a fire pit doesn’t get enough air, it can result in heavy smoke. Standing water can also cause combustion problems. The type of fire pit design in this guide will bring in plenty of air and drain away water. Read on for the general steps on how to build an in-ground fire pit.
Difficulty:
Advanced
Duration:
Over 1 day
Table of Contents
Gather Materials and Tools
Lay Out the Location
Dig In-Ground Fire Pit Hole
Add Drainage
Build the Fire Pit
Build a Paver Patio
Gather Materials and Tools

You can buy a fire pit kit or make one from scratch. Building a DIY in-ground fire pit requires the right tools and materials. Here’s what you’ll need for the fire pit:
- Retaining wall blocks
- 4-inch x 2-foot aluminum pipe
- 90-degree elbow aluminum pipe
- Aluminum vent pipe flashing (for air inlet)
- Coarse gravel for drainage
- Square point shovel
- Trenching shovel or drain spade
- Tamper
- Hoe
- Rake
- Wide push broom
- Level
- String and level
- Lumber for stakes
- Measuring tape
- Marking paint
The amount of materials you’ll need to build the paver patio will vary based on the square footage of your space. For example, if an area measures 60 square feet, you’ll need 60 12-inch x 12-inch paver stones. You'll need 4 inches of gravel, which is 1/3 of a yard, for a paver base. Multiply square footage by 1/3 for gravel amount. For 60 square feet, you'll need 20 cubic feet of gravel, or 3/4 cubic yards. Get 1/3 as much sand as gravel.
Lay Out the Location

Choose an area in your backyard that’s level and has a good view. The location where you build your DIY in-ground fire pit shouble be at least 15 feet away from any shrubs, trees or buildings. Once you’ve determined your location, here’s how to lay out the in-ground fire pit:
- The in-ground fire pit described in this guide will be 36 inches across and surrounded by pavers.
- Find the center of the your new pit. Put a stake in the ground to mark it. You will use this center point stake to draw two circles. To make each circle, tie a string loosely to the stake. You will want it to turn as you walk.
- For the in-ground fire pit circle, measure 40 inches from the stake using the string. This allows for a few extra inches to work with as you build. Hold the paint can at the radius of your circle and spray as you walk the string around the center point.
- For the second circle for the paver area, measure a 12-foot circle from the stake using the string. Hold the paint can at the radius of your circle and spray as you walk around the center point.
Tip: Before digging, call 811 to check for underground utilities. Remember, they will not know about any lines that weren’t installed by a utility. Be careful when you dig in case underground utilities were installed as part of other DIY projects.
Dig In-Ground Fire Pit Hole

Dig the pit first, following the first circle marked in Step 1.
Make the pit about 18 inches deep. Have a wheelbarrow or tarp handy to hold the excavated soil. Once the pit has been dug, move on to the second, larger circle from Step 1.
Dig this second circle to the depth of your chosen pavers. You’ll want the paver patio area to bevel slightly away from the fire pit. This will help keep rainwater out of the pit. As you dig, check the angle of the pavers using the line levels with string and stakes.
Tip: If grass is growing in the area, consider using a sod cutter and transplanting the grass elsewhere.
Add Drainage

An important part of making a DIY in-ground fire pit is to make sure it drains properly. An insufficiently draining fire pit will become a breeding ground for mosquitos. It can also grow mold or other organisms. Use one of the following drainage techniques depending on your needs:
- If the soil drains well or there is moderate precipitation, simply dig a hole in the center of the fire pit. The hole should be 12 inches in diameter and 18 inches deep. Fill this hole with large gravel.
- If the soil doesn’t drain well or there is heavy precipitation, dig a trench from the center out. If you’re adding a drainpipe, dig about 10 feet from the fire pit. The drainage trench should be 6 inches wide. Make sure the depth of the trench gradually gets deeper. Start with a 2-inch depth and gradually go to 6 to 12 inches deep at the end. This will provide a sufficient incline to carry water away. Cover the base of the fire pit with loose gravel or lava rocks. Pack gravel into the dirt with a tamper. Fill the pit with 6 inches of loose gravel. Place about 2 inches of large, loose gravel in the trench. Lay a drainpipe. You can use perforated pipe, wrapped in landscape fabric or a section of septic tank drain field pipe. Put the pipe into the trench and cover it with more loose gravel. Lay a piece of landscaping fabric over the gravel and finish filling the trench with dirt until it is level with the rest of the patio area.
Build the Fire Pit

The next step in how to make an in-ground fire pit is to lay the blocks.
- Lay the first course of blocks in the pit. Once satisfied with the shape, remove two blocks. Take one from each side, directly across from each other. (Make sure no block covers the drainage trench.)
- Dig out the dirt to accommodate the elbow pipe. The elbow pipe will extend upward from the outside of the fire ring. It will go in the opening and point into the fire area.
- Install the elbow pipe. Form dirt under and around the elbow pipe. This will support the landscaping blocks that will go over it. Continue stacking landscape blocks. Offset the joints in a brick pattern.
- Connect the aluminum pipe to the elbow. Use a paver or two to gauge the final height of the patio area. Using a level, and a marker, mark the finished height on the air inlet pipe.
- Remove the pipe and use the air inlet cap to determine where the pipe should be cut. The cap’s opening should be just above the finished surface. Open the pipe and use snips to cut it.
- Being careful of any sharp edges, close the pipe and attach the cap. Insert the pipe into the elbow.
- Place another inch or two of loose gravel into the bottom of the fire pit, being careful not to push too much into the air inlets. Finish laying the blocks.
Build a Paver Patio

The last step in how to build an in-ground fire pit is creating the paved area. This will provide a solid surface for chairs and other patio furniture.
- Spread 4 inches of gravel base and about 1 inch of paver sand throughout the work area.
- Compact the area with a tamper until you have a firm base.
- Start laying pavers from the center of the fire pit outward. Pavers should slope away from the pit about 1 inch for every 8 feet. Create a mason’s line with stakes and string. Mark the height on the stakes as you go. Adjust the mason's line as necessary to maintain the proper depth and slope of the pavers.
- Fit pavers together snugly as you go. Cut pavers with a circular saw to fit as necessary.
- Spread a light layer of paver sand over the entire area. Use a push broom measuring your outdoor space.
Fire Pit Safety Tips

Enjoy your new fire pit, but keep yourself and your property safe. Here are some fire safety tips:
- Strong winds can blow sparks out of your pit and set wildfires. Check weather reports.
- Make sure your garden hose reaches your fire pit area. Or have a fire extinguisher handy in case of emergencies.
- Always put fires completely out. Spread out any hot ash or unburnt wood. Spray lightly with water to extinguish.
- Never use any lighter fluid or other flammable materials to light a fire pit.
- Always use a fire pit cover when not in use. This will keep out rain or snow.
- Keep children and pets at a safe distance.
Now you know how to make an in-ground fire pit. It’s a great way to improve your outdoor living spaces. Building an in-ground fire pit requires planning and time. Make sure you get all the tools and materials you need before you begin your project. When you’re ready to start, the Home Depot delivers
online orders
when and where you need them.