How to Build an Outdoor Kitchen

Last updated September 7, 2023
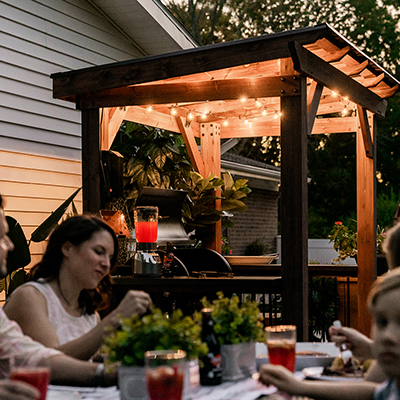
Outdoor entertaining is a fun way to connect with friends and family. A DIY outdoor kitchen makes it easy to prepare and enjoy meals outdoors in the fresh air. You can build an outdoor kitchen that's as well-appointed as your indoor one.
Read on for guidelines on how to build an outdoor kitchen with a straight counter and a side grill.
Difficulty:
Advanced
Duration:
Over 1 day
Table of Contents
Make a Plan
Gather Tools & Materials
Cut Boxes
Make Stretchers
Connect Sections
Attach Plywood
Make a Plan

Knowing how to build an outdoor kitchen starts with planning. Think about where you want your outdoor kitchen, the size you want to make it and the layout.
An ideal outdoor kitchen is set up close to your back door. Other spots to build an outdoor kitchen include near a deck or patio. If you have a large gazebo or covered pergola, these also work as places for your outdoor kitchen that can offer shade and protection from the elements.
The DIY outdoor kitchen in this guide gives you steps on how to build an outdoor kitchen counter frame using a box design. Making an outdoor kitchen counter frame this way means you’re free to frame more boxes for a larger counter or use two smaller ones. This construction design also offers several layout options:
- A straight counter with a grill in the center or on either side.
- A J-shaped counter with a sink at the end.
- A single-box counter and a double-box counter.
Tip: Before building an outdoor kitchen, decide the height of the countertop. The standard height for a countertop is 3 feet.
Don’t forget to consider the countertop itself and the base with the metal feet when figuring the total height.
Gather Tools & Materials

You'll be framing three wood boxes for this outdoor kitchen counter. For each box you'll need the following pressure-treated lumber:
- Eight 2" x 4" posts — countertop height (about 3 feet)
- Four 2" x 4" posts — cut to the depth of the kitchen counter
- Four 2" x 4" posts — cut 3 inches less than the width of the kitchen counter
Get additional pressure-treated wood for other parts of the counter:
- One 2" x 4" — cut to fit inside the bottom frame for cabinet support (if adding cabinets or a grill)
- Sheathing plywood
You'll need the following tools and materials:
- Exterior screws — 1-1/2-inch, 2-inch and 2-1/2-inch lengths
- Roofing nails
- Circular saw
- Drill
- Construction adhesive
- Masonry hoe
- Mortar mix
- Mortar trough or bucket
- Trowel for scratch coat application
- 1/2-inch notched trowel
- Pointed trowel
- Wet tile saw
- Tile edging (optional)
- Countertop
Protective gear:
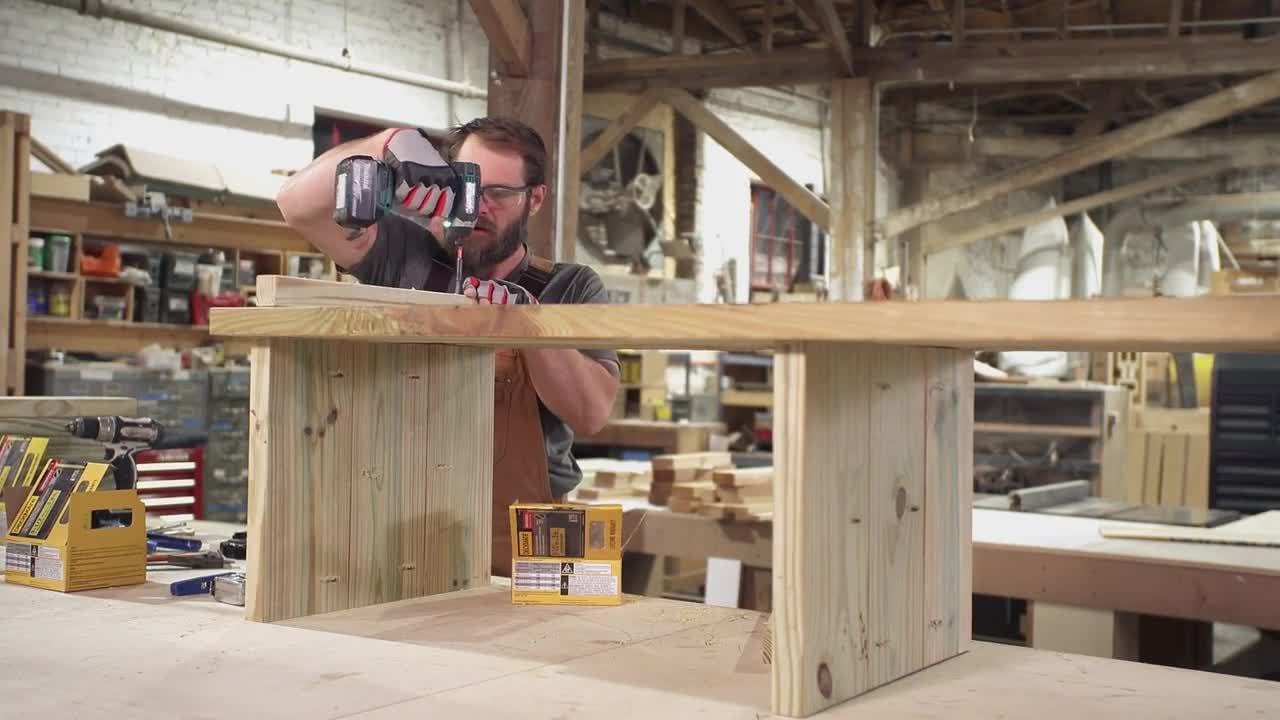
Cut Boxes

Here's how to frame a wood box section for this outdoor kitchen counter. (You'll need to build three of these.)
Make the posts:
- Cut eight 2" x 4" posts to match the height of the countertop.
- For each of the four posts, cut a notch. At both ends, use a circular saw to make a notch that’s 3-1/2 inches high and 1-1/2 inches deep.
- Fasten two of the boards together, side by side. Use 2-1/2-inch exterior screws.
- Continue to screw pairs of boards together until you have four double-boards or posts.
Make Stretchers

Stretchers are the boards outlining the kitchen counter. They help it to fit snugly.
Here's how to make them:
- Cut four 2" x 4" stretchers that match the depth of your kitchen counter. Consider the depth of any smokers, grills or sinks that you may be adding.
- Take two posts and insert the stretchers into the notches at the top and bottom.
- Screw the stretchers and posts together.
- Repeat with the other two posts.
- Make and add another stretcher across the tops of the posts.
Connect Sections

Next, build the counter frame. Outline the width with long boards:
- Cut two 2" x 4" to match the width of your kitchen counter, minus 3 inches.
- Use exterior screws to connect one post to another.
- Add one long board at the top and one long board at the same height as the stretchers.
- This will be the back of the counter. You should now have a rectangular frame.
- If you’re adding cabinets, fasten an additional 2" x 4" in the middle of the bottom frame.
- If you're not adding cabinets or inserting a grill, you'll need to address that space. Add another set of long boards across the other posts at the front of the counter.
Attach Plywood

Once you’ve built the three boxes for your frame, the next step in building an outdoor kitchen is to start shaping your counter.
- Using the deck screws, fasten the boxes together in a line.
- Screw metal feet to the corners of the frame. This will keep the wood structure of your DIY outdoor kitchen off the ground.
- Measure your frame sections, width and height. Check each one in case there are small variations.
- Take those measurements and cut sheathing plywood panels to fit over the frame.
- Squiggle a line of construction adhesive along where the panel will fit. This provides extra hold.
- Lay the panel in place over the frame.
- Press down on the plywood to spread the adhesive.
- Fasten the panel to the frame with 2-inch deck screws.
- Repeat with other plywood panels as needed.
- Continue until each side of the counter is covered with plywood.
- If you’re adding cabinets, leave that part open. You’ll add a door later instead of a plywood panel.
- Flip the counter over so it stands on the metal feet.
If you're not adding cabinets, go to Step 8.
If you’re adding cabinets:
- Construct plywood boxes that fit inside the frame.
- To hold them together, fasten them first with construction adhesive. Then add 1-1/2-inch deck screws to secure them.
- At the front of each cabinet box, add a flange. It should measure 1 inch wide and 1-1/4 inches deep.
You’re done with the cabinets for now. They’ll be added and attached inside the outdoor kitchen counter before you add the mortar.
Install Ceramic Tile

Decide on a layout design for your outdoor ceramic tile. Try a classic grid or add interest with a herringbone look. Make sure to dry fit your tiles before attaching them. Hold them up against the counter in the pattern you've chosen.
Once you've settled on a tile pattern, it's time to make the mortar and install the tiles.
In a trough or bucket, mix the powdered mortar mix and water. Make it spreadable and not too thick. When making the mortar, follow the manufacturer's instructions and wait time. The mortar is ready when it is firm to the touch. If it’s still wet or squishy, wait a little longer. It shouldn’t fall or drip off your trowel.
Apply the mortar to the kitchen counter:
- Hold a 1/2-inch notched trowel sideways. Tilt it to about 45 degrees.
- Drag the jagged edge firmly through the mortar, scoring it. You’ll see lines indented into the mortar.
- Run the trowel horizontally in long lines. The scoring lines should be parallel to the ground.
- If you can make it all the way around the kitchen counter in one pass, do so.
- If you need to make multiple passes with the trowel, that's fine. Just pick up where you left off and continue the lines.
- When you’re done, the counter will have 1/2-inch grooves scored into it all the way around.
- Let the mortar cure for one day.
Start with the tiles you’ll be setting along the bottom of the kitchen counter:
- Using your trowel, “butter” or spread mortar on the back of your tile piece. Apply 1 inch of mortar.
- Press a V-shape into the center mortar with your trowel.
- Skim excess mortar from the edges.
- Firmly press the tile into the mortar.
- If excess mortar squeezes out, scrape it back under the tile. Fill the gap between the tile and the counter, so it’ll be watertight.
- Continue setting the first row of tiles: Butter, lay, press and seal.
Tip: To protect the ground from mortar drips when building an outdoor kitchen, cover the area along the bottom of the counter with scrap wood.
Cut Tile to Fit

After your first row of tile is successfully laid, spread out from that initial corner. Think of working a section of a puzzle.
Continue the process of buttering and laying tile until you’re near the top.
- Avoid keeping all the tile in a perfectly straight line. The next row should have the seams in the middle of tiles in the row below.
- Don’t lay tiles over the flanges for the cabinets. The doors will go there.
If any tiles aren’t fitting together quite right, trim them:
- Use a wet tile saw to cut the tile.
- Be sure to wear a respirator and don't inhale the dust.
When all the tile is laid and set, let dry 24 hours.
Tip: If the tile didn’t set firmly, remove it. Butter and reset it. You need the wet and the semi-dry mortar together to get a clean seal. This prevents a loose tile from falling off later.
Add Countertop

Now that your outdoor kitchen counter is tiled, it's time to add the countertop.
Countertops are very heavy.
You’ll need a friend or two to help you move it.
- Add adhesive to the top of the outdoor kitchen counter.
- Lift countertop and put it in place. Make sure it is straight and level before pressing it into the adhesive. Secure the countertop with more adhesive or follow the manufacturer’s instructions.
- Add tile edging to sides and bottom of the piece for a finished look.
- If you have cabinets, now's the time to add the doors.
DIY Outdoor Kitchen Tips

Your DIY outdoor kitchen is almost ready for entertaining. Depending on your design, you can add a grill, sink or ready-made cabinets.
A few things to think about:
- Consider the appliances that will be a part of your DIY outdoor kitchen. Charcoal or propane grills are standard in most backyards, but your outdoor kitchen may include an outdoor refrigerator, pizza oven or even a smoker.
- Think of the patio furniture that complements the look. Building an outdoor kitchen also creates a place for relaxation, so choose patio furniture that’s sturdy and comfortable for your family and guests until dinner is served.
Now that you know how to build an outdoor kitchen, it’s time to start planning. Pick a spot that's both convenient and inviting. Decide on what type of outdoor kitchen layout you want. Choosing appliances and materials is one of the best things about designing an outdoor kitchen. A DIY outdoor kitchen can be customized in any way you’d like.
Feeling inspired and ready to begin building your outdoor kitchen? Use The Home Depot Mobile App to locate products and check inventory. We'll take you to the exact aisle and bay.