How to Install Track Lighting
Published April 1, 2024
Track lighting offers a way to get focused light from a single ceiling fixture. The track works with a narrow-focus bulb to spotlight a piece of artwork or other decoration. Track lighting can also serve as a wide-focus "wall washer" to bathe a wall in light. It can also add more light to a kitchen counter or reading nook.
This guide covers how to install track lighting using an existing, switch-equipped electrical box.
Difficulty:
Intermediate
Duration:
Over 1 day
Table of Contents
Track Lighting Basics
Track Lighting Types
Decide on the Track Lighting Location
Preparing to Install Track Lighting
Detach Wires From Previous Fixture
Install the Mounting Plate
Track Lighting Basics

A track lighting fixture features multiple lights along a track or rail. You can angle or adjust the lights so that they shine exactly where you want them to.
As you consider track lights, think about your lighting needs:
- Do you want to add more overall light to a smaller room?
- Do you want to spotlight a piece of artwork?
- Do you need task lighting in a room in your home, such as the kitchen?
The options to customize track lighting are countless. The track may be straight or curved. It can be flush with the ceiling. For spaces with high ceilings, the track can be suspended from cables to bring the light down into a room. With track connectors, you can join several tracks to fit long rooms or unique spaces.
The fixtures come in a variety of finishes. Before you install track lighting, decide on which style you’d like. Your track lights can match or complement your decor.
Some types of track lighting, called plug-in track lights, can even be plugged into an outlet.
Most track lights need to be hard-wired, however. The track lighting fixture is connected to an existing, ceiling-mounted electric box in your house.
Depending on where you live, you may need a permit for electrical work. Check the local building codes before you start installing track lighting.
If you are not comfortable working with electricity, hire a professional to install track lights for you.
Track Lighting Types

The three main types of track lights are H tracks, J tracks and L tracks. The three types are not compatible. If you have an H track, you can only use H parts. Only J parts can be used with J tracks. L parts must be used with L tracks.
Before installation, make sure your tracks and parts will work together. For the best fit, use parts from a single manufacturer, brand and model. Parts from different companies may not fit together.
Decide on the Track Lighting Location

Before installing, decide where you want to place the track lights.
At the mounting plate, measure to see how far the side of the track will be from the nearest wall. Mark the ceiling so the track will be consistently parallel to the wall. Use a framing square to draw lines if the track turns a corner.
Preparing to Install Track Lighting

- Before you begin installing track lights, you will need to shut off power at the service panel.
- After you have turned off the power, use a voltage tester to test the switch-equipped box to check that no live current is running through the wires.
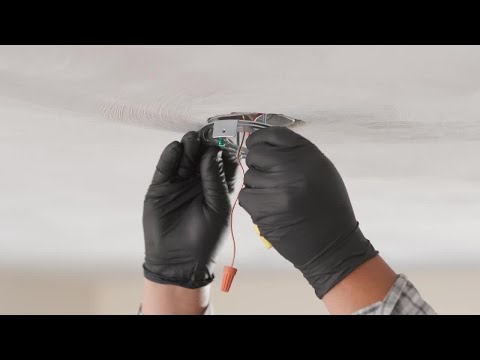
Detach Wires From Previous Fixture

If the ceiling-mounted electrical box still has wires attached to it from the previous fixture, you will need to follow these steps to remove them.
- Gently pull the wires downward and away from the electrical box.
- Detach the wires connecting to the existing fixture. To do this, unscrew the nut (yellow in this image), remove the wire that isn’t connected to the ceiling-mounted fixture, and then screw the nut back onto the wire that remains connected.
- Start by removing the black, load-bearing wire. Replace the wire nut to the wire coming out of the electrical box.
- Next, remove the white, neutral wire. Replace the nut onto the wire coming from the box.
- Finish by removing the ground wire, again replacing the nut onto the wire coming from the box.
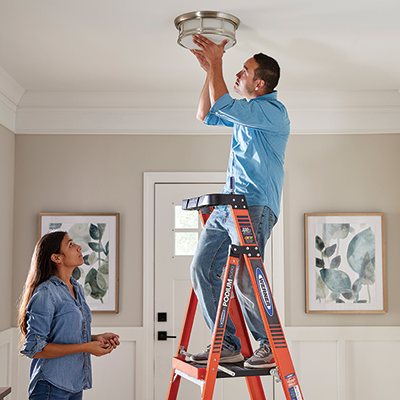
Install the Mounting Plate

To attach the track to the fixture, follow these steps as outlined in the video.
- Unscrew the screws on the new track’s mounting plate. Remove the mounting plate so it can be attached to the electrical box.
- As you place the mounting plate onto the electrical box, line up the tabs that will attach to the track light hub in the direction you prefer for the new track.
- Attach the mounting plate to the electrical box using long screws. Tighten the screws so the mounting is secured.
Connect the Wires

Now you need to connect the wires from the new fixture to the wires coming out of the electrical box on the ceiling.
- Wrap the ground wire around the loosened green screw on the mounting plate. Crimp it into place with pliers, and then tighten down the screw.
- Twist together the ground wires from the mounting and from the track light’s hub. Then attach the wire nut.
- Twist together the white neutral wires next, again securing the attachment with the wire nut.
- Twist together the stripped ends of the two load-carrying wires, securing them with a wire nut as well.
Attach the Track to the Mounting Plate

Now that the wires are connected to the new fixture, the next step is to secure it to the electrical box.
- Just as you gently pulled the wires out of the electrical box, carefully push each one back into the electrical box.
- Tuck the loose wires into the track light’s hub and slide the hub onto the mounting plate. Line up the tabs with the screw holes.
- Use screws to securely tighten the hub onto the tabs. The track lighting should now be snugly attached to the ceiling-mounted electrical box.
- Have a helper hold the track in place against the ceiling and centered on the mounting plate. Drive the set screws to anchor the track to the plate.
Secure the Track

Use a stud finder to locate joists. If the track is more than 4-feet long, have a helper hold one end while you work.
Snap the track onto the plate and drive a screw into every available joist. If there are no joists, drill holes every foot or so. Then, insert plastic anchors and drive screws into the anchors.
Twist on the Live-End Connector

Insert the live-end connector and turn it 90-degrees until it snaps into place. Align the connector's two copper tabs with the two copper bars inside the track. Snap the plastic canopy over the track and mounting plate.
Attach a Corner

You can buy connectors to make 90-degree turns, T- shapes or odd-angled turns. Slide the connector into the track that is already installed, slide the next track onto the connector and attach that track to the ceiling. Cover all open track ends with end caps.
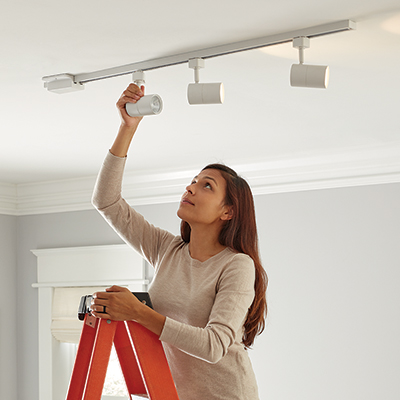
Twist the Lights In

One type of light twists into place in the same way as the live-end connector in Step 10. Another type has a metal arm that you need to twist to tighten.
Turn the power back on. Then turn on the switch. Once your new track lights are on, you can swivel and turn them for the best effect.
Knowing how to install track lighting gives you a way to spotlight an area of your home. Track lights can highlight anything from a painting in the living room to a kitchen workspace.
Ready to brighten things up with track lighting? The Home Depot delivers online orders when and where you need them.