DIY Rain Barrels

Last updated April 18, 2025
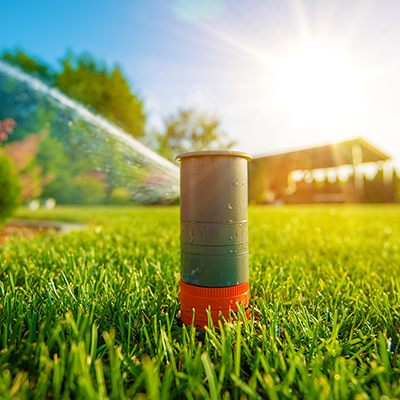
Don’t let your rainwater go to waste. Did you know that up to 600 gallons of water can be collected from just 1 inch of rain falling off a 1,000 square foot house? Start saving money and conserving rainwater by building your own rain barrel to water your landscape.
There are other benefits to having your own rain barrel. It reduces stormwater runoff and can direct water away from house foundations, potentially preventing basement flooding.
Difficulty:
Intermediate
Duration:
2-4 hours
Table of Contents
Choose the Location and Make Some Decisions
Gather Materials and Tools
Drill Holes for Spigot and Overflow Drain
Add Screen to any Openings
Install Rain Barrel
DIY Rain Barrel Maintenance
Choose the Location and Make Some Decisions

Before buying anything, choose the location for your rain barrel and decide how the water will be transferred from the barrel to the garden. Rainwater barrels are easy to find in sizes ranging from 40 to 80 gallons, but the average size for most households is 55 gallons.
A few questions need to be answered before picking a location:
- Is the spot already level?
- Is the elevation of the spot higher than the rest of the garden? (Gravity should do most of the work of moving the water.)
- Will you need to use a watering can to take the water to many separate locations, or would you like a pump to use a garden hose?
- Are your needs best served by a repurposed barrel, or would another durable container be better?
Our example will be set up to use a watering can for taking water to multiple potted plants. The barrel will be filled directly from the downspout. Downspout diverters are available that will allow the water into the barrel to be turned on and off as needed.
A watering can may also be filled using a siphon. This can be as simple as a 6-foot length of rubber hose or a kit can be purchased that includes a hand pump to start the flow. A siphon isn’t fast, but it might be a good way to “test the waters” before committing to drilling a hole in the barrel.
If using a siphon or pump, you may opt to dispense with installing a spigot altogether.
Gather Materials and Tools

Materials:
- Food grade barrel (If the barrel has previously been used, ensure that its contents were nontoxic)
- Rain barrel spigot kit or boiler drain and matching fitting or lock nut
- Silicone caulk
- Aluminum, stainless steel or fiberglass window screen mesh or drain hair strainer
- 1/2-inch screws: brass, stainless steel or exterior grade
- Flexible downspout adapter or downspout diverter
- Gravel (optional)
- Landscape timbers (optional)
- Concrete blocks and/or pavers (optional)
- Water pump or siphon (optional)
Note on tools: Woodworking bits and blades will easily cut most plastics.
Tools:
- Drill
- 3/4-inch drill bit or hole saw (Measure your spigot for exact size, then go about 1/8-inch smaller than the diameter of the threads)
- Driver bit for screws
- Jigsaw if barrel has non-removable lid
- Wrench or pliers for retaining nut, if needed
- Utility scissors to cut screen
- Caulk gun for silicone sealant
Note: Plastic barrels are usually made of high density polyethylene (HDPE.) Commonly available sealants and glues do not adhere to HDPE, so the screens and spigots must be attached by mechanical means. Sealants may compress to form a gasket, but cannot be relied on to act as an adhesive. Also, plumber’s putty can cause plastic to become brittle over time, so it shouldn’t be used in this project.
Drill Holes for Spigot and Overflow Drain

The drill bit should be slightly undersized for the spigot so its metal threads will bite into the plastic during installation. Drill just above the curve of the barrel. Apply sealant to the threads and flange, then screw it into the hole. Some force will be necessary to get the threads to start.
A thin-walled barrel will require a nut or fitting on the inside to support the spigot. If your barrel has a sealed top, a hole large enough for you to reach inside to tighten it will need to be cut. Consider a barrel with a removable lid, or cut away a portion of the top and cover it with screen. This will make a good inlet for the rain gutter.
A nut or fitting will be best served by a rubber washer rather than relying on caulk or sealant alone.
Drill an overflow hole hidden in the back of the barrel 3 inches from the top. Use a window screen or drain screen and sealant to prevent insects from entering the barrel. Attach with screws, as in the next step.
It may be beneficial to attach a pipe to the overflow hole to direct excess water away from the barrel.
Add Screen to any Openings

It is important to cover any openings with a screen that will allow water to flow while keeping it clean. This will stop insects and debris from entering the barrel. Most importantly, it will prevent mosquitos from entering the barrel and multiplying in the water.
On a related note, it’s important to deal with any standing water around your home during the warmer months when mosquitos reproduce. Mosquito eggs can hatch in a surprisingly small amount of water.
If the openings on your water barrel will be small enough, a tub strainer or drain cover can be used. Be sure to select one with a pattern that is small enough to keep mosquitos out.
For larger openings, cut a piece of screen to cover. The screen should be oversized, large enough to fold the edge and allow room for screws and sealant. Drive several screws through the tripled-over folded edges. After screwing in the screen, go around the perimeter with a bead of sealant and smooth it with a gloved finger. This will improve the appearance and ensure that it encapsulates the mesh and contacts the barrel. As stated previously, it will not adhere to an HDPE barrel, but it should fill any gaps between the screen and the opening.
Install Rain Barrel

If the ground is level or if extra height is needed, a barrel can be elevated by building a platform for it. This platform must be capable of supporting the weight of a barrel full of water, which would be close to 400 lbs. for 50 gallons. The barrel in the example is on a bed of gravel that is supported by pressure treated lumber. A suitable platform can be easily constructed with concrete blocks and large pavers or built with heavy, pressure treated lumber.
Attach a flexible downspout to your rain gutter using the manufacturer’s instructions. Cut a tab on one side of the downspout outlet. Secure it with a screw through the tab. Alternatively, a water diverter may be installed.
DIY Rain Barrel Maintenance

Regular inspection of your barrel keeps it in tip-top shape so you can continue harvesting fresh rainwater. Make it part of your routine to check your rain barrel on a semi-regular basis. Ensure all the fittings are secure and your lids or mesh are working properly and remove any debris that’s collected inside.
Barrels exposed to direct sunlight are a breeding ground for algae. Select a darker rain barrel or give your rain barrel a coat of black paint to prevent sunlight from encouraging algae growth.
If you notice any algae forming in your water barrel, empty the barrel out and wash it with a couple capfuls of bleach mixed in a gallon of water. Scrub the barrel, then rinse it thoroughly before using it to collect rainwater again.
Rainwater barrels have become a popular garden staple over the last few years due to their simple set-up and payoff in water conservation. Storing rainwater is a good alternative to dipping into your water table for outdoor tasks like landscape irrigation, washing the car and giving your dog a bath. If you haven’t taken the plunge yet, try this guide and have a ready-to-use rainwater barrel in no time.
Ready to start your project? Start planning your rain garden today with The Home Depot Mobile App, where you can find the tools to make your project easier. Locate products, start a shopping list and check product availability, all from the comfort of your patio.