How to Build a Fence
Last updated April 30, 2025
Fencing can help increase home security and provide privacy. Popular fence types include privacy, wood, split-rail and basket-weave. It’s easy to learn how to build a wood fence using either fence “pickets” or ready-made panels. Vinyl and metal fences typically come as kits with pre-assembled panels and matching posts. Learning how to build any fence requires careful planning and construction. Read on for steps on how to build a wood fence from scratch.
Difficulty:
Intermediate
Duration:
Over 1 day
Table of Contents
Plan Your Fence
Measure and Lay Out the Fence Posts
Dig Holes
Position Posts in Concrete
Attach Rails or Panels to Posts
Attach Pickets to Rails
Plan Your Fence

You will likely need a permit before you build your DIY fence. Check local building codes concerning fence restrictions such as height and location. For example, backyard fence height is often limited to 6-feet or 8-feet.
- Choose building materials carefully. If you’re thinking about how to build a wood fence, consider cedar. A cedar fence can last up to 40 years when properly installed and maintained.
- Determine your property line. Your local assessor’s office can provide information on your property line.
Think about where you want your fence in relation to your property line. - Review any fence plans with neighbors who share your property line to head off any future disputes.
- Determine where you want to locate your gates. Spray paint parallel lines on the ground to indicate the gate placement. Measure and document all gate sizes. Gates can be made out of partial panels or by assembling the rails and pickets to blend with the rest of the fence.
- Measure the perimeter of the fence area to get the total linear footage.
- If building a fence using pre-assembled panels, divide the linear footage of fencing by the panel length (in feet) of the style fence you selected. This will determine the total fence panels and posts you need. Remaining footage will require a partial panel. Add two to the number of panels to determine how many posts you will need.
- If building a fence using individual fence boards or pickets, determine both your picket width and the spacing between the pickets. For example, if you have a 5-inch picket and you want a 3-inch spacing between pickets. The total space needed for each picket and its space is 8-inches. Convert the linear footage of the fence to inches (linear footage x 12). Divide this number by the picket width (in inches) plus spacing inches. For example, if you are building a fence that has a linear footage of 120-feet, 120 x 12 = 1,440 inches. Divide 1,440 by 8 = 180 pickets. Next, determine the number of posts you will need. Divide the total linear footage by 6-feet or 8-feet and add 2.
Measure and Lay Out the Fence Posts

Begin installing the fence by laying out the fence perimeter using batter boards and a string line. Mason’s line is a good choice because it is strong and flexible enough to be pulled tightly. Run the string line to represent either the outside or inside perimeter of the fence. If running your fence parallel to the house:
- Start by running a string line parallel to the house first. Then run perpendicular lines to complete the perimeter, crossing the string line at the corners.
- Square the corners using the 3-4-5 method. Measure 3-feet from where the lines intersect and make a mark on the string line. Measure 4-feet along the line that runs perpendicular to that line. Make a mark. Measure between the 3-foot and 4-foot marks. Adjust the line until the marks are exactly 5-feet apart.
- Mark fence post locations using spray paint. If building the fence using pickets, position the fence posts every 6-feet to 8-feet along the line where you want the fence to stand. Make sure the spaces between the posts are consistent.
Dig Holes

Dig holes using a post hole digger or two-person auger. You can rent an auger and make quick work of digging the post holes. When using an auger, avoid any areas marked by the utility company.
Dig holes about a third as deep as they are tall. For example, an 8-foot post needs a hole at least 2 1/2-feet deep, plus add about 4-inches for gravel. The diameter of the hole should be three times the width of the post.
In colder climates, dig below the frost line. Look up the frost line in your area online or contact your local building office. Not digging sufficiently below the frost line will cause the posts to heave out of the ground.
Tip: Call 811 before you dig. Your local utility company will mark the location of any water, gas, and power lines in your yard. To be safe, hand dig any holes that are within 18-inches to 24-inches of a marked utility.
Position Posts in Concrete

Once the holes are dug, it’s time for the next part of learning how to build a fence.
- Pour 3-inches to 4-inches of gravel down the base of the hole for proper drainage. Tamp the gravel using the bottom of the post or a tamper.
- Prepare the concrete mix according to the manufacturer’s direction.
- Position the post in the middle of the hole on top of the gravel. Pour in concrete. Fill the hole to within 6-inches of grade. Slope the concrete away from the post. Fill the remaining area in with dirt once the concrete sets.
- Brace the posts plumb using 2-foot by 4-foot boards and stakes. Allow the concrete to set per the manufacturer’s instructions. This may take several days.
Attach Rails or Panels to Posts

Once the concrete has cured, it's time to build the fence.
- Attach the wood fence rails or wood fence panels to the posts. Attach the rails to the posts. The widest part of the rail should register on the post.
- Secure each rail with No. 8 3-inch deck screws or galvanized 10d by 3-inch nails. Power drills or claw hammers are effective tools for this step. Use two fasteners per post. Pre-drill for the fasteners when attaching the ends of the rails to the posts to avoid splitting.
- Use a level to keep the rails running in a straight line. A string line equipped with a line level and pulled tightly is an effective way to get a level line. This method works well over long runs such as one corner post to another. Use this level line as a reference point. Measure down from it for each of the rail locations.
- Run a top and bottom rail for fences up to 4-feet tall. Add a third rail in the middle for taller fences. Keep the rails down about 6-inches from the top and up about 6-inches from the bottom.
- Rails should start and end in the middle of posts. Stagger these joints so that they aren’t on the same post for the rails. This will improve the overall strength of the fence.
- If you’re using panels, skip to step 7 after you've secured them to the posts.
Attach Pickets to Rails

Once the rails are in place, begin attaching the pickets to the rails.
- Use a level to plumb the first picket. Use a spacer block to set the consecutive pickets. Use the spacer block at the top, middle, and bottom of each picket. Check the pickets occasionally using a level. Adjust as necessary to keep them plumb.
- Secure each picket with No. 8 1-1/2-inch deck screws or galvanized 1-1/2-inch nails. Adjust the fastener length relative to your picket thickness and rail thickness. Make sure it does not come through the rail.
- Depending upon the width of your picket, use 2 or 3 fasteners per rail.
- On a sloped yard, attach a picket at each post. Run a string line from the top of one to the top of the other. Use this string line as a guide for the height of your pickets.
Attach Post Caps

To finish building a fence, attach a post cap to each of the posts. Tap each cap lightly with a rubber mallet. Each one should fit snugly onto the post. Tack the cap in place using a galvanized finish nail.
Stain or Treat the Wood

The last part of learning how to build a wood fence is staining or treating the wood.
- Apply wood preservative around the base posts to prevent the wood from rotting.
- If the fence is built of pressure-treated wood, wait until the wood has fully dried before applying stain or finish. Pressure-treated wood should not need additional preserving or water-proofing.
- Apply new coats every 2 to 3 years. Clean the fence with a wood or fence cleaner the day before application.
- Refer to stain, finish or paint manufacturer instructions for specific directions.
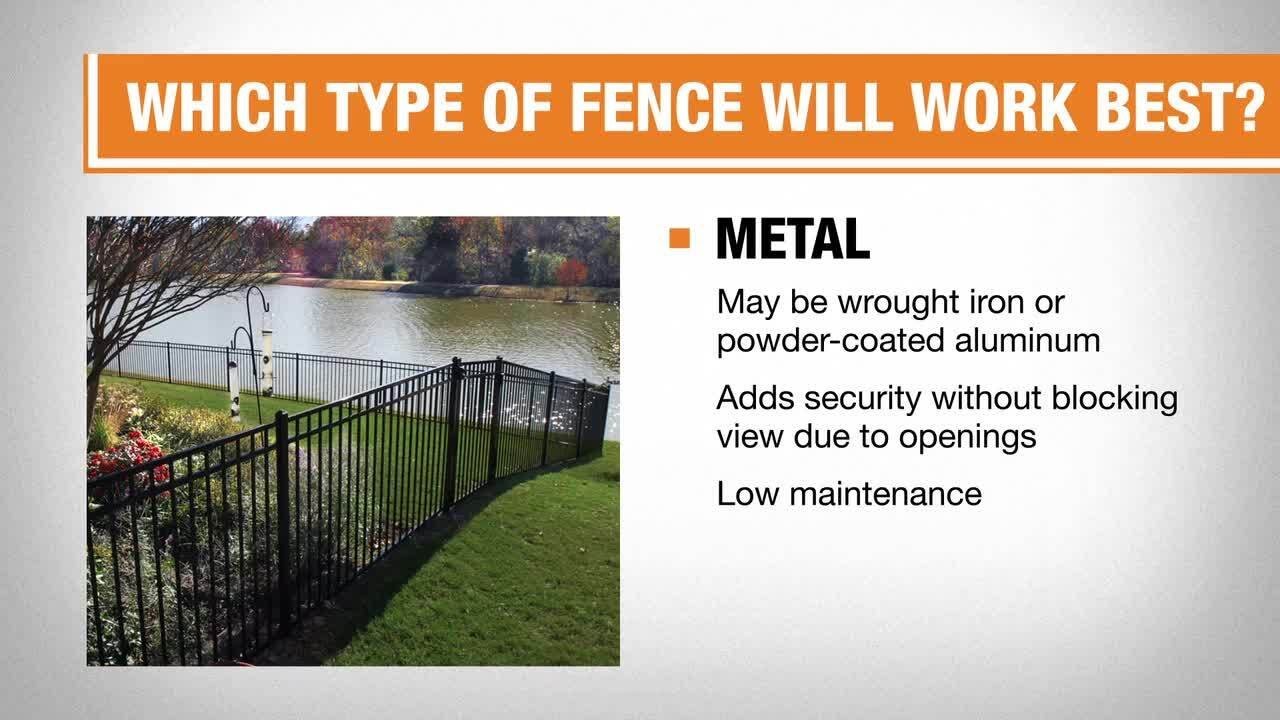
Knowing how to build a fence starts with a fair amount of preparation and planning. Fences can be made from such materials as wood, vinyl and metal. When installing a fence, carefully plan the type of fence you need that fits your home and neighborhood.
A beautiful wood fence can give your home more curb appeal. Don't worry if you don't own all the tools needed to complete this DIY fence project. Rent tools from us. If you'd prefer to have a professional build a fence on your property, we have fence installation services.
Related Products
Related Guides
Leave Your Next Project to Us
Professional Fence Installation
- Expert Fence Contractors Do It For You
We hand-select licensed and insured fence contractors in your area who are known for their experience, knowledge, and superior service.
- How Our Fence Installation Service Works
Start with a free in-home consultation. Next, we’ll measure your yard and discuss product options based on the size of your yard, the material you’re interested in, and any other wants and needs for your new fence. After that, we’ll schedule a date for your installation, pull any permits you might need, and order your materials. Sit back and relax while you enjoy full-service installation of your new fence.


