
A Note From The Home Depot
No need to waste money on the same old boring board games. Head over to your local Home Depot to grab just a few items, like cardboard, paint, and glue to create fun DIY projects like this one Serena Appiah of Thrift Diving made for her kids. She was able to DIY this cool tabletop tennis game, check out the step-by-step details of how she did it below!
Playful competition between siblings and family is such a fun way to spend an afternoon! With this DIY mini table tennis game, made with everyday items found around the home, such as cardboard and hot glue, your family will have hours of fun without spending any money! For this project, we’re using a foam ball found around the house, but feel free to use a rubber ball or inexpensive small table tennis balls.


Step One: Cut Out a Blade Pattern

Fold a piece of paper in half, approximately 2” wide and 5” long. Using a pencil, draw one half of the shape of a blade. This will ensure that the blade will be consistent in shape. Use scissors to cut it out, then unfold. Make small adjustments to the shape by re-folding the paper and trimming as needed.

Once the shape has been cut out and you like the shape, open the paper to reveal an evenly shaped blade. Trace the blade pattern onto a piece of thick cardboard box, and then cut out carefully with a utility knife. Scissors can be used, but utility knives provide the cleanest edge when cutting out cardboard. Place extra cardboard underneath to prevent cutting the table surface. Cut out two blades.


Step Two: Cut out the Rest of the Cardboard Pieces
The rest of the pieces are simple straight cuts. See the pattern pieces below and their measurements. Use thicker shipping cardboard boxes for the blades, handles, and net, which need strength. Use thinner cereal box cardboard to create the posts and bases, which is easier to bend and fold.

")
")


Step Three: Tape off the Blades and Paint
Using painter’s tape, tape off the bottom sections of both blades on both sides, and then using craft paint, paint each side of the blades. Once the paint dries, peel off the painters tape to reveal clean edges on the front and back of each blade.


Step Four: Hot Glue the Blade to the Handle
Little hands need something thick to hold for grip. To create the paddle, glue the small insert to the back side of one handle pieces using hot glue, lining up the bottom edges. Next, use hot glue to secure the blade to the handle
Finally, hot glue the other side of the handle to the blade, to create the paddle. The small insert should be sandwiched in between the two handle pieces, to add thickness and stability to the handle. Add craft paint to the handle to cover any unpainted edges.

Step Five: Paint the Net
Using green craft paint, add a couple of layers of paint. Once it’s dry, use white craft paint, or a white paint pen to draw a grid to create the net. Use a ruler to help keep the lines neat and even.


Step Six: Fold and Attach the Posts to the
Using your fingernail or the hard edge of an object (such as a nail), gently score the lines in the cardboard which will help the cardboard to bend easier. Fold the posts along the fold lines. Trim the edges of the cardboard as needed so that the posts fold up neatly and evenly. After the pieces are folded, use hot glue to secure the posts to each side of the net. Paint the posts with 1-2 coats of craft paint.


Step Seven: Paint, Fold, and Attach the Bases
To keep the table tennis net from falling over during a game, a base will need to be added. Using the pattern dimensions above, cut two pieces of thin cardboard from cereal boxes, and score along the lines so that folding is easy. After scoring, add 1-2 coats of craft paint to match the posts. Once the paint has dried, use hot glue gun to secure each post to the base.


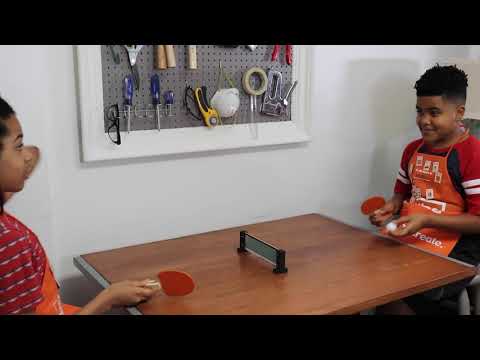
Step Eight: Play a Friendly Game of Mini Table Tennis
Now that everything has been constructed, let the games begin! Grab a white board or make your own DIY chalkboard with scrap wood and chalkboard paint to keep score!


Whether you make this mini table tennis game with a wooden Kids Workshop Kit (available in limited supply from The Home Depot), or you make your own with cardboard and hot glue, this game is sure to create hours of friendly competition!
If you enjoyed this mini tennis table, be sure to also check out other fun DIY Kids Workshop activities, tutorials, including a Kids Ladder Truck, and more!