How to Refresh your Kid's Room with Wallpaper
Last updated August 21, 2024

Charlotte Smith shares her chaotic and color-loving adventures in DIY and design on her blog, At Charlotte’s House. Charlotte writes about fixing up her 1850’s historic home, her five small children, and bringing flea market and vintage décor into a modern home. Her design style is fun, personal, and… sturdy! Charlotte has appeared in print and online in Better Homes and Gardens, Fairfield Magazine, Houzz, Good Housekeeping and more. Each month you can catch her on News 8’s CT Style and on WWLPs Mass Appeal. Other on-camera appearances include Rachael Ray, Flea Market Flip and the Hallmark Channel’s Home and Family show.
A Note From The Home Depot
Give your child an oasis of their own—with custom design splashes–with the help of The Home Depot. Watch as Charlotte Smith of At Charlotte's House weaves pops of color and fun wallpaper into her daughter’s room in creative ways. Then visit Home Depot to stock up on your room-makeover supplies!
Table of Contents
Using Wallpaper in Unique Ways!
Step 1: Decide Your Size
Step 2: Measure Out Your Wallpaper
Step 3: Draw the Arch and Cut Out the Paper
Step 4: Paste Wallpaper on the Wall
Step 5: Wallpaper on the Floating Shelves
Using Wallpaper in Unique Ways!
We hung wallpaper in my daughter's room in fun and simple unconventional ways.

I love a wallpaper moment, but my oldest daughter wasn't as enamored with the idea. Because she didn't want to have wallpaper all over her room, we decided to bring it in in smaller, more specific ways—and she loves it! We used this fun graphic paper from Home Depot to make her both a headboard and some patterned floating shelves.
(I suggested covering her desk also, but she said no thank you.)

Step 1: Decide Your Size
Once we’d moved her bed out of the way, we measured the wall and figured out how wide and how high to make our wallpaper arch. Eleanor likes her headboard, so we wanted the arch to be tall enough so she could keep her headboard if she wanted.

Step 2: Measure Out Your Wallpaper
We found a floor area downstairs that was just large enough to unroll our wallpaper. We taped it in place, matched the pattern, and rolled it out enough to cover the area we’d measured upstairs. I used green Frogtape to hold the paper in place but should have used their yellow tape for delicate surfaces to be safe and to prevent any tearing.

Step 3: Draw the Arch and Cut Out the Paper
With the paper lined up, I tied a piece of twine to a thumbtack and had Eleanor hold it in place in the center of our "headboard." I tied a pencil to a length of twine the same length as our headboard radius. With Eleanor holding the thumbtack steady, it acted as the center point so I could stretch the twine taut and draw an arch. We untaped the paper, drew straight lines on either side, and carefully cut it out.


Step 4: Paste Wallpaper on the Wall
Upstairs in the bedroom, we measured and lightly marked where the headboard needed to go with a pencil so we would have guidelines. Eleanor was in charge of drawing the arch this time. We used a wallpaper paste
that gets painted on the wall first, then carefully smoothed the first strip of our wallpaper headboard in place. It's always a good idea to use a level to draw your first vertical guideline.


Our headboard was only three strips of wallpaper, so Eleanor helped smooth the rest in place, and I showed her how to look for air bubbles and pull them out toward the edges with our plastic scrapers.
To clean up any leftover pencil marks, I used a sponge along the edges of the headboard.

Step 5: Wallpaper on the Floating Shelves
For the other side of the room, Eleanor asked for some floating shelves, and since they are plain white, I suggested maybe bringing the wallpaper onto the front of these, as well. Eleanor really liked the idea, so we measured our paper and centered it on the pasted shelves. We’re only covering the front faces of the shelves to save paper but also to make it so we could still wipe down the top shelves if needed which would not be possible with wallpaper on there. We learned after installation, that we should have lightly scuffed up the melamine shelves. The paste wasn't strong enough to hold the paper in place so we ultimately just used double stick tape which worked just as well.

Step 6: Hang the Shelves
The shelves were pretty simple to hang. They have a weight limit of 15 to 20 pounds each and mount on plastic anchors. Eleanor knows not to load them down with lots of books and is excited to display some of her artwork and favorite things.


To make this makeover feel a bit more special, we also grabbed her a new loveseat
and a few new lavendar pillows.
Of all my children, she spends the most time reading or drawing up in her room, so I love being able to give her something special that she loves.


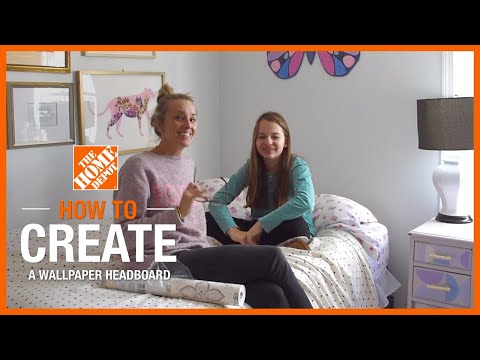
Head over to Home Depot for more Kids Workshop ideas and a video tutorial!

This post was created in partnership with The Home Depot. The author may have received compensation for this article and associated images or video, potentially in the form of products and/or services. All expressed opinions and experiences are the author’s own words.