Summer Kitchen Refresh

Last updated February 18, 2026

Katie Shears is a Nurse Anesthetist (CRNA) who has dreamt of renovating a home for as long as she can remember. She and her husband purchased their first home and it needed a ton of renovations. They had very little idea as to what they were doing, but wanted to dive in headfirst, so what better time to share her DIY journey? She started her Instagram page @florencerevival and now years later, she’s built a community bigger than she could have ever imagined. Together (with Teddy, their German Shepherd “supervisor”) they’re tackling renovations on their first home, a 1929 Tudor Revival, in the heart of Tulsa, Oklahoma.
A Note From The Home Depot
Looking to revamp your kitchen space? Follow along with Katie of Florence Revival as she documents her own journey in refreshing her kitchen. From design decisions to practical solutions, dive into her experiences and gain inspiration for your own project. Keep reading for a few tips and tricks on how she did it!
Table of Contents
Summer Kitchen Refresh
Benefits of a Kitchen Refresh
Existing Space
Kitchen Refresh Goals
Mood Board
Wall Repair
Summer Kitchen Refresh
The kitchen is the heart of the home but is a space we often overlook and neglect. This quick kitchen refresh is all about giving a very achievable update to the space that we use the most.
Kitchens aren’t just for cooking meals. This is where people come together. It’s where we communicate with each other, promote our physical well-being through nutritious meals, fellowship with friends, and celebrate all things big and small.

Benefits of a Kitchen Refresh
While growing up, our kitchen was the hub of our home. The kitchen was where our days started and ended… and as adults, none of that has changed. We create meals here that fuel our minds, bodies, and spirits. We taste-test chips here and laugh about Teddy’s antics. We make our coffee and talk about our upcoming day. We lean on the counters and chat with our friends. We walk through this space every time Teddy wants to go outside to bark at a squirrel. We run through the kitchen on our way out in the morning and drag ourselves back through the door after a long 12-hour shift at the hospital. It’s the last thing we see when we leave, and the first thing to welcome us back home.
Our kitchen has had some updates, but it still wasn’t quite working for me – it needed a bit more function in order to work as a proper entryway, and it was lacking the life and personality that I’ve worked hard to infuse into the other parts of our home. So when The Home Depot asked if I wanted to join them for #THDBuildYourSummer, I was all in to figure out this kitchen refresh. No matter what I’m looking for – paint, painting supplies, tools, smart home devices, appliances, or even decor, The Home Depot is my go-to place, and they definitely had everything I needed for this summer refresh!
Existing Space

I love the harlequin-painted floor and the amount of natural light that I get in this room. I love the color scheme and the new lighting that we’ve put in. This kitchen
looks
pretty good, but the old fridge malfunctions often (requiring me to defrost the entire thing every few months). I’ve never been able to figure out what to do with the empty back wall, and I have absolutely nowhere to put all of the tiny things that need to go in and out of the house regularly other than dumping them on our limited counter space.
When you don’t have a huge house (that’s most of us), every bit of space needs to work for you, so my hope was to do a kitchen refresh that fixed the pain spots that we have here… and then get to enjoy a bit more beauty and function in our everyday lives!
Kitchen Refresh Goals
I stay very busy with my career – just like most of you. Good news: all projects don’t have to be epic or take months in order to make a huge difference in both the aesthetic and practicality of our homes! This is my wish list of items that would make my kitchen work better for our family:
- Organizational Solutions
- Live Plants
- Reliable Fridge
- Aesthetically Pleasing
Mood Board
I like to start a project with a mood board, and this is what I mocked up to let me visualize approximately what I was looking for with the finished project. Although you can definitely skip this step, or do something much more simple, having an idea before you start will save you a lot of indecision later!

I already had an idea in my mind of what I wanted. I first taped up approximate outlines with Painter’s Tape and edited things a few times. Since there were already holes in the wall to patch, I decided to go ahead and temporarily put things up on the wall and play around with them before I made the wall pristine. As it turns out, it was a good idea, because I made some edits between taping and the mockup, and then a few more before the final product!

Wall Repair
The first thing that I did here was work on the walls. With older houses, you generally have to do some work to get your space back to a blank slate. In this case, we needed to do a lot of wall patching. We had some random holes from various artwork and hooks I’ve tried on the empty wall, but also a large drywall patch from getting a new electrical panel last year.
The small holes were easily filled with spackling. For the drywall patch, I had to do several layers of drywall compound, with dry time and wet sanding between layers. In other words, if you know you have any drywalling in your project, start that part a few days ahead!

Painting
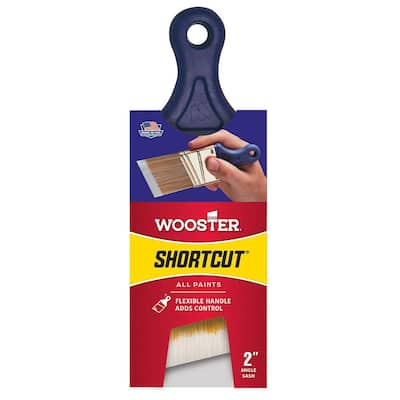
Next, it time to was give the walls and trim a good cleaning. Cleaning will ensure the paint sticks over time. I then used Caulk where the baseboards met the wall to make sure it looked seamless. After making sure everything was nice and clean, it was time to paint. Using my favorite Wooster Paint Brush, I painted everywhere the roller brush wouldn’t reach. This is called “trimming out.” Once that was done, I moved on to painting the rest of the wall with a roller brush. I made sure to take off the covers for my outlets and switches to ensure they didn’t get any paint on them.


Hanging Things Up
And then it was time to hang up my command center! I used a laser level (you could use a regular level) to ensure everything is super crisp and looks great. Just use a Ladder when you’re working on tall things and a step stool for everything else! It’s best to secure anything you hang into a stud. If you can’t find a stud, opt for an in-wall anchor.


Making a Bench
I love a slightly rustic bench, and while you can buy them, making them is easy and totally doable – even with limited supplies or experience! I’ve made these in varying sizes, and they work so well anywhere I put them! Making it yourself makes this a very affordable project – I used redwood that I sourced at my local Home Depot.
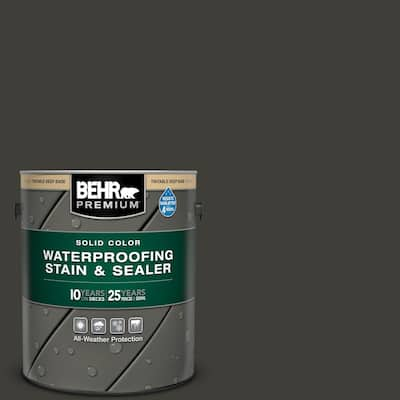
I used 2×6 and 2×2 lumber for the bench. The legs were cut at a 10-degree angle, and I attached everything with pocket hole screws and wood glue. I gave it a little distressing with my reciprocating saw and then finished it off with Behr Waterproof Stain and Sealer.


Kitchen Refresh Reveal!
Let’s chat about everything! I’m so excited about how everything came together.
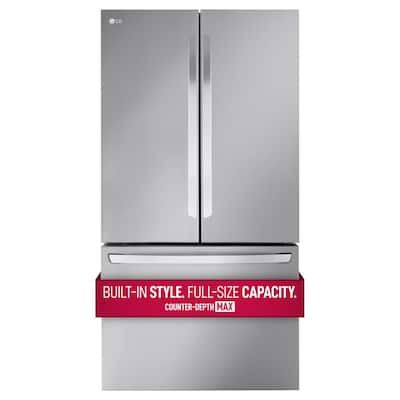
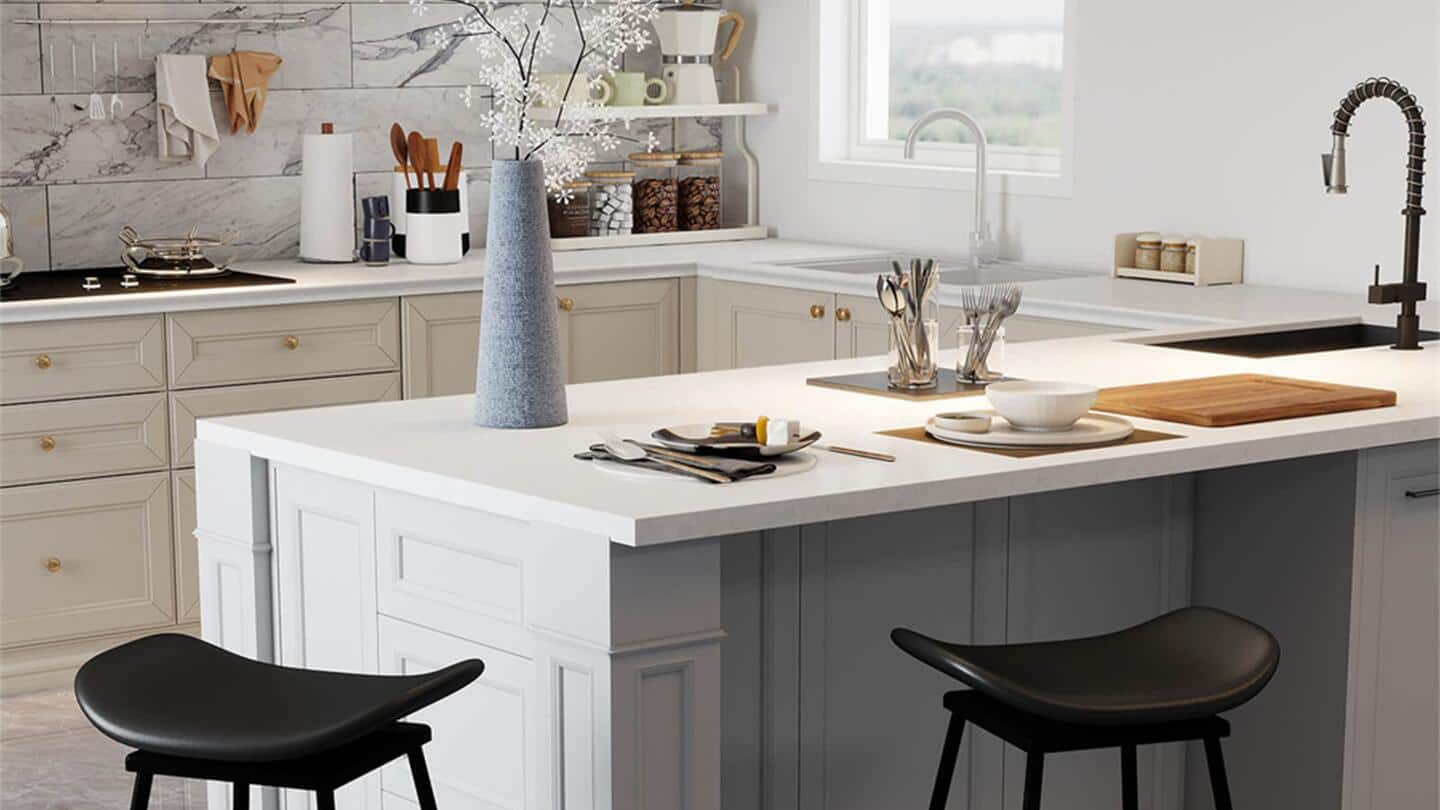
Refrigerator
First of all: the new
LG French Door Refrigerator. I’m obsessed with it. It’s cabinet width, stainless steel, has a water filler on the inside of the fridge (hello, clean lines on the doors), and an icemaker in the freezer. I’m so excited to not have to constantly defrost my fridge. My new fridge is both beautiful and reliable!


Paint Updates
I taped off the original dark wood on the windows and gave it a much-needed facelift with
satin paint. I’m really impressed with how much brighter the kitchen looks by doing this! Because I wanted the outdoors to be the focal point (not the window grid), painting the grid the same mushroom color as the trim allows your eye to skip past it.
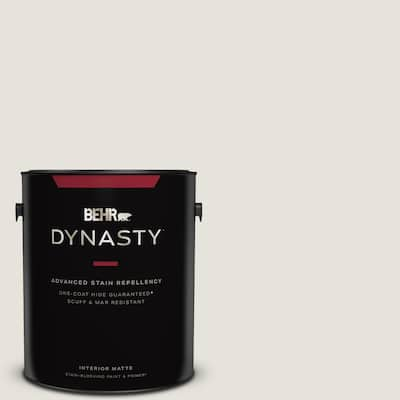
Speaking of paint, did you notice that I decided to also paint all of the walls the same color as the cabinets and trim in order to really embrace the tone-on-tone vibe? If you’ve been a long-time follower, you know that
Behr paints
are my forever choice. Behr Marquee White Matte Paint & Primer covers so well, and as someone who isn’t a fan of painting multiple coats, this product is definitely the hero of this project for me. I used one coat on the walls, and only needed one coat on the raw wood door! True one-coat coverage! That’s insane, so this is a high recommendation from me.


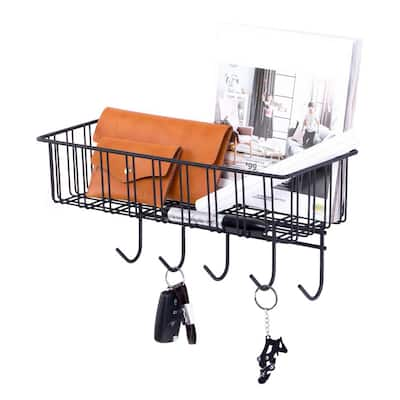
Command Center
Having a command center was really important to me. I wanted there to be a good mix of form and function – and at last, this empty wall transformed into exactly what I wanted for that.
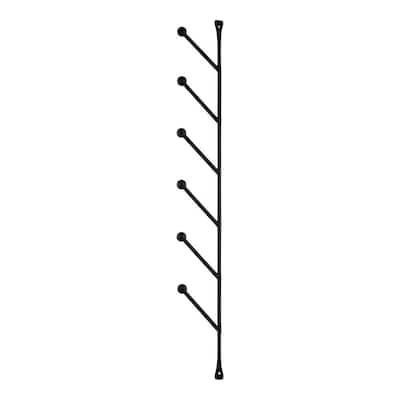
A
Vertical Hook Rack holds hats and jackets, with a
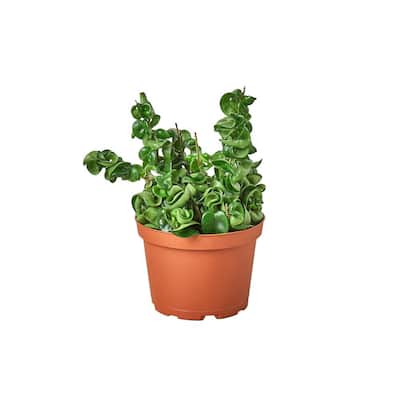
Woven Basket of greenery below. I chose a
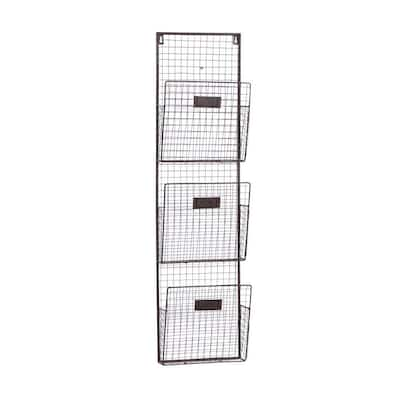
vertical stack
of three Magazine Baskets that can hold mail, magazines, or even folders with frequently accessed information! The
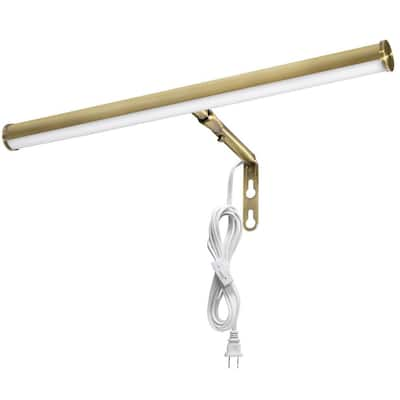
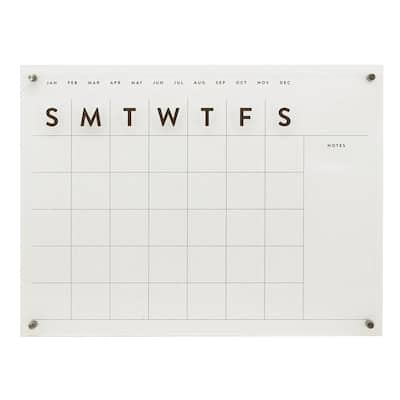
Calendar is modern and simple, and I absolutely love thePicture Light above it – lighting makes every space feel more intentional. I added a
Metal Organizer Rack to hang keys and store small items. Completing the wall is one last larger hook to hold Teddy’s leash or a towel for Teddy’s wet paws.

DIY Bench
This DIY bench I love. The
dark solid wood stain
grounds the space. I gently distressed it
just enough
so that it fits with the age of our home. There’s enough room to sit to tie your shoes or store a few items on/underneath but is narrow enough to not clog up the walking space. And it’s the perfect spot for the cute little plants that I found at The Home Depot. This was SO easy to make, and it’s a classic piece that could go almost anywhere in our house.

Little Details
I truly believe that the tiniest details make a space. For example, I could have placed a basic key hook rack here, but
this option
allows me to also place practical items in the top rack (notebooks, a snack for work, etc.) or even little pieces of artwork that I can switch out according to seasons or mood! And my favorite feature?

Nest Thermostat
Last but most definitely not least, we were really excited to add a smart thermostat. Our A/C isn’t wired to the kitchen, so we couldn’t add this
Nest Thermostat to our command center, but because we have remote access to the Nest app through WIFI, it doesn’t even matter! The installation was quick and easy, and it’s so pretty. Ugly thermostat, you’re out forever.


That’s it guys! For a space that we walk through many times a day, and can view from multiple rooms, this little kitchen refresh has made SUCH a difference. Before, it was just dead space. Now, it’s fully functional and beautiful. And it didn’t take me weeks to complete. I did some wall patches (that I needed to do anyway), some paint touchups, small DIY projects, hung items, and finally invited nature inside by adding multiple live plants. That’s IT!
Sometimes stepping back and focusing on one small space can make a bigger impact than you would have ever thought. You don’t need a huge budget or a lot of time to make an immediate change in your home. Nothing in this project required any advanced tools or skills – not to mention that this simple weekend project has given us an instant and long-lasting mood boost!


This post was created in partnership with The Home Depot. The author may have received compensation for this article and associated images or video, potentially in the form of products and/or services. All expressed opinions and experiences are the author’s own words.