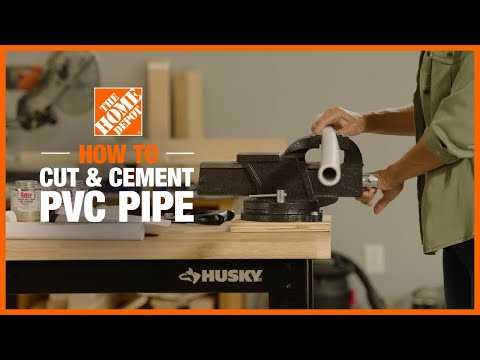
How to Cut PVC Pipe
Last updated September 7, 2023
ABS, CPVC and PVC are common types of rigid plastic pipe commonly used in home plumbing systems. The tools and techniques used to cut and prepare these pipes are similar. This guide outlines how to cut rigid plastic pipe by choosing the best and safest methods based on the different pipe sizes.
Difficulty:
Intermediate
Duration:
Under 2 hours
Table of Contents
Choose Your Pipe
Choose Your Cutting Method
Using a Hacksaw
Using Scissor or Ratchet-Type Cutters
Using a Miter Saw
Prepare Pipes and Fittings for Connection
Choose Your Pipe

- PVC stands for polyvinyl chloride. Use PVC pipe
for cold water, irrigation, main gas lines and drain-waste vents. PVC can become brittle with sun exposure. It’s available in 10-foot and 20-foot lengths that range from 1/2- to 6-inch diameters. Connect lengths for longer stretches with primer and solvent cement or push-to-connectPVC fittings . - CPVC stands for chlorinated polyvinyl chloride. It’s suitable for hot and cold water, making it a good choice for residential plumbing. CPVC pipe is available in 2- and 10-foot lengths with a diameter range of 1/2 to 1 inch. Join primer and solvent cement or push-to-connect fittings to connect lengths of pipe.
- ABS stands for acrylonitrile butadiene styrene pipe. Use it for drain-waste-vent applications. ABS withstands higher-temperature drain water. Pipe and fittings join with primer and solvent cement.
This guide is specific to PVC, but the steps will work for the other rigid plastic pipes discussed here. Learn more about plumbing pipes from our buying guide.
Tip: Check the local plumbing codes to find the required pipe type and size in your area.
Choose Your Cutting Method

Choose the best cutters based on the diameter of the pipe and the number of cuts you’ll need to make.
- A hacksaw is a good choice if you need to make just a few cuts.
- Scissor-type plastic cutters are effective for small pipes of 1 inch in diameter or less, but they require more effort by hand.
- Ratchet-style cutters tend to be more accurate than scissor-type. They can cut larger-diameter pipes up to 1 1/2 inches.
- Power miter saws work on all sizes and are the best choice when cutting large quantities of pipe.
Using a Hacksaw

Make the cuts as straight as possible to ensure the best possible fit. Here’s how:
- Using a tape measure and a pencil or other writing instrument, mark on the pipe surface where you want to cut.
- Secure the pipe with a vise , clamp,miter box or even duct tape to keep it from shifting out of place while cutting.
- With the pipe secure, slowly draw the hacksaw blade back and forth, making sure that the cut is straight. Reduce speed near completion to provide a clean cut at the end.
Safety Tip: It is unsafe to secure the pipe with just your hand while cutting
Using Scissor or Ratchet-Type Cutters

Mark the pipe as you would if you were cutting with a hacksaw. Place the pipe inside the jaws of the cutter, making sure that the blade lines up with the mark.
For scissor-style cutters, apply pressure to the handles and slowly rotate the cutter around the pipe. Making sure the cut is straight, continue to rotate until you cut through the pipe.
For ratchet-style cutters, arrange the blade over the mark, then squeeze and release the handle. Continue the ratcheting action until the pipe is cut into two pieces.
Using a Miter Saw

Mark the pipe. Align the mark under the saw blade at the workbench. Secure the pipe under the miter saw.
Put on ear protection and eye protection. Activate the saw and slowly bring it down until it cuts through the pipe. Turn off the saw and wait for the blade to stop spinning before removing the pipe.
Tip: Use a composite material or plastic circular saw blade instead of a standard wood saw blade.
Prepare Pipes and Fittings for Connection

Cutting or sawing pipe leaves rough edges and stray fragments of PVC. Deburring removes the shavings or burrs and leaves a smoother edge. A smoother edge will ensure a better connection during the gluing process.
To prepare the pipes and fittings for connection:
- Deburr each pipe by using a deburring tool or utility knife to remove shavings or other particles.
- Dry-fit the pipes and fittings to make sure the pipe is sized correctly and does not bend or twist.
- For ABS pipes, remove any ink, oil or dirt with chemical pipe cleaner and allow it to dry.
Apply the Primer and Cement

- Use a dauber to apply an even coat of primer at the end of the pipe and the inside of the fitting. Do not use the same dauber for the cement that you used on the primer.
- Use the appropriate kind of cement that matches the material and follow the instructions on the package.
- Apply cement to the end of the pipe and inside the fitting.
- After applying cement, quickly push the connectors together with a twist until properly sealed.
- Hold the connected pipes for 30 seconds to ensure that they stick together.
- Wipe away any excess cement with a rag.
Tip: The types of glue used for cementing the pipes together can vary. Read the label to make sure you choose the correct glue for your pipe and project.
PVC Pipe Sizes

PVC Pipe Sizes (Schedule 40):
Pipe size: 1/2 inches
Outer diameter: 0.840 inches
Inner diameter: 0.622 inches
Wall thickness: 0.109 inches
Pipe size: 3/4 in.
Outer diameter: 1.050 inches
Inner diameter: 0.824 inches
Wall thickness: 0.113 inches
Pipe size: 1 inch
Outer diameter: 1.315 inches
Inner diameter: 1.049 inches
Wall thickness: 0.133 inches
Pipe size: 1 1/4 inches
Outer diameter: 1.660 inches
Inner diameter: 1.380 inches
Wall thickness: 0.140 inches
Pipe size: 1 1/2 inches
Outer diameter: 1.900 inches
Inner diameter: 1.610 inches
Wall thickness: 0.145 inches
Pipe size: 2 inches
Outer diameter: 2.375 inches
Inner diameter: 2.047 inches
Wall thickness: 0.154 inches
Working with PVC and other kinds of rigid pipe can be the easiest part of home plumbing projects. The right tools and supplies can make short work of your next PVC pipe project. The Home Depot delivers online orders when and where you need them.