
A Note From The Home Depot
There’s nothing better than homemade gifts to show somebody that you care, and Cara Newhart from Never Skip Brunch has you covered with some DIY gift ideas this holiday season! Grab some items from your local Home Depot store and keep reading for some inspiration.
DIY Gift Ideas / Gift Basket
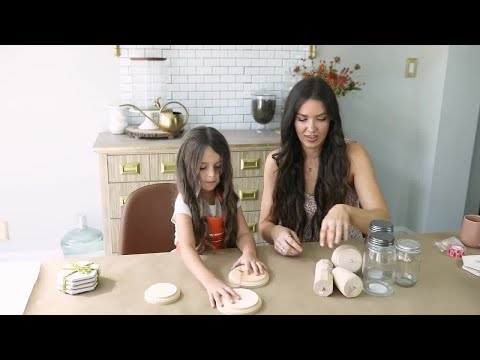
These three diy gift projects are perfect for making on their own or creating a few of each to bundle up into a gift basket. We’ll make some diy tile coasters, some custom painted kitchen or hand towels, and some apothecary jars.
PROJECT 01: DIY Tile Coasters

These super simple coasters add a modern touch to an end or coffee table. They’re made with just tile and felt pads, so they’re a perfect mess-free diy gift idea that adds both function and style.

Choose some tile that is about 4 inches wide — you can opt for round, square, etc, but we went with a hexagon tile for a modern look.

Add 4-6 self adhesive felt pads to the bottom of the tile, spacing them out evenly. These create “feet” for the coaster and add a layer of protection so the tile doesn’t scratch the furniture.

If your tile is square, you might want to put one in each corner. For our hexagon tile, we applied a felt pad at each point.

Optional: finish with a ribbon or gift tag.
PROJECT 02: Custom Painted Hand / Kitchen Towels

These towels are perfect for creating a functional art piece that can be used in the bathroom or kitchen. Simply let the kids paint on the towel with acrylic paint and customize a design.

You can keep it simple by painting a minimal design in the corner of the towel for a subtle detail, or go all out with a big design.

If you don’t want to freehand the artwork, you can use stencils or stamps to guide you as you create a design.
PROJECT 03: Apothecary Jars

Upleveling mason jars into these DIY apothecary jars makes them a stylish gift and functional decor piece afterwards. You can fill them with anything that fits your gift basket theme: hot cocoa mix, marshmallows, tea sachets, or a sugar scrub.

Start by removing the threaded metal piece from the furniture leg — just grasp it tightly with pliers and twist in a counterclockwise direction until it comes out.


Create the wood base — glue the furniture leg to the wood base with wood glue by applying a generous amount of glue to the bottom of the furniture leg and positioning it in the center of the wood round (rosette) — let dry completely.
Optional — once the glue is dry, you can paint or stain the wood base in your color of choice.


While the wood round is trying, you can create the lid. You can choose any drawer pull you’d like as long as it has a flat base so that it sits flush when glued to the lid. Apply hot glue to the threaded end of the drawer pull and stick it down in the center of the top of the mason jar lid. Hold in place until the glue cools.

We chose to create gold bases by using brass drawer pulls and spray painting the metal lid with gold metallic spray paint. Other lid options include a black drawer pull with a black spray painted lid or skipping the paint altogether and adding a matching drawer pull to the top.


Attaching the jar and base — apply a strip of permanent clear double sided tape to the bottom of the mason jar and stick it to the top of the furniture leg, pressing securely.
The double sided tape creates a pretty strong bond, but alternatively you can attach the mason jar and furniture leg with hot glue.
PROJECT 04: Gift Baskets
You can bundle all the DIY gifts together to create a themed basket. Get creative with your theme to create a gift basket that’s totally personal or choose from one of the ideas below:
Hot Chocolate Bundle

Stack 2-4 coasters together, wrap and tie with ribbon to create a set. Create a set of kitchen towels by folding them and stacking two to four with your favorite design on top before tying with ribbon.
Choose two apothecary jars in differing heights. Fill one jar with powdered hot chocolate mix and secure the lid tightly. Add marshmallows to the other jar and arrange all the items in the gift basket. You can add fillers for a personal touch — like greenery or candy canes tucked into the open spaces between the items.
Optional: finish with a ribbon or gift tag.
Spa Bundle
Stack two to four coasters together, wrap and tie with ribbon to create a set. Create a set of hand towels by folding them and stacking two to four with your favorite design on top before tying with ribbon.
Choose two apothecary jars in differing heights. Fill one jar with sachets of your favorite tea and secure the lid. Add a sugar scrub or body butter to the other jar and arrange all the items in the gift basket. You can add fillers for a personal touch — like greenery or a spa headband tucked into the open spaces between the items.
Optional: finish with a ribbon or gift tag.


