![Straight shot of white staircase and black banister with a plant on a stool. Straight shot of white staircase and black banister with a plant on a stool.](https://contentgrid.homedepot-static.com/hdus/en_US/DTCCOMNEW/Articles/RaftynRignell-RignellRanch-2023DIYOT-header1.jpg)
![Raftyn Rignell contributorImage](https://contentgrid.homedepot-static.com/hdus/en_US/DTCCOMNEW/Articles/RaftynRignell-RignellRanch-HeadShot.jpg)
A Note From The Home Depot
Give your staircase a refresh with this satisfying DIY stair tread repair project. Follow along as Raftyn Rignell of Rignell Ranch transforms her attic stairs and instantly brightens up her space.
Attic Stairs Tread Repair
Our home was built in the 1880s, and like our home, the stairs going to the attic are very old. Not only are the stairs very narrow and steep, but over time, the treads have been worn down and many of them are broken. They are also very loud and squeaky when walking up and down.
![Person at the top of wooden stairs with their black shoes in shot. Person at the top of wooden stairs with their black shoes in shot.](https://contentgrid.homedepot-static.com/hdus/en_US/DTCCOMNEW/Articles/RaftynRignell-RignellRanch-2023DIYOT-AtticStairsRepair-photo1.jpg)
Step 1
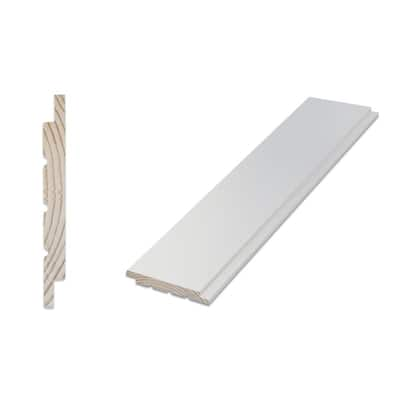
We started this stair project by adding some white smooth nickel gap shiplap from The Home Depot to the right side of the stairway. The addition of this shiplap mimicked the wood that was originally on the left side of the stairway. Adding the new shiplap and painting the existing wood shiplap has really helped tie the two sides together.
![Worn down stairs with white shiplap on wall to the right of the staircase. Worn down stairs with white shiplap on wall to the right of the staircase.](https://contentgrid.homedepot-static.com/hdus/en_US/DTCCOMNEW/Articles/RaftynRignell-RignellRanch-2023DIYOT-AtticStairsRepair-photo2.jpg)
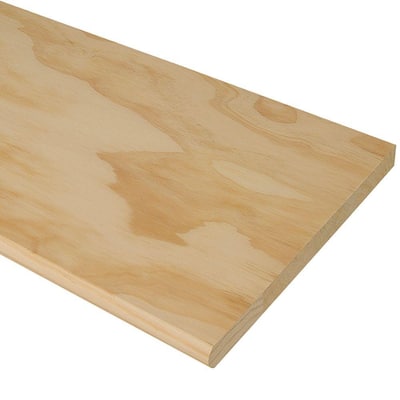
Since finishing our attic remodel, our family has been enjoying this new space in our home so much! Having the kids going up and down so often, it was time to make the stairs more safe and secure. We bought these unfinished plain cut pine stair treads from The Home Depot. Since I have always planned on painting the stairs, I decided to use unfinished pine stair treads, which are very budget friendly. However, if you were doing this project and wanted to stain your treads, The Home Depot has a beautiful oak option, too.
First, we cut each stair treads down to size, then secured them to each existing riser using finishing screws. I couldn’t believe how sturdy they already felt when installed; we should have done this a long time ago! Now time for primer and paint.
![Staircase with new wooden treads. Staircase with new wooden treads.](https://contentgrid.homedepot-static.com/hdus/en_US/DTCCOMNEW/Articles/RaftynRignell-RignellRanch-2023DIYOT-AtticStairsRepair-photo3.jpg)
Step 2
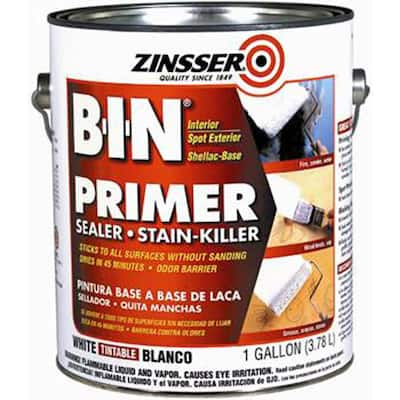
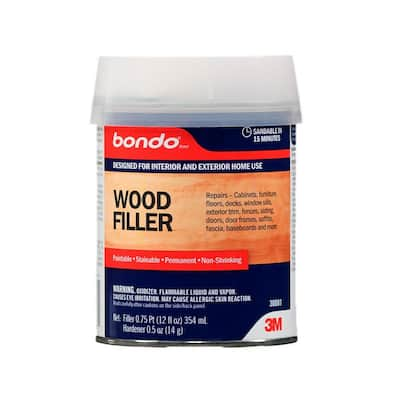
Using wood filler, I filled all the screw holes, then sanded them smooth so they will completely disappear after I apply the paint. We used Zinsser BIN primer to prime the entire staircase and the wood wall on the left side. Once the primer was dry, I took a 220 grit sanding block to smooth out the grain of the wood on the new stair treads. When bare wood is primed, the grain of the wood will raise, leaving it feeling very rough. It is always helpful to feel along with your hand when sanding. You’ll be able to feel where the grain has raised from the primer and how smooth it gets after a few passes with the sanding block. Once sanded, be sure to vacuum and wipe down the areas where you sanded before adding paint.
![Staircase painted with white primer. Staircase painted with white primer.](https://contentgrid.homedepot-static.com/hdus/en_US/DTCCOMNEW/Articles/RaftynRignell-RignellRanch-2023DIYOT-AtticStairsRepair-photo4.jpg)
Step 3
I originally wanted to paint the stairs black like the floor in the attic, but after seeing how bright and airy just the primer looked, I knew white was the right choice. Another reason I went with white was to match the other stairs in our home to keep a cohesive look.
![Staircase with fresh coat of white paint with white painted walls. Staircase with fresh coat of white paint with white painted walls.](https://contentgrid.homedepot-static.com/hdus/en_US/DTCCOMNEW/Articles/RaftynRignell-RignellRanch-2023DIYOT-AtticStairsRepair-photo5.jpg)
![Woman standing next to staircase with carpet and baskets on stairs. Woman standing next to staircase with carpet and baskets on stairs.](https://contentgrid.homedepot-static.com/hdus/en_US/DTCCOMNEW/Articles/RaftynRignell-RignellRanch-2023DIYOT-AtticStairsRepair-photo6.jpg)
Step 4
After a second and final coat of paint, it was time to add some art to the walls! I am calling this “landscape lane” as I added this asymmetrical gallery wall of all my favorite landscape artwork I have collected throughout the years. I am so happy with how the stairs turned out, it went from dark and dingy to bright and airy. Going up and down these stairs now feels so sturdy and safe and these new stair treads are so quiet underfoot! I love a good before and after photo, and this project did not disappoint. We still need to add a railing to the wall, and I am also thinking of adding a stair runner too! Be sure to follow along with us @rignellranchfor the rest of this process!
![Person at the top of wooden stairs with their black shoes in shot. Person at the top of wooden stairs with their black shoes in shot.](https://contentgrid.homedepot-static.com/hdus/en_US/DTCCOMNEW/Articles/RaftynRignell-RignellRanch-2023DIYOT-AtticStairsRepair-photo1.jpg)
![Top of finished stairs painted white with a plant on stool at foot of the stairs. Top of finished stairs painted white with a plant on stool at foot of the stairs.](https://contentgrid.homedepot-static.com/hdus/en_US/DTCCOMNEW/Articles/RaftynRignell-RignellRanch-2023DIYOT-AtticStairsRepair-photo7.jpg)
![Worn down treads on staircase leading up to attic with a black bed frame. Worn down treads on staircase leading up to attic with a black bed frame.](https://contentgrid.homedepot-static.com/hdus/en_US/DTCCOMNEW/Articles/RaftynRignell-RignellRanch-2023DIYOT-AtticStairsRepair-photo8.jpg)
![Freshly painted white staircase with framed paintings on right wall. Freshly painted white staircase with framed paintings on right wall.](https://contentgrid.homedepot-static.com/hdus/en_US/DTCCOMNEW/Articles/RaftynRignell-RignellRanch-2023DIYOT-AtticStairsRepair-photo9.jpg)
![Angled shot of white staircase from the top with a plant on a stool at foot of stairs. Angled shot of white staircase from the top with a plant on a stool at foot of stairs.](https://contentgrid.homedepot-static.com/hdus/en_US/DTCCOMNEW/Articles/RaftynRignell-RignellRanch-2023DIYOT-AtticStairsRepair-photo10.jpg)
![Straight shot of white staircase and black banister with a plant on a stool. Straight shot of white staircase and black banister with a plant on a stool.](https://contentgrid.homedepot-static.com/hdus/en_US/DTCCOMNEW/Articles/RaftynRignell-RignellRanch-2023DIYOT-AtticStairsRepair-photo11.jpg)