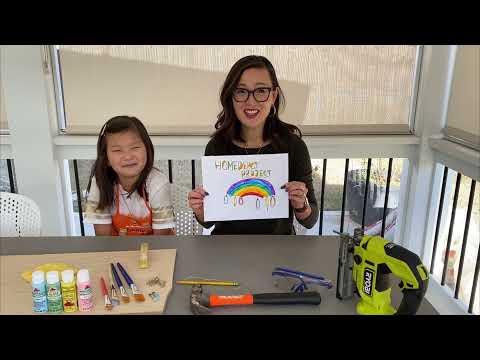
How to Build a Rainbow Jewelry Holder
Last updated August 21, 2024

Yuni is a Korean- American raised in the South who loves all things designing, DIY-ing, and cooking. On her blog, Love Your Abode, you can find about interior design inspiration, home remodel makeovers, and recipes.
A Note From The Home Depot
There’s nothing worse than tangled jewelry—that’s why it’s important to keep it organized! Yuni Min from Love Your Abode is here to help with a DIY Rainbow Jewelry Holder that’s easy enough for your little one to help with. Head down to The Home Depot to grab some supplies and keep reading below to see how to make your own!
Table of Contents
How to Build a Rainbow Jewelry Holder
Gather Your Supplies
Step One: Using a Pencil and String, Draw a Half Circle on the Plywood
Step Two: Using the Jigsaw, Cut the Semi-Circle
Step Three: Sand the Plyboard Surface and Edges
Step Four: Measure and Mark the Sections of the Rainbow

How to Build a Rainbow Jewelry Holder
If your child wants a cute way to store their jewelry, this is a fun way to organize and display it. My daughter drew up a fun design on paper, and I helped bring that vision to life.
Have your little one help you create this unique rainbow jewelry holder, so they can display all their pretty pieces.
Gather Your Supplies

Start by gathering the below items:
Step One: Using a Pencil and String, Draw a Half Circle on the Plywood

Take one end of the string and tie it on the pencil, close to the lead. Take the other end and with your finger, hold it down on the plywood. Take the pencil out and create a semi-circle around the plywood. You can make it as big or small as you want.
Step Two: Using the Jigsaw, Cut the Semi-Circle
The pencil drawing will give you a good visual as you slowly cut the plywood with the jigsaw.

Step Three: Sand the Plyboard Surface and Edges

Have your little helper sand down all the pieces of the plywood. Use 120–150 grit sandpaper to smooth out the surface and all the edges.
After you finish sanding, clean the plywood with a tack cloth.
Step Four: Measure and Mark the Sections of the Rainbow

Depending on how many colors you want to add, measure and mark the segments with a tape measure. Using the same pencil and string method, create the segments. Place one end of the string
in the middle of the board and use the other end to go around and mark the half circle according to the marks you previously made.

Since Emmy was using pastel colors, I erased the marks so they weren’t so noticeable. The lines will guide your helper as they painteach section a different color.
Step Five: Paint the Sections of the Rainbow
Emmy chose all the paint colors and the order for the rainbow. Let your helper paint each section, as it helps them practice hand-eye coordination. Remember, it doesn’t have to be perfect!

You’ll want them to give each color at least two coats of paint.

Step 6: Attach the Screw Hooks
Once it’s completely dried, it’s time to attach the steel screw. Using a small drill bit
create preliminary holes. Then, twist and install the screw hooks by hand. Feel free to add as many hooks as you want.

Step 7: Install the Sawtooth Hangers
Flip the plywood over and install two sawtooth hangers.
Have your little one help you hammer them in.

Final Step: Time to Hang it up!
Admire your pretty project, and find the perfect spot to hang it. We used two picture hanging hooks to hang it up in Emmy’s room.

We found a great spot over her nightstand. Make sure to hang it low enough for them to hang their jewelry.

It was so much fun watching this project go from THIS

to THAT!

This post was created in partnership with The Home Depot. The author may have received compensation for this article and associated images or video, potentially in the form of products and/or services. All expressed opinions and experiences are the author’s own words.