How to Install Metal Roofing
Last updated January 23, 2024
Whether you are looking to replace your existing roof or add a roof to a new building, metal roofing can be an attractive alternative to asphalt shingles. Metal roofing is strong enough to survive hurricanes, hail and wildfires. It is an extremely durable material offering a life span of 50 years or more, depending on the climate and type of metal used.
This guide will teach you about the types of metal roofing and give you step-by-step instructions on metal roofing installation for a basic corrugated through-fastened metal roof.
Difficulty:
Advanced
Duration:
Over 1 day
Table of Contents
Safety Considerations
Types of Metal Roofing
Tin Roofing
Zinc Roofing
Steel Roofing
Aluminum Roofing
Safety Considerations

When learning how to install a metal roof, understanding safety is the most important step. Always be sure to prioritize safety when working above ground. Gloves and safety goggles should be part of your roofing supplies and worn at all times to prevent injury, especially when using tools such as saws or power drills while cutting metal roofing. We recommend that you install a metal roof with one or two helpers and fall protection equipment designed for roof work.
- Be sure there are no electrical wires or low branches hanging over the roof.
- Secure your ladder at the base and at the point of roof contact. Test the ladder to be certain it will not shift under your weight.
- Use proper fall protection equipment and be certain the system is anchored to your roof studs correctly.
- Wear appropriate safety shoes when engaging in roof work.
While this overview can give you a good idea of how to install a metal roof, the metal roofing installation process can be very complex and hazardous. A project of this scope is often best assigned to a professional installer. If you decide to hire professionals for your metal roofing installation, thoroughly research and select a team that has experience in roof repair, the roofing system you want and that is insured (general liability and worker’s compensation insurance) and licensed as required by your state.
Types of Metal Roofing

While most metal roofing styles can be installed as an advanced DIY project, metal roofing installation is complicated and can vary slightly based on the brand of panels or shingles that you select. While metal roofing can be made from a variety of metals, tin, zinc, steel, aluminum and copper are the most widely used and most commonly available options. Each metal has its own advantages and disadvantages, as well as cost considerations.
In addition to material choices, metal roofing is also available in three design styles: through-fastened panels (commonly called “corrugated”), modular panels and standing-seam (or “crimped”) panels.
- Through-fastened corrugated metal panels are the most common and readily available type of metal roof. They can be installed over roof sheathing or purlins.
- Modular panels, which mimic other roofing materials like asphalt shingle and tile, are also available in a wide range of colors and styles. They can also be installed over solid sheathing or wood battens.
- Standing-seam panels are installed over solid or skip sheathing (sheathing with gaps in between) and have the most complex installation process, so are typically best left to professional roofing installers.
Tin Roofing

While the term “tin roof” is commonly used to describe some of the oldest roofs still around today, they weren’t actually made of tin.
- Tin roofs were often made of another metal material – like steel iron – and then plated with tin.
- Tin has a shiny, gray appearance that wears away over time. This coating can leave the metal underneath susceptible to rust.
- Installing a steel roof coated in tin is not common these days, but old tin roofs can be recoated with specialty coatings.
Zinc Roofing

Zinc is easy to form and work with, making it a good choice for standing seam or crimped panels.
- It naturally resists weather, and so will not rust.
- Zinc weathers to a dull blue-gray color over time.
- Depending on the climate, zinc can last 80 to 100 years when properly installed.
Steel Roofing

Steel is the strongest and most economical metal roofing option. Installing a steel roof is a good option in climates subject to heavy snow falls and hail due to its crush resistance.
- Bare steel is prone to rust.
- Galvanized steel, which is created by using a soft layer of zinc, is the most common type of steel roofing. Galvalume, which is created by using zinc, aluminum and silicon, is another option.
- Steel is often painted to increase its longevity, and comes in through-fastened panels, modular panels or standing seam options.
- Depending on the climate, steel can last 30 to 50 years when properly installed.
Aluminum Roofing

Lightweight and rustproof, aluminum is more expensive than steel. It is a great choice for acid-rain environments and coastal climates due to its resistance to salt water corrosion.
- While aluminum does resist corrosion, it is best painted with high-performance coatings to improve its longevity. It dents easily so it is not a good option in climates prone to hail.
- Aluminum is available in modular and standing seam panel options.
- Depending on the climate, aluminum can last 30 to 50 years when properly installed.
Copper

Often chosen for its aesthetic appeal, copper roofing is the most expensive metal roofing option.
- It is also the most durable, making it a good option in a variety of climates.
- Copper does not need to be coated and is therefore left to age to a natural patina.
- Copper is available in modular and standing seam panel options. Depending on the climate, copper can last up to 200 years when properly installed.
Measure the Roof

Whether you install a metal roof with off-the-shelf corrugated panels or by placing a special order, having the right length and amount of materials starts with knowing the square footage of the roof. In addition to knowing the square footage, you’ll need to know the length of each section from the ridge to the outer edge of the eave. This distance will tell you how long the panels need to be.
- For a basic gable roof: Start by measuring the rake of the roof which is the point from the ridge all the way to the outer edge of the eaves. For example: 14 feet.
- Next, measure the width of the roof: From one side of the roof all the way to the other side, including the eaves on each end. For example: 35 feet.
- Multiply these two numbers to get the area of one side. For example: 14 x 35 = 490.
- Multiply the result by 2 to get the total square footage of the roof. For example: 2 x 490 = 980 square feet.
- Order roofing supplies by the square foot, adding 10 percent for waste.
- Try to order panels long enough to run the full length from the ridge to the eave so that you can avoid seams.
- Be sure to order your roofing screws at the same time as your metal roofing panels so that you’ll match the colors.
Remove Old Roofing and Repair Any Damage

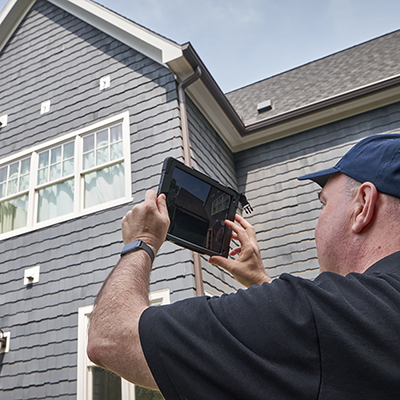
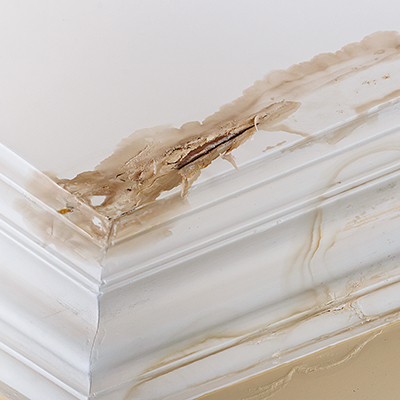
While it is possible to install a metal roof over old asphalt shingles, a full tear-off of the old roof is highly recommended. Removing the old roof will allow you to inspect the sheathing and flashing and replace any problem areas before moving forward. That way, the sheathing and flashing can be inspected (and, if necessary, replaced) before the new roof goes down, reducing the chance of a leak.
- Start from the top of the roof and remove the old shingles along with the flashing, underlayment and vents.
- Hammer down or pull any large nails that are exposed by the removal.
- Inspect the underlying roof sheathing for damage and make any needed repairs with sealants and roofing adhesive.
- Install a layer of roofing underlayment, including a layer of felt paper or rosin slipsheet, as recommended by the roofing manufacturer. Metal panels expand and contract at different rates than the sheathing, so it’s important to follow manufacturer’s guidelines regarding underlayment.
Install Drip-Edge and Closure Strips

- Use 1 1/4-inch galvanized roofing nails to install drip edge along the eaves and rake of the roof, nailing into the sheathing about every 16 inches. If installing multiple runs of drip edge, lap them by 1/4 to 1/2-inch and keep the nail back from the lapped joint.
- If there are gutters installed on the eaves, the drip-edge flashing should be installed to overhang the lip of the gutter by about 1/2-inch.
- Once the drip edge is installed around the perimeter of the roof, add sealant tape along the top of the drip edge and about 1 inch in from the edge of the drip flashing.
- With the sealant tape set along the drip edge, remove the top protective backer paper and place an inside closure strip on top of the tape. If the closure strip is flexible, be careful not to stretch it or it will not align with the panel properly.
Install Metal Panels

- Align the first metal roofing panel so that it overlaps the edge by 1/2 to 3/4 of an inch and is square to the roof line.
- It is recommended to use drills with a clutch when installing metal roofing.
- Some profiles require clips, while others have a built-in fastener flange. A built-in fastener flange gives your bolts a built-in washer which may help reduce materials cost.
- Fastener flange panels have a recommended maximum length of 30’.
- Be sure the larger edge is laid so that the small edge of the next panel will overlap it.
- Follow the roof panel manufacturer’s guidelines for screw placement on the panels. Some manufacturers require you to drive fasteners directly into the ribs, some want the screws in the flat. Follow necessary fastening patterns per local codes in hurricane zone areas.
- Start from the eave and work your way up to the ridge to avoid buckling.
- Secure the screws but do not overtighten. The washer under the screw head should seal to the surface of the panel without bulging or shifting.
- Run a bead of 100 percent silicone sealant along the underside of the short edge of the next panel. Install the panel so that the short lip overlaps the large lip. The silicone will spread and adhere, creating a seal.
- Screw the new panel in place as noted in the manufacturer’s instructions.
- Continue adding panels until the roof is covered. You may need to cut panels to fit angles. Cutting metal roofing can be done using a circular saw with a metal-saw blade. Alternatively, you can use tin snips.
Install Ridge Cap

With the panels in place, it’s time to cap the ridge. To do so, you’ll need to install an outside closure strip. Similar to the inside closure strip installed in the beginning, the outside closure strip runs over the top of the metal panels in a shape that matches with the panel’s ridges and flat parts. There are two types of closure strips: solid and vented. It’s always recommended to vent a roof system, unless the system is designed specifically to be closed.
- Center the ridge cap so that it evenly laps each side of the roof and make a mark along the metal roof panels where the ridge cap will sit. You can do this by making a mark on each end of the ridge and snapping a chalk line to connect the marks.
- Run a strip of sealant tape the full length of the ridge, up from the line you snapped by a distance recommended by the roofing manufacturer (typically about 1 inch). Repeat this process on the opposite side of the roof.
- Run the closure strip along the sealant tape, taking care to ensure it fits tightly over the contours of the metal panel. Repeat this process on the opposite side of the roof.
- Run another strip of sealant tape along the top of the closure strip on both sides of the roof.
- Install the ridge cap per the manufacturer’s instructions – typically by running screws at each main rib of the metal roof panel and overlapping consecutive pieces by about 6 inches.