Questions and Answers for Giani Carrara White Marble Countertop Paint Kit
- Transform countertops to the look of marble
- Covers 35 sq. ft. or 16 running feet of countertops
- Includes durable, high-gloss, epoxy topcoat
Questions & Answers
117Questions
Q:Do you have to use the white highlights mineral paint? Also using sos pad do you use dry or wet?
by|Feb 29, 2024
1 Answer
Q:Can this be used on white quartz bathroom countertops?
by|Jan 25, 2024
1 Answer
Q:How can I paint over something that was done by your product? I primed it 3 times with your product and 2 months later it is now yellow. The stain must of bread through the primer
by|Jan 20, 2024
1 Answer
Q:Can I use this on an old marble double sink countertop ?
by|Jan 17, 2024
1 Answer
Q:Can you paint inside the sink?
by|Dec 30, 2023
1 Answer
Q:My counter has a seam do I fill it in and sand smooth
by|Dec 13, 2023
1 Answer
Q:What I need to do if my countertop turns yellow ??
by|Dec 7, 2023
1 Answer
Q:Can this be applied over concrete counter tops?
by|Nov 17, 2023
1 Answer
Q:Does the paint get lumpy
by|Nov 13, 2023
1 Answer
Q:I have laminate countertops with the same laminate running 18” up as a backsplash. Can this be used on that backsplash?
by|Oct 30, 2023
1 Answer
Frequently Bought Together
Top Rated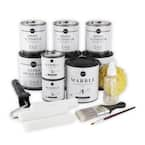
Price:
$199.95
Compare Similar Items
Paint/Stain Features | |||
|---|---|---|---|
Durable, Low Odor, Stain Resistant | Abrasion Resistant, Advanced Hide and Coverage, Chemical Resistant, Durable, Kit, Low Odor, Low VOC, Moisture Resistant, Stain Resistant, Washable | Abrasion Resistant, Advanced Hide and Coverage, Chemical Resistant, Durable, Kit, Low Odor, Low VOC, Moisture Resistant, Stain Resistant, Washable | Abrasion Resistant, Advanced Hide and Coverage, Chemical Resistant, Durable, Kit, Low Odor, Low VOC, Moisture Resistant, Stain Resistant, Washable |
Sheen | |||
High-Gloss | Semi-Gloss | Semi-Gloss | Semi-Gloss |
Coverage Area (sq. ft.) | |||
35 sq ft | 40 sq ft | 40 sq ft | 40 sq ft |
Container Size | |||
120 Ounce | 228 Ounce | 228 Ounce | 228 Ounce |


